Introduction to Virtual Machines in VirtualBox
The advantage to using virtual machines in Virtualbox (by Oracle) is that you can run multiple operating systems. In fact, you can run multiple operating systems at one time! By comparison, if you did not use virtualization software, you would have to reboot each time you needed to change operating systems.
The reason for running virtual machines is obvious. If you purchased software that you like 10 years ago, it might work on Windows XP, but maybe not on Windows 10. For this reason, you can install Windows XP as a Virtual Machine in VirtualBox under Windows 10. This will allow you to use your older software.
In time, you might also want to learn other operating systems, such as Linux, or FreeBSD. By installing the other operating systems as a VirtualBox, you can continue using the operating system you are familiar with. Simultaneously, you can open the operating system you wish to experiment with anytime you like!
Downloading and installing VirtualBox
Before installing Virtual Machines in VirtualBox, you must install the VirtualBox software. Up to the present time, you can download virtualbox from the virtualbox.org website. Equally important, you need to download an operating system to install into the virtualbox. Tihs might be available on CD or DVD. You can also download the iso image of an operating system. The ISO image is just a “virtual CD image” that is represented by a file on your hard drive. For this example, I will install Debian 9 which is available from www.debian.org.
Install the VirtualBox
Next, I installed VirtualBox. In this case, I just ran the install file that we downloaded earlier, and left all settings at default.
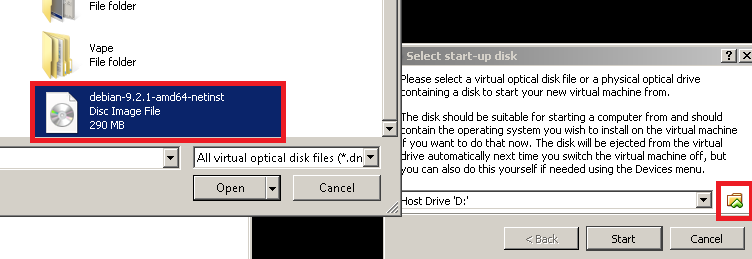
For the Debian 9 image, I downloaded the 64 bit NetInstall image for the CD. This will ensure that all of the updated files are downloaded during the install.
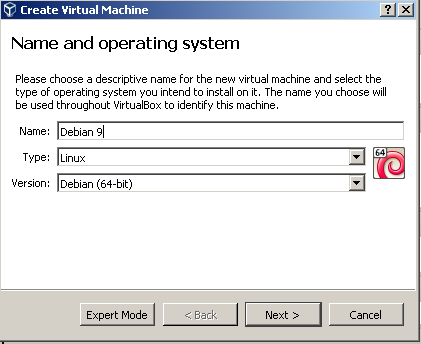
First, let’s create a new virtual machine.
Secondly, we’ll name the machine, then click “Next”.
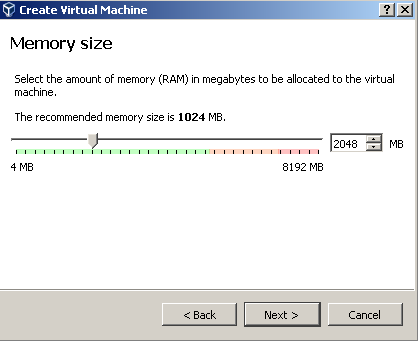
Thirdly, set the memory size. Be sure to leave enough memory for your host operating system to run while the Virtual Machine is also running. By the same token, you want the virtual machine to have enough memory to run smoothly also.
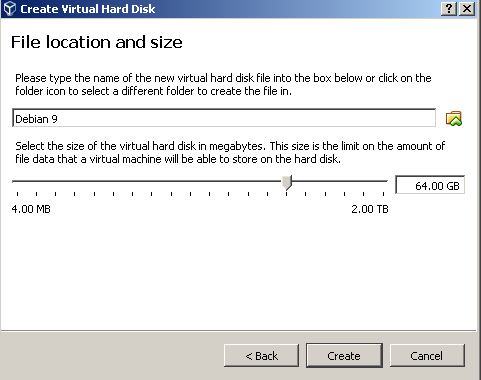
Next, we will create a virtual hard disk:
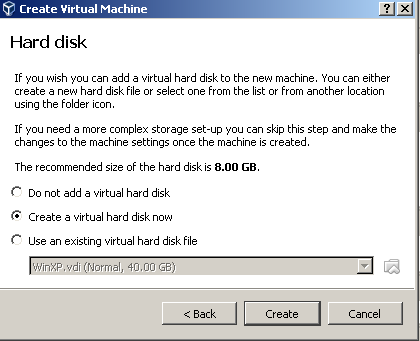
We will make this a VirtualBox Disk Image (VDI), and it will be dynamically allocated.
Finally, we need to set the size of the disk image. This needs to be large enough to hold the virtual operating system. With this in mind, it also needs to be small enough that it does not interfere with your host operating system.
At last, your Virtual Machine is created.
![]()
Keepin in mind that we have not actually installed the virtual operating system yet. All we have so far is a “container” in which we can install our operating system. Within VirtualBox, start the container that you just created.
Click the folder to browse for the ISO image you downloaded earlier, and your system will now install!
— Ricky Bryce