
Introduction: Configuring Xmodem Gateway
Configuring Xmodem Gateway is done through a single file called xmodem.conf, located in the same directory as the server binary. If the file does not exist when the server starts, it will create a default copy automatically. The format is straightforward: one key=value pair per line, with comments marked by a leading hash (#). The program silently ignores missing keys, and will fill any missing keys in with defaults the next time the server writes the file. This self-healing behavior means you can start with a minimal configuration and let the server populate the rest.
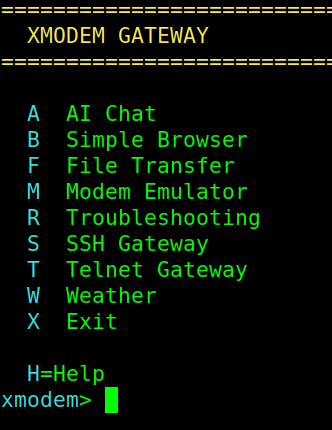
Xmodem gateway acts as a modem emulator, file server, telnet or ssh server, web browser, AI chat interface, and a way to check your weather for vintage computers.
You will find the source code and binaries for both Linux and Windows at this link.
Telnet Server
The telnet interface is the primary way most users will connect, especially those on vintage hardware. The telnet_enabled option (default: true) controls whether the telnet listener starts at all. Setting it to false puts the gateway into SSH-only mode. The listening port is set by telnet_port, which defaults to 2323. The max_sessions option caps the number of concurrent telnet connections at 50 by default, protecting the server from being overwhelmed. idle_timeout_secs controls how long a session can sit idle before being disconnected, defaulting to 900 seconds (15 minutes). Setting this to 0 disables the idle timeout entirely.
# Enable telnet on port 8023 with a 10-minute idle timeout
telnet_enabled = true
telnet_port = 8023
max_sessions = 25
idle_timeout_secs = 600
Configuring Xmodem Gateway Authentication
By default, there is no security. This allows open access to the gateway. Setting security_enabled to true activates username/password authentication for telnet sessions. The credentials are set with the username and password keys, both of which default to “admin” and “changeme” respectively. When you enable security, the server enforces a per-IP lockout policy: three failed login attempts result in a five-minute ban from that address. Note that SSH has its own independent credential set (described below), so enabling telnet security does not automatically secure SSH or vice versa.
# Require login for telnet sessions
security_enabled = true
username = sysop
password = s3cur3pa$$
File Transfers
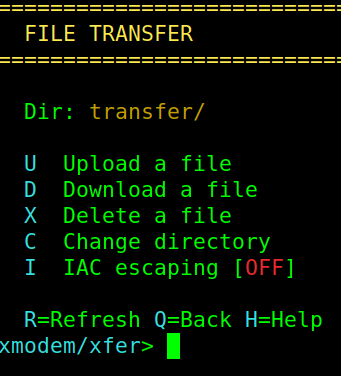
The transfer_dir option specifies the directory used for XMODEM file transfers, relative to the server’s working directory. It defaults to “transfer”. The server validates all filenames to prevent path traversal attacks.
Three settings control XMODEM protocol timing. xmodem_negotiation_timeout (the default: 45 seconds) is how long the server waits for the initial handshake between sender and receiver. xmodem_block_timeout (default: 20 seconds) governs the per-block wait during an active transfer. xmodem_max_retries (default: 10) sets how many times we retry a failed block before aborting the transfer. These defaults work well for most connections, but users on particularly slow or unreliable links may want to increase them.
# Store files in /srv/xmodem/files and use relaxed timeouts for slow links
transfer_dir = /srv/xmodem/files
xmodem_negotiation_timeout = 90
xmodem_block_timeout = 30
xmodem_max_retries = 20
SSH Server
The SSH interface provides encrypted access to the gateway for modern clients. It is disabled by default; set ssh_enabled to true to activate it. The ssh_port defaults to 2222. SSH uses its own credentials, configured with ssh_username and ssh_password (both default to “admin” and “changeme”). An Ed25519 host key is automatically generated on first startup and saved to a file called xmodem_ssh_host_key, so clients will see a consistent key across restarts.
# Enable SSH on the default port with custom credentials
ssh_enabled = true
ssh_port = 2222
ssh_username = operator
ssh_password = MySSHp@ss!
Configuring Xmodem Gateway Serial Modem Emulation
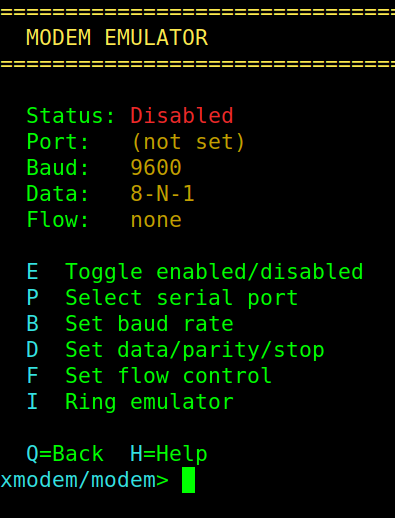
The gateway includes a Hayes AT command-compatible modem emulator for use with a physical serial port. Set serial_enabled to true and specify the device with serial_port (e.g., /dev/ttyUSB0 on Linux or COM3 on Windows). The serial line parameters are fully configurable: serial_baud (default: 9600), serial_databits (5 through 8, default: 8), serial_parity (none, odd, or even), serial_stopbits (1 or 2), and serial_flowcontrol (none, hardware, or software). The server will silently ignore invalid values, and use default values instead.
Several additional serial keys store modem state that is saved with the AT&W command and restored with ATZ: serial_echo, serial_verbose, serial_quiet, and serial_s_regs. The server manages these itself. Generally, you do not need to edit these values by hand.
# Attach to a USB serial adapter at 115200 baud with hardware flow control
serial_enabled = true
serial_port = /dev/ttyUSB0
serial_baud = 115200
serial_databits = 8
serial_parity = none
serial_stopbits = 1
serial_flowcontrol = hardware
# Windows example: COM3 at 9600 baud, 7-E-1 (7 data bits, even parity, 1 stop bit)
serial_enabled = true
serial_port = COM3
serial_baud = 9600
serial_databits = 7
serial_parity = even
serial_stopbits = 1
serial_flowcontrol = noneAI Chat
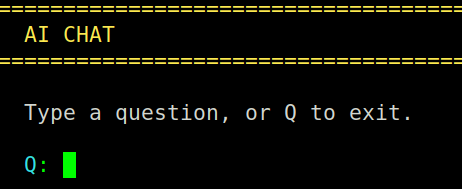
The AI chat feature uses the Groq API. To enable it, obtain an API key from Groq’s developer console and set groq_api_key in the configuration. If the key is empty, the server disables the AI option.
# Enable AI chat with a Groq API key
groq_api_key = gsk_abc123yourKeyHere
Configuring Xmodem Gateway Browser and Weather
The browser_homepage option sets a URL that is loaded automatically when a user enters the built-in web browser. Leaving it empty starts the browser with a blank prompt. The weather_zip key stores the last-used zip code for the weather lookup feature and is updated automatically each time the user checks the weather.
# Set a default homepage and weather location
browser_homepage = https://example.com
weather_zip = 90210
Diagnostics
Setting verbose to true enables detailed XMODEM protocol logging to standard error. This is useful for debugging transfer issues but produces a large amount of output, so it is false by default.
# Turn on protocol-level logging for troubleshooting
verbose = true
All boolean options are case-insensitive: “true”, “True”, and “TRUE” are all accepted. The server treats any value that is not exactly “true” (in any case) as false. The server writes configuration atomically via a temporary file and rename, so a crash during a write will never leave a partial config on disk.
One of my favorite uses for this program is for connecting my Altairduino connected to the Internet!
— Ricky Bryce