
Introduction to Creating a Virtual Axis
In this document, we will be creating a virtual axis. The purpose of creating a virtual axis is this document will be to understand the motion direct commands, and the motion commands in logic. In a real application, we might create a virtual axis to control. The real axis could then follow the virtual axis.
An Axis can be thought of as a servo motor. Each servo motor would be a different Axis in ControlLogix, but you can also have an axis that is made up of a simple encoder that is providing a position for any part of your equipment. The creation of a virtual axis is very similar to a real axis, except we do not need a drive and servo motor to learn how the axis work!
If you have not yet done so, please read the introduction to motion control post.
Add the Motion Group
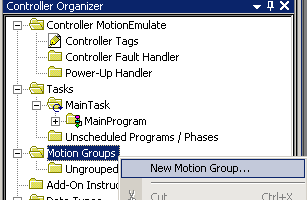
Before we add the virtual axis, we must add a motion group in Studio 5000. To do this, right click on the Motion group folder, and select “New Motion Group”.
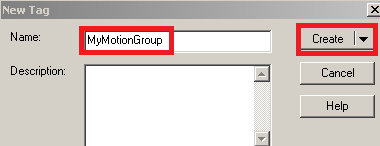
Now, we will name and create the motion group.
Create the Virtual Axis
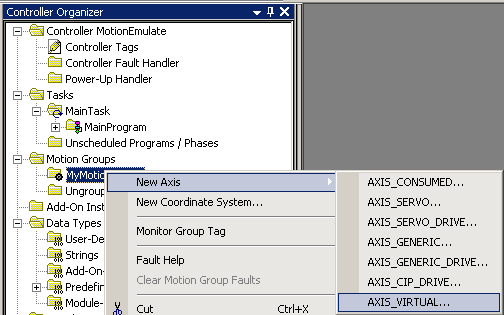
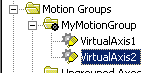
Next, we will right click “MyMotionGroup”, and create an axis. This will be “Axis Virtual”.
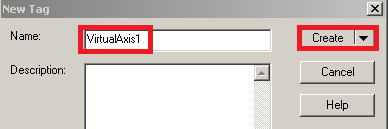
We will name the axis “VirtualAxis1” and then press “Create”.
While we are here, create “VirtualAxis2” in the same manner. Later in another document we will use both axis to show how the gearing feature works. When you are finished, your tree should appear similar to this:
Configure the Virtual Axis
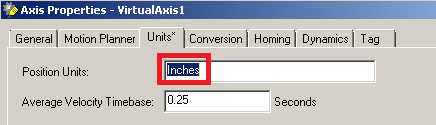
Now, right click on “VirtualAxis1” and go to “Properties”. For this example, we will go to the “Units” tab, and use “Inches”.
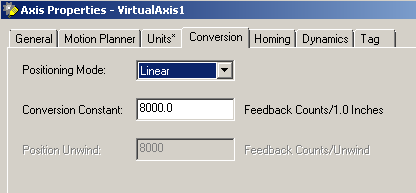
On the “Conversion” Tab, notice that we have a linear axis, and that 8000 counts on the virtual encoder will equal 1 inch of travel.
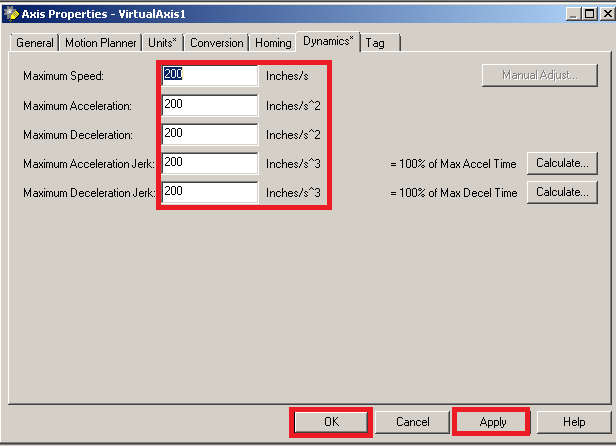
Now, we need to enter the dynamics. Go to the dynamics tab. For the purpose of other documents in this section, we will keep things simple, and enter the value of 200 for each of the parameters under dynamics. The dynamics will set the maximum speed, accel, decel, and jerk. The jerk is used in an S-curve profile. Think of accelerating from a stop sign. If you do not use jerk, then you would just press the gas pedal all the way to the floor, and you will have a constant acceleration until you are at full speed. If we use a jerk value, then we would slowly press the gas pedal to the floor. This would mean that we start off with a slow acceleration rate, and then the acceleration increases with time.
Repeat the same procedure for VirtualAxis2 using the same parameters, and you are ready to move onto the next document in this section. This document will show you how to use motion direct commands to control your axis!
— Ricky Bryce
Pingback: Using Motion Direct Commands in the ControlLogix processor
Pingback: Motion Axis Gearing in the ControlLogix processor using Virtual Axis