
Introduction to PlantPAx 4 Motor Operated Valve
The PlantPAx 4 Motor Operated Valve instructions allows us to open or close a valve. Additionally, it provides some diagnostic information about the valve. That is, we will get an alarm if the valve fails to open or shut. Even if we get a switch failure (such as both switches being made), the operator is informed of the problem.
Add the logic
To begin, let’s import the P_ValveMO add-on instruction. Later on, we will use this instruction in logic to control the valve, and to view it’s status.
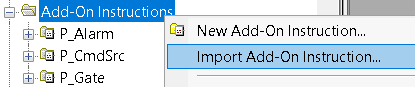
Right-click “Add-On Instructions”, and “Import Add-On Instruction”.
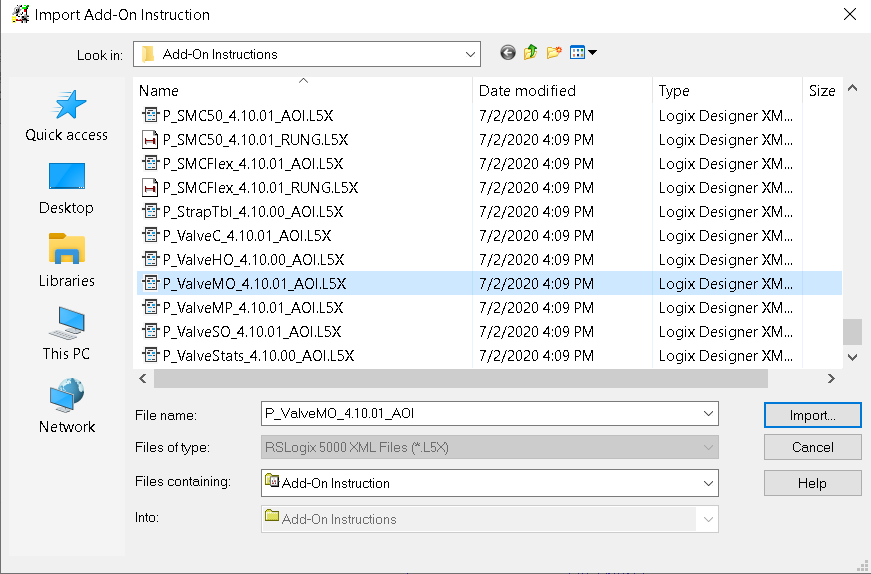
Select the P_ValveMO add-on instruction, the click OK.
Just leave the instruction at default settings when you import. In this case, I’ve created a subroutine for the valve. The Subroutine is a function block type. It’s important to realize that you must jump to this subroutine with a JSR statement.
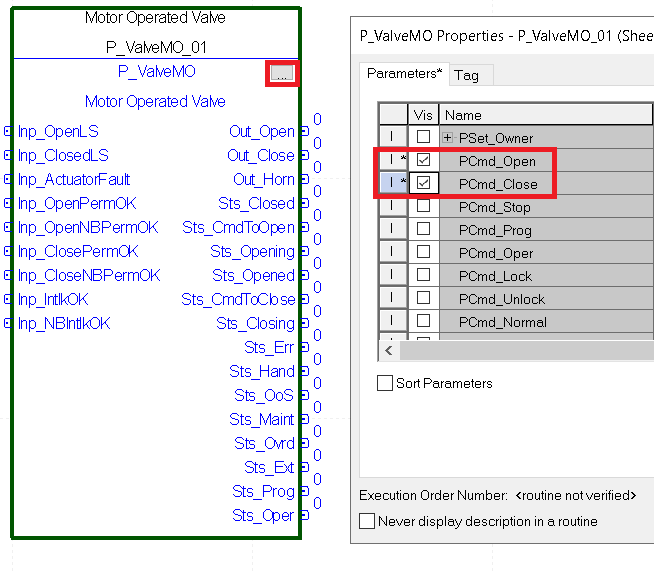
At this point, add the instruction onto your function bock. Click the Ellipsis to configure the instruction’s parameters. Be sure to make PCmd_Open, and PCmd_Close visible, then press OK.
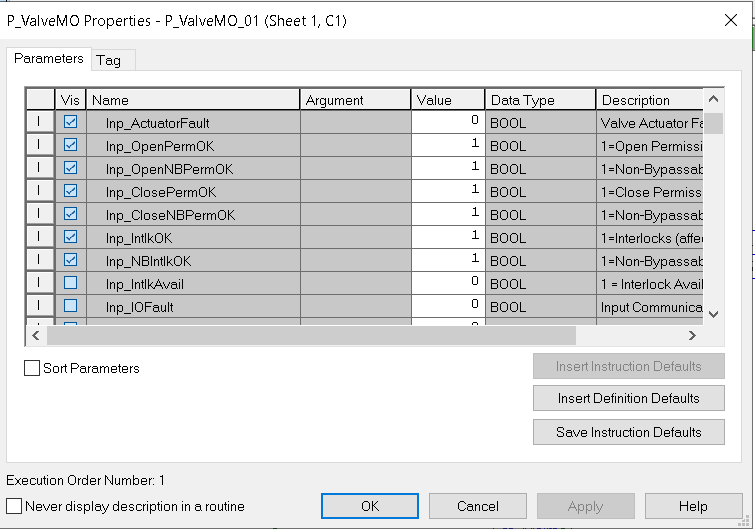
At this time, since we are not using interlocks and permissives yet, go into the configuration of the object (using the ellipsis). Set the following tags to the value of 1 as shown.
Let’s also add 4 Input references and 2 output references as seen below.
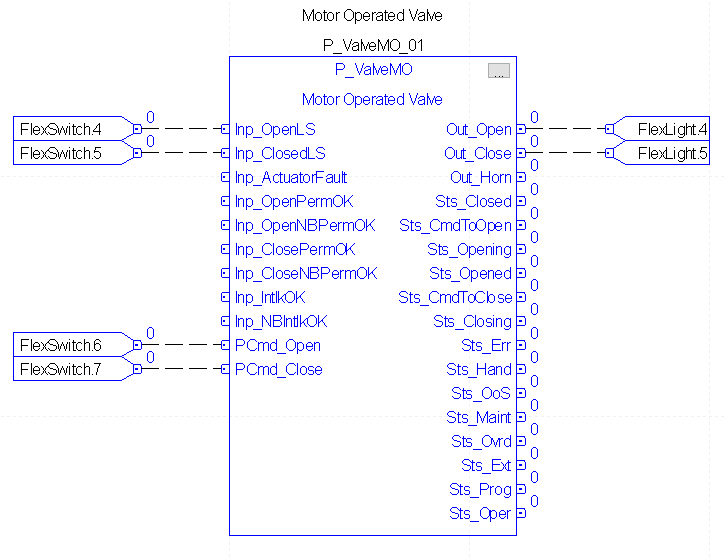
As you can see, FlexSwitch.4 and FlexSwitch.5 will act as our open and closed Limit Switches. Of course, FlexLight.4 and FlexLight.5 will simulate the open and close outputs to the valve. FlexSwitch.6 and FlexSwitch.7 will be our commands to control the valve while we are in Program Control Mode.
Import the Faceplates
Next, back in FactoryTalk View SE, right click “Displays” under graphics, and “Add Component into Application”.
At this point, we will hold the CTRL key, and select P_ValveMO-Advanced, P_ValveMO-Faceplate, P_ValveMO-Quick, P_ValveStats-Advanced, and P_ValveStats-Faceplate. When finished selecting the objects, click “Open”.

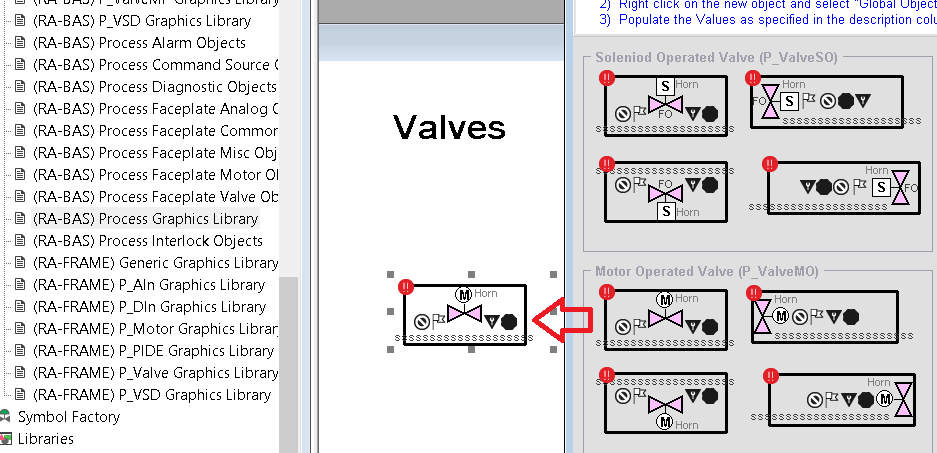
Finally, lets add the PlantPAx4.1 Motor Operated Valve instruction onto our display. You will find this object in the Process Graphics Library.
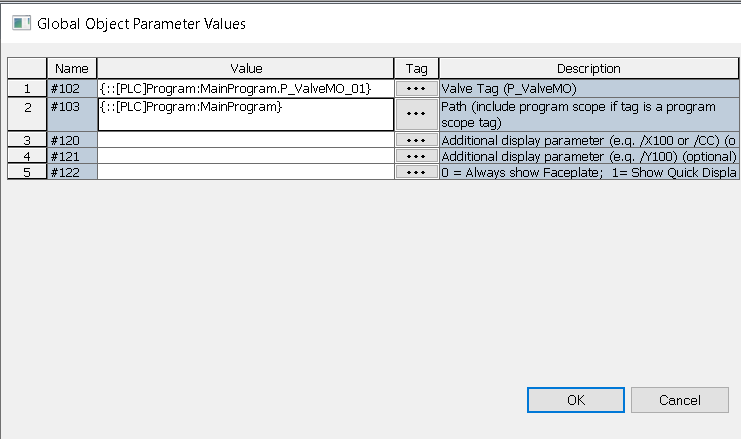
Be sure to right click this new object and set the global object parameter values. Parameter #102 will point to our tag for the valve in logic. Parameter #103 is the path for the object to locate other instructions such as permissives and interlocks.
At this point, close your screen and save. Be sure you have a way to get to this display, and a way to log in. Launch the SE client.

Using the display object
Be sure to log in to the client, and navigate to your display screen for the valve object.
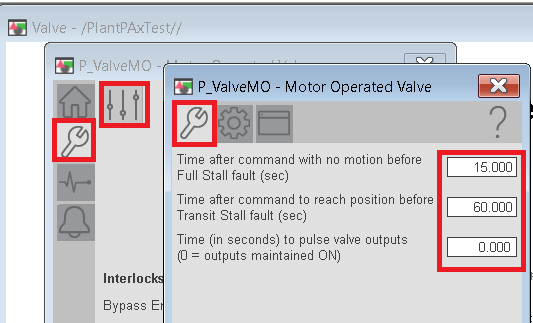
Next, go into Maintenance, Display advanced properties, and set up the timeouts as shown for this example.
At this point, go to the Engineering tab. Declare that the valve has an open and closed limit switch. Depending on how the switches are wired, we need to set the fault state. For this example, we will set a fault state when both switches are 1. Also, check that the operator can reset a fault.

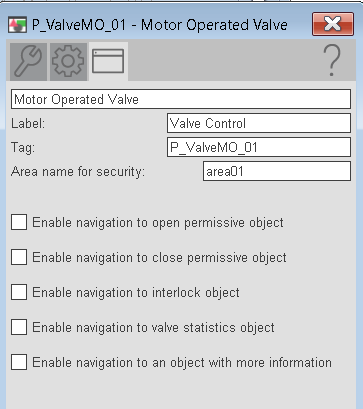
On the HMI Configuration tab, document the tag’s label and tag.
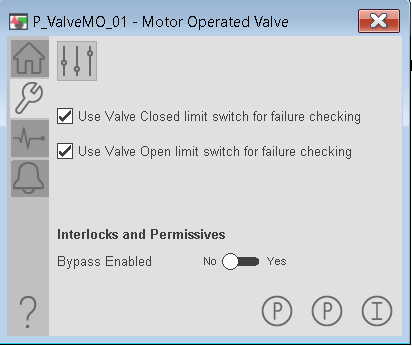
Finally, back on the Maintenance tab, check that we will use the limit switches for faults checking.
At last, you are ready to launch the client, and test your work. Use the operator commands to open and close the valve. Put the valve into program control mode. Use the switches on your station to issue an open command, then toggle the open limit switch to ensure the valve has opened. Likewise, do the same with the close command. Try to open or close the valve without toggling the limit switches. Explore the faceplates to identify the fault condition, and to reset the fault.
For more information, visit the PlantPAx category page!
— Ricky Bryce