
Introduction to ControlLogix Messaging over DH+
ControlLogix Messaging over DH+ allows us to read or write data over a DH+ Network. In this case, we will send a message to a PLC-5. We also use the same procedure to send a message to a SLC 5/04 over DH+. The PLC-5 is at Node 70 on the DH+ Network. This is simply a demonstration of how to message a device on DH+. The implementation at your facility will vary.
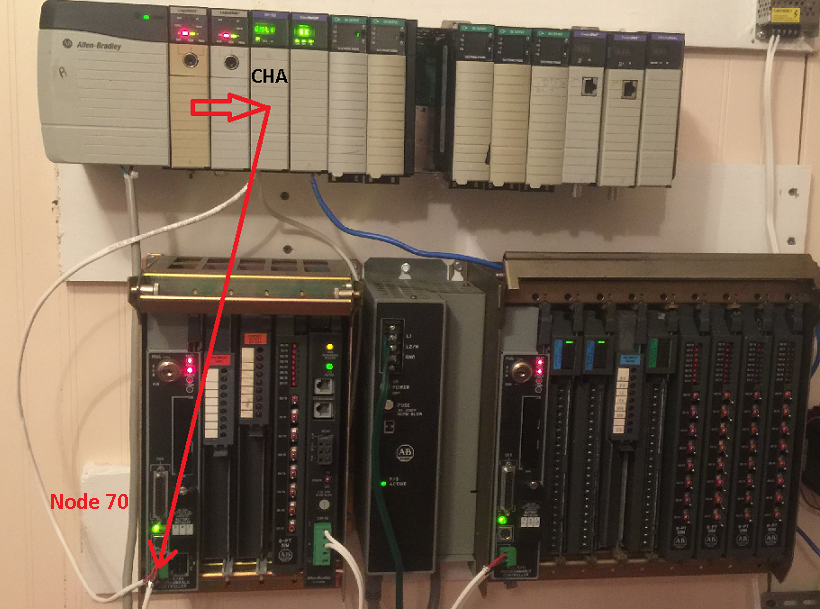
To clarify, we’ll send a message from the ControlLogix processor in slot 0. We’ll go through the 1756-DHRIO module in slot 2. Then, we will come out of Channel A of slot 2, and write to N7:0 at Node 70 on our DH+ Network. The proper cable to use for DH+ is Belden 9463.
PLC-5 Project
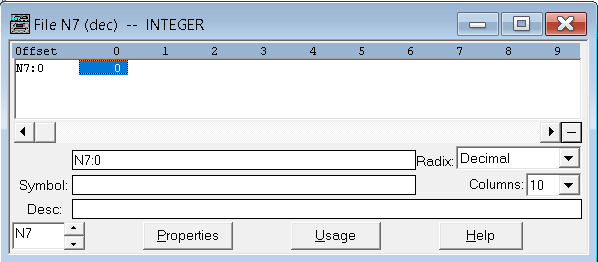
To demonstrate, I’ll simply leave the PLC-5 project at default. Therefore this project will have no logic whatsoever. Our goal is to simply write a value into N7:0 from the ControlLogix processor.
ControlLogix Project for ControlLogix Messaging over DH+
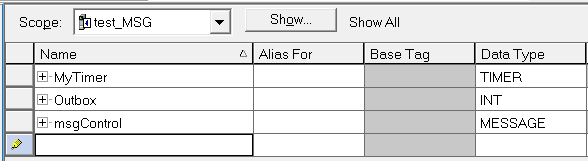
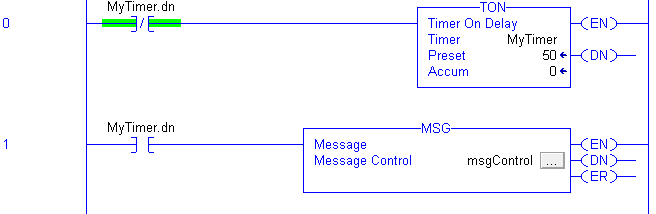
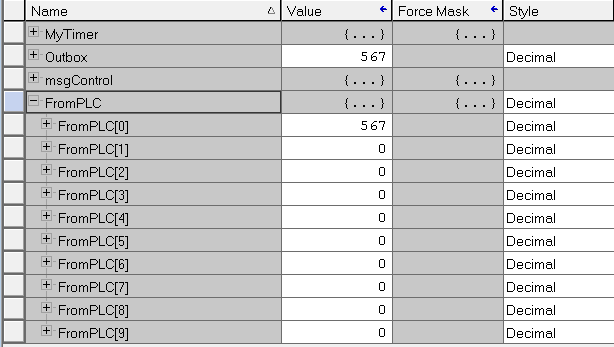
To begin, I’m starting with a default ControlLogix project. First, we’ll create some tags that we will need for the message instruction to work. We will use MyTimer to trigger the message instruction, which is a TIMER Data Type. Likewise, Outbox (INT) contains the data we will send to the PLC-5. msgControl (MESSAGE) is the workspace for the message instruction to operate.
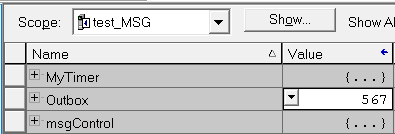
Next, I’ll go to “Monitor Tags”, and place a random value into the Outbox tag. This allows us to verify the message instruction is working properly. Normally, logic populates this tag.
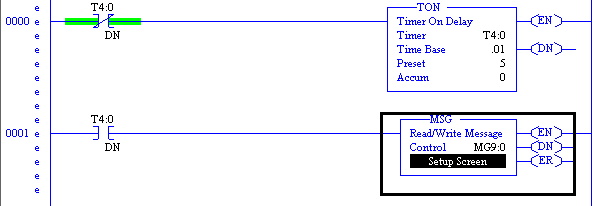
Next we’ll write the logic as follows. We’re using the timer to trigger the message instruction every 50ms.
Configure the MSG Instruction for Messaging over DH+
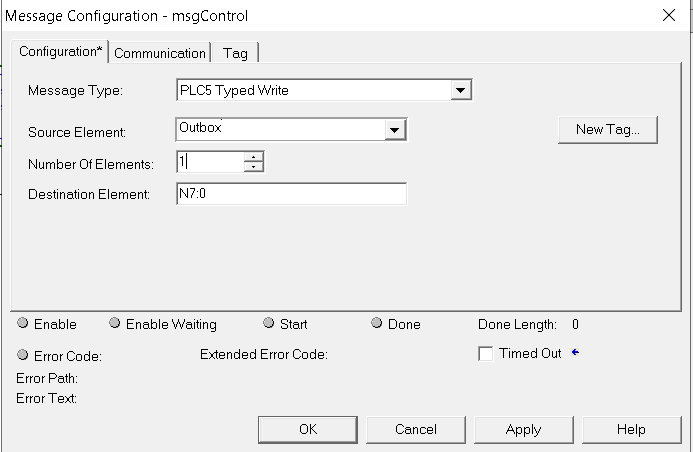
Additionally, we need to click the Ellipsis (three dots) on the message instruction. This allows us to configure the message type, source and destination tags, and the communication path.
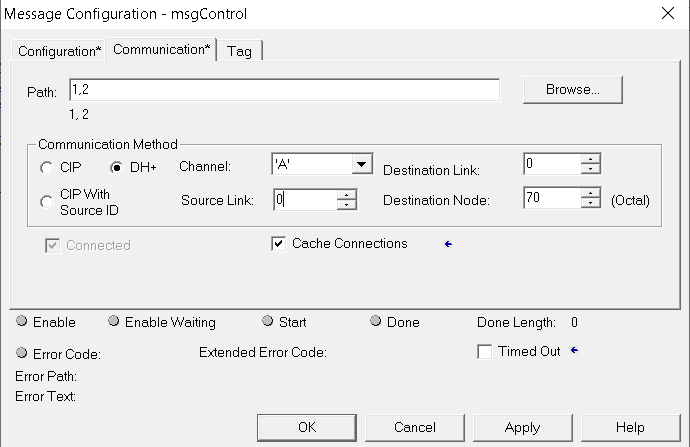
Finally, go to the Communication tab to configure the path. Our path will start with 1,2. This gets us to the backplane, then to slot 2. After that, we pick up the message over DH+ on Channel A to go to Node 70 on the network. Notice how we check DH+ under the communication method. Since this is a local network, we’ll leave the source and destination links at 0.
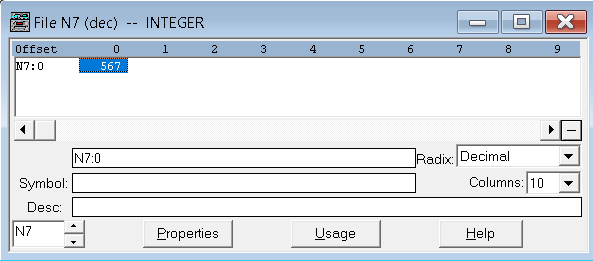
You are ready to download and test the work. Notice that our data did get to the PLC-5 at Node 70.
PLC-5 or SLC 5/04 Initiating the message
If a PLC-5 is initiating a message back to the ControlLogix, the PLC-5 will “think” it’s messaging another PLC-5. You must create a tag array in the ControlLogix (perferrably INT), then go to Logic | SLC/PLC messaging to map a legacy file number to the array. For example: I’ve created an array called FromPLC:
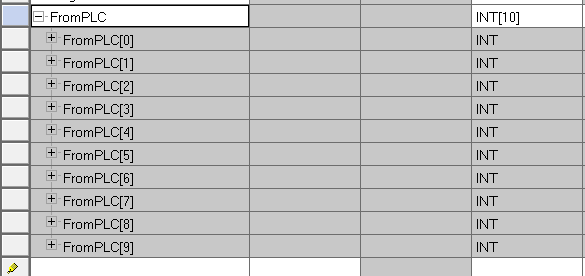
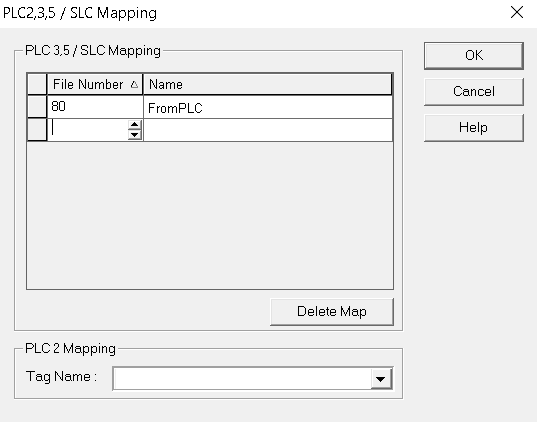
Now, we’ll go to Logic | Map PLC/SLC Messages. Any request for file 80 is mapped to the array “FromPLC”. For example, if the PLC is reading or writing a message using N80:0 as the target device… N80:0 either comes from or goes to the tag “FromPLC”. We will be offline to configure this mapping.
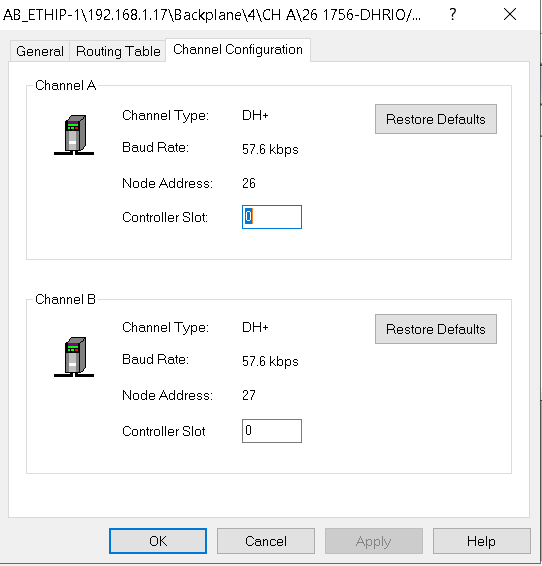
There is just one other thing to consider. In RSWHO, I’ll go to the “Module Configuration” of the DHRIO module. We will see that any message received by the DHRIO module will be forwarded to the processor in Slot 0 by default. Also take note of the Node address. In this case the node is 26.
PLC / SLC Logic
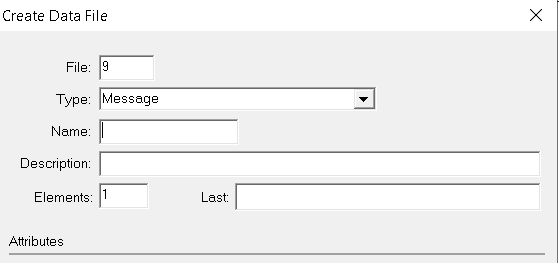
Then, we’ll go to RSLogix 5 to write the PLC-5 logic to initiate a message. First, we’ll right-click data files and create a new data file with a MESSAGE data type. If you have an older processor, or the 5/04, just create a new integer file.
We will trigger the message instruction with a timer.
Now, the setup screen will appear, and we’ll populate it as follows. We are doing a PLC-5 write from N7:0 (1 element). The messages goes out of Port 1A on the PLC-5 to Node 26. Remember in the “Module Configuration” of the DHRIO module, the processor was at Slot 0. Once the data gets to slot 0, the ControlLogix will then map the N80 file to the tag “FromPLC”.
Let’s download and test our work. We see the ControlLogix is now receiving data from the PLC-5.
For more information, visit the ControlLogix Category Page!
— Ricky Bryce