
Introduction to PlantPAx 4 Digital Input Instruction
The PlantPAx 4 Digital Input instruction monitors discrete (digital) inputs in your system. The advantage of using a P_Din for each input is that we will display the status of the input for the operator. Another advantage is to ensure the switch has reached it’s target state. In general, there are two steps to make this happen. First, we will add the instruction to the processor logic. Secondly, we will add the HMI object to a display.
Import the Add on Instruction
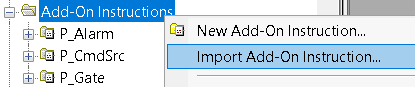
To begin with the add-on instruction, first we must import this into our Studio 5000 project. Right-click “Add-On Instructions”, and choose “Import Add-On Instruction”.
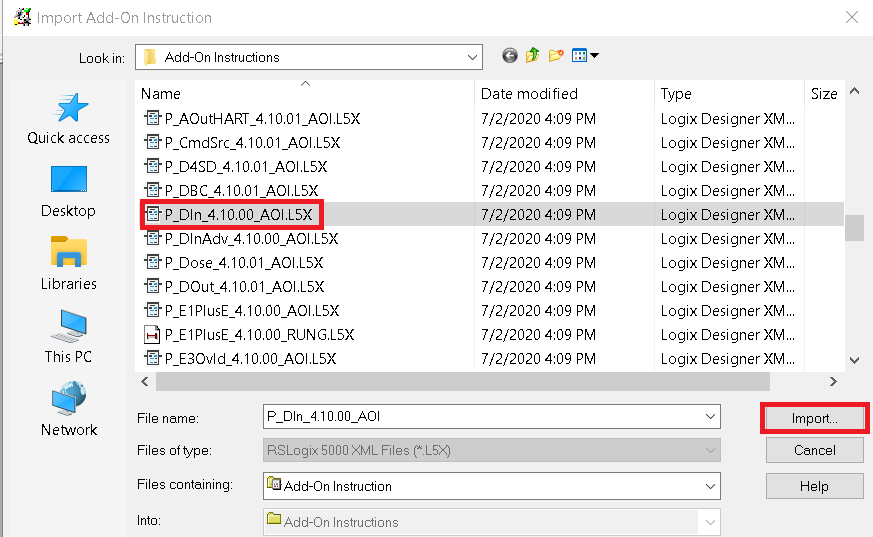
Be sure to choose the P_Din instruction, then choose “Import”. Obviously for more advanced features (such as in a speed switch), you can choose P_DinAdv.
Add the logic
At this time, we are ready to add the logic for the P_Din instruction to work. I’m going to create a subroutine that is a function block type. Be sure to add the JSR instruction from the MainRoutine.
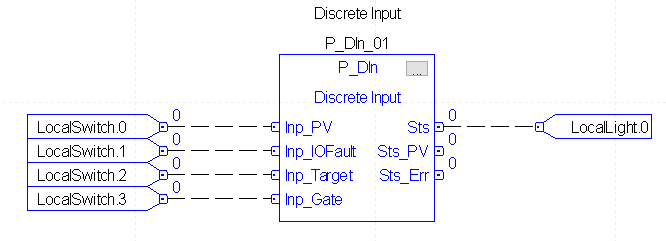
As long as our instruction imported properly, we should find the P_Din instruction under Add-On instructions in the instruction toolbar. As an illustration, add 4 input references, 1 output reference, and a P_Din instruction.
Finally, download your work to the training processor, and place the processor into remote run mode.
Import the Faceplates
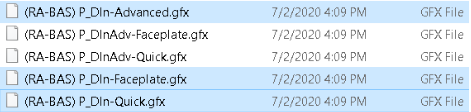
There are a few faceplates that we want to import for the P_Din instruction. Right click “Displays” under Graphics. Select “Add Component into Application”. Add the faceplates as shown from the GFX folder in your process objects folder. We need P_Din-Advanced, P-Din_Faceplate, and P_Din-Quick.
Add the PlantPAx 4 Digital Input HMI object
Our next step is to add the P_Din HMI object onto a display. As I have said, we will point this object to the tag for the P_Din instruction. By default, the tag is a program tag, and we added the instruction into the MainProgram.
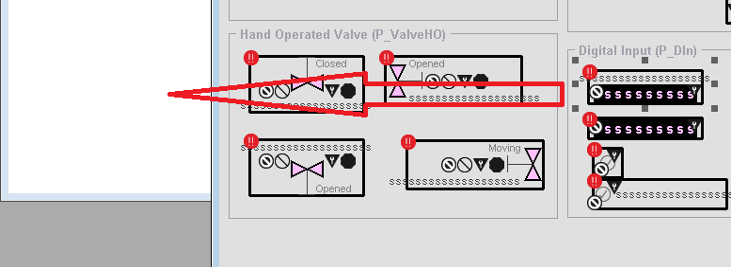
To demonstrate the P_Din object, I created a new display. Locate the Process Graphics library under “Global Objects”. Drag the first object onto your new display.
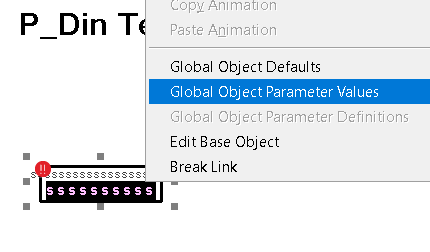
So long as we have already downloaded (and your communication is already configured under FactoryTalk Linx), just right click this new object on your display, and set the global object parameter values.
Choose the Ellipsis to browse for the instruction’s tag. In this case, it’s a program tag called P_Din_01. Refresh all folders, then locate the P_Din_01 tag. Click this tag, then press OK.
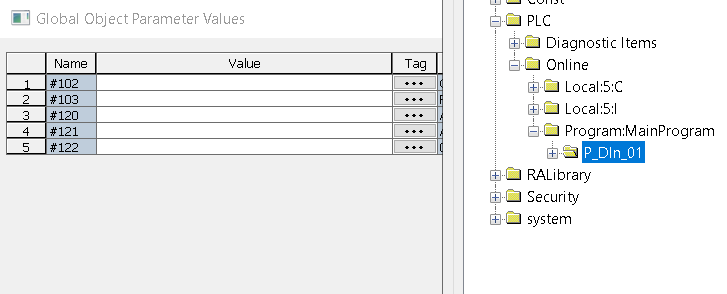
Be sure to set the Path (Parameter #103). The path is the folder that contains the instruction’s instruction.

Save your display screen as “DIN”. At last, we are ready to test the client. Click the “Launch SE Client” icon in the standard toolbar.

Create a new Client Configuration File.

In this case, we’ll leave the name (and path) at default. Press Continue.
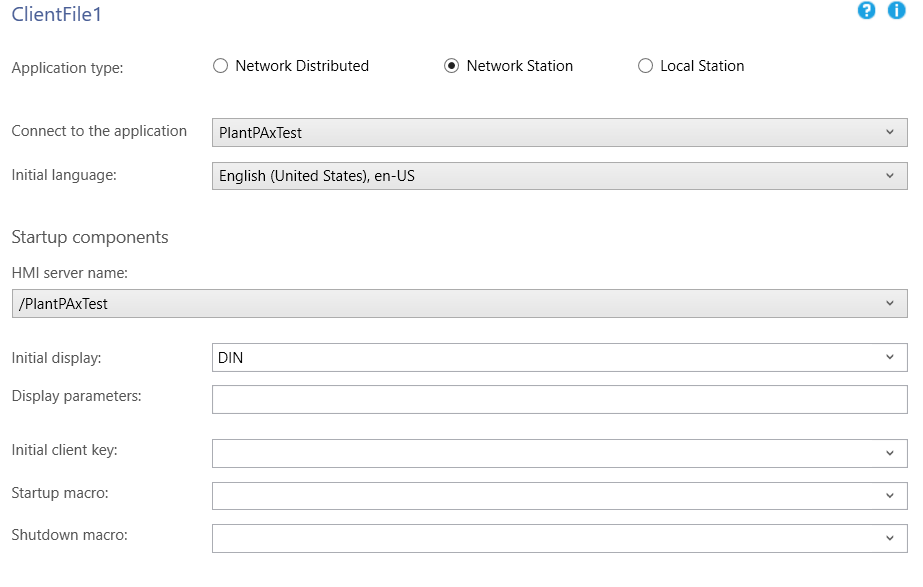
Under “Startup Components”, we’ll set the fields as shown. Be sure to select your proper application type. Sooner or later, we’ll set up a startup macro to organize the initial displays. In the meantime, we’ll select the initial display as DIN. Press “Save”, then “Run”.
Your project is now running, and we are displaying the state of the input to the operator.

Configure the Faceplate
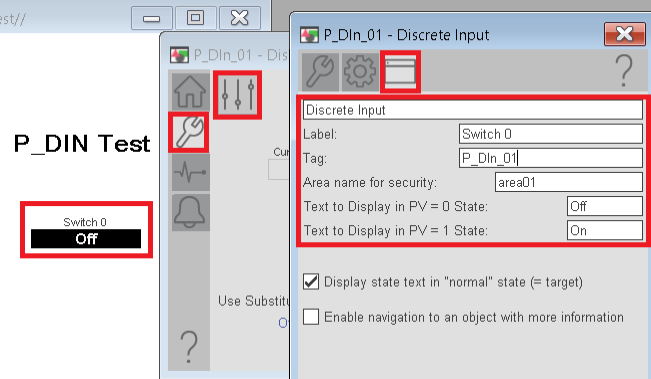
Click the object, and go to Maintenance, Display Advanced Properties, and then to HMI Configuration. Configure the Label, Tag, and states. In this case, we want to display the text in the normal state (vs hiding the state text).
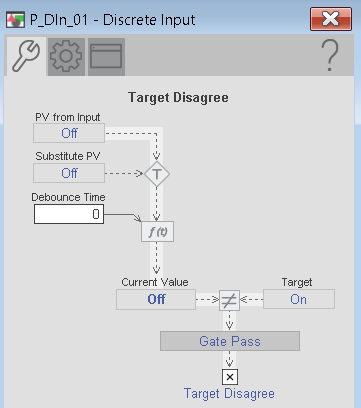
On the “Maintenance” Tab, set a debounce time if needed. This ensures the instruction only sees one transition in a certain amount of time.
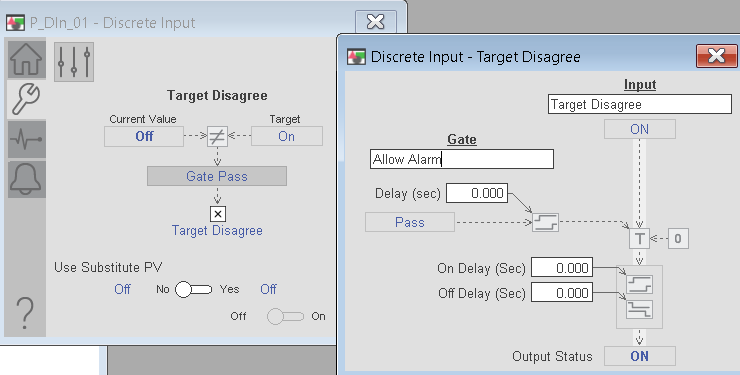
The engineering tab allows you to use a substitute PV. You must be careful how you use this feature. For example, if you remove a limit switch, you might substitute a value of 1 temporarily.
Observations
- To illustrate, turn the switch on and off. You will see the state of the input change on the display screen.

- If the gate is on, and the input does not match the target, your object will turn black (instead of gray) to indicate a mismatch.

For more information on PlantPAx, visit the PlantPAx category page!
— Ricky Bryce