
Introduction to FactoryTalk View with SLC-500 using OPC
In this post, I’ll show you how I connect FactoryTalk View to SLC-500 using OPC in RSLinx. This procedure also works for the PLC-5. In this example, I have a SLC 5/04 running on DH+. It does not matter what your communication method is, or which processor you use. As long as you can actively see the processor in RSWho, and have RSLinx Professional, you will be able to connect using the OPC method. Remember, to actively view and connect to tags through OPC, you must install and activate RSLinx.
Configure the OPC Topic
Before setting up the communication in FactoryTalk view, we’ll configure an OPC topic in RSLinx. Remember, a “Topic” simply represents the path to your processor. RSLinx does create topics automatically, but in this case, we’ll set up our own topic with a known configuration.
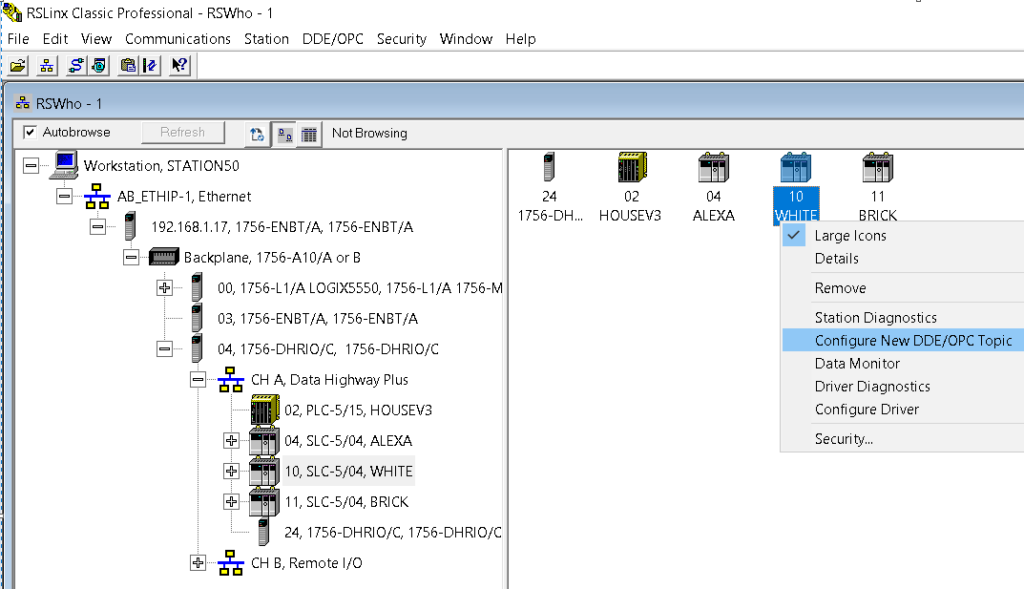
In RSWho, right-click the processor, and choose “Configure new DDE/OPC Topic”.
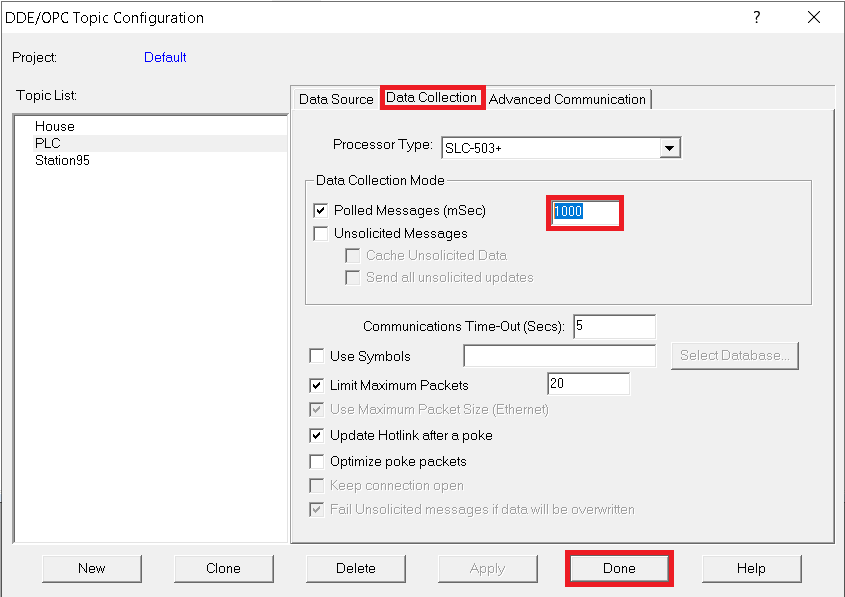
I’m creating a topic called “PLC”. Be sure that both the name of the topic, and the processor are highlighted at the same time. By default, the update time time is 1000ms. If you wish to change this update time, go to the “Data Collection” tab.
FactoryTalk View configuration
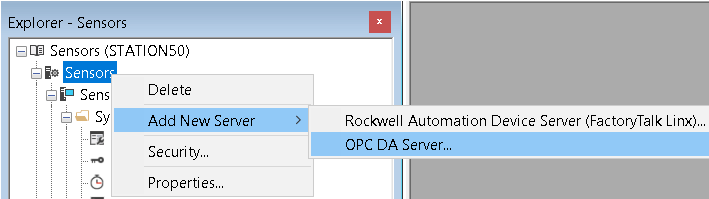
Next, we’ll go back to FactoryTalk View. Right click the Application name, add new server, and add a new OPC DA Server.
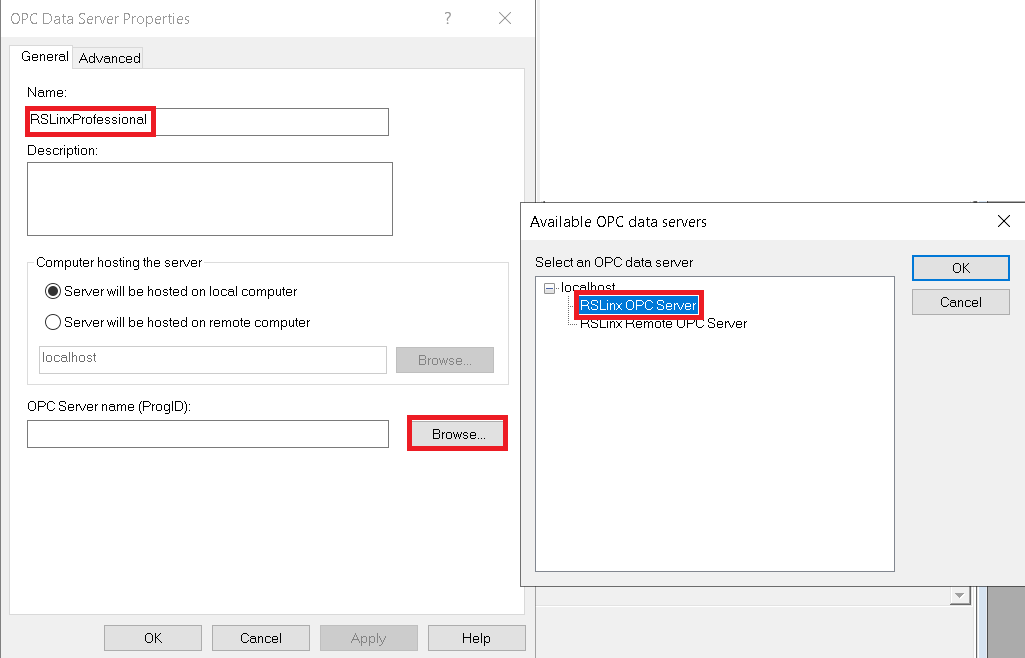
Set the name of your server, then browse for the server name. We’ll choose “RSLinx OPC Server”. Press “OK” then “Apply” and “OK”.
At last, we’ll add an object onto our display screen to test the connection. In this case, I’m just adding an ellipse object, and setting up the color animation. (Right click the ellipse, go to animation, and choose the color animation).
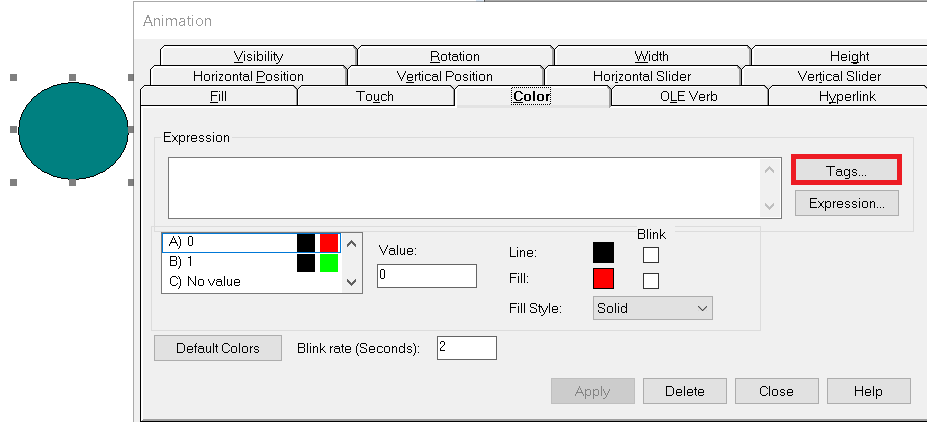
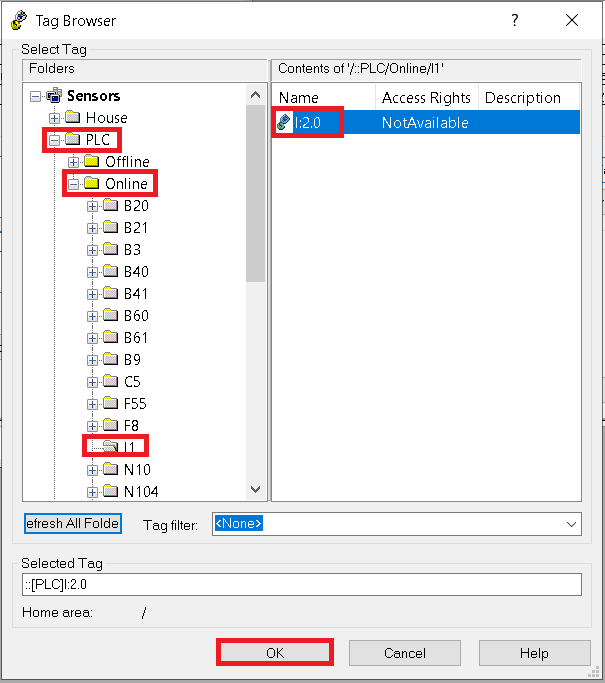
I’ll go to “Tags”, then “Refresh all Folders”.
In this example, I’ll just point to the first switch of the Input module in slot 2. So we’ll go through the topic “PLC”. Choose the Online tags, and Highlight I1. I’m going to choose I:2.0, then hit “OK”.
Since I only want to look at bit 0, I’ll need to add the “/0” after I:2.0.

Test your work
In order to test our work, let’s press the “Test Display” icon in your toolbar. As you can see, the switch is currently off.

When I turn the switch on, I have verified the communication path is working properly.

For more information on FactoryTalk View, and how to configure other objects, visit the category page.
— Ricky Bryce