
Introduction to Getting Started with Altair BASIC
In this post, we’ll talk about Getting Started with Altair BASIC. There are several different ways to program the Altair 8800 computer. The BASIC programming language is one of them. Usually, this is the easiest method for beginners. BASIC is short for “Beginner’s All-Purpose Symbolic Instruction Code”.
We won’t talk about every BASIC command. We’ll just discuss a couple of commands, and how to get started. At that point, you can research individual commands to expand your skill. Additionally, I’ll have more commands in other posts here.
For this example, I’ll use the Altair-Duino. Although you can build your own, a kit is much easier. Check out the kits at AdWaterAndStir.com. I have an SD card inserted with the Altair Disk Images. A a special thanks to those who have been working on the AltairDuino project!
Booting Altair Hard Disk BASIC
At this point, we are ready to boot into BASIC. It’s important to realize that a 8800 “B” mode is soon to be implemented. My Altair is NOT running in “B” mode. The B mode will change the behavior of the AUX switches, so the procedure for booting may be slightly different.
First, be sure your terminal program is connected to the Altair. Next, raise switches 13 and 12. This tells the Altair to look for a hard drive image. By pressing Aux 2 Down (Not in “B” Mode), you will see the images. Altair BASIC is the first image. Raise switch 0. Thirdly, press AUX 2 down to mount the image. Finally, turn on ONLY switches 3, 2, and 1. Press AUX 1 down to boot to BASIC.

For Memory size, just hit “Enter”. For Line Printer, I just use capitol C. Highest disk number is 0, then 4 files. At last, you will enter the date, and you are ready to start programming!
General Commands
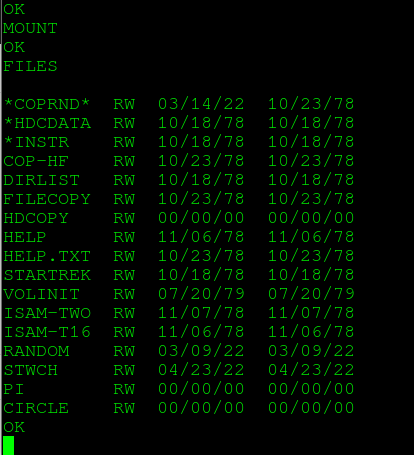
At first, you will want to mount the disk. Simply type MOUNT. This allows you access to the files on the hard drive.
Type FILES to see what files are available.
In order to load a file, type LOAD “FILENAME”, where FILENAME is the name of the file you wish to load. The name of the file is in quotes.
For example, I’ll type LOAD “PI”. This loads the program into memory for calculating PI.
LIST will list the lines of code for the file you have in memory. Note that each line of code begins with a line number. Typically, you space these in increments of 10. For this reason, you can insert lines of code in the future.
SAVE will save the file to your hard drive. If I make a change, I would type SAVE “NEWPI”. In this case, the original file still exists. I will LOAD “NEWPI” in the future, which has the changes.
NEW erases a program from memory.
RUN will run the program that is in memory.
PRINT and GOTO Statements — Getting Started with Altair BASIC
Generally, the PRINT statement is one of the most common commands. The PRINT statement does not print to the printer. It simply prints to your screen.
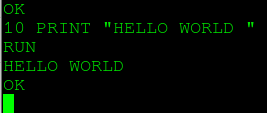
At this point, let’s try to write a simple program. Before we begin, type NEW to clear any previous program from memory. Type the following: 10 PRINT “HELLO WORLD “
If you make a mistake, for beginners, it’s usually just easier to re-type the line of code. Keep in mind that you can type LIST at any time to review your code.
Now type RUN.
Each PRINT statement begins on a new line, unless you use a semicolon after the print statement.
Let’s try this program.
10 PRINT “HELLO WORLD. “;
20 PRINT “I’M AN ALTAIR!”

Additionally, you can use a colon to separate commands on the same line. In other words, we can put this entire program on the same line as follows:
10 PRINT “HELLO WORLD. ;” : PRINT “I’M AN ALTAIR!”

Furthermore, we can have this program run continuously with a GOTO statement. Using the example above, we’ll add another line of code: 20 GOTO 10

Obviously, when you type “RUN”, the same text repeats over and over again.
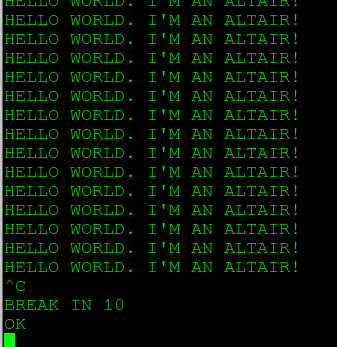
Type CONTROL and C at the same time to stop your code.
Summary for Getting Started with Altair BASIC
The purpose of this post is to simply start you out on Altair BASIC. There are also other versions of BASIC that work very similar on the Altair. For example, you have a version in ROM. Another version is on your floppy disks. In the next post, we’ll discuss some more in-depth commands. These include the INPUT command, assignment operators, and FOR NEXT loops.
Visit the main site for more information on the Altair, and other fun projects!
— Ricky Bryce