
Introduction to Assigning IP Address with RSLinx (Static IP)
There are two common ways to assign an IP address to an Ethernet module in the ControlLogix chassis: BootP, or RSWho. A third way of assigning an IP address only works if you are using the subnet of 192.168.1.x. On newer modules, you will have a thumb wheel to dial in the last octet.
When you are Assigning IP Address with RSLinx, you must have communication to at least one other module in the chassis. You can use an Ethernet driver if there is another Ethernet module in the chassis. Another communication path would be through a USB port, or through the DF1 Driver.
Step 1: Determine what the IP address of the new module should be.
Do not guess at what the IP address should be of a replacement module. If the old module still powers up, the IP address of the old module should scroll across the front. If it is totally dead, we will have to refer to other documentation. You might have a spreadsheet in your plant that lists all the IP addresses. Another way to get the IP address to use for a replacement module is in Studio 5000. If the project is documented properly, you can open the offline file. Next, right-click on the Ethernet module that you are replacing, and go to “properties”.
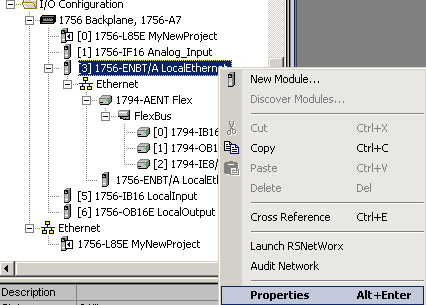
The properties screen should display the information you need to assign the IP address.
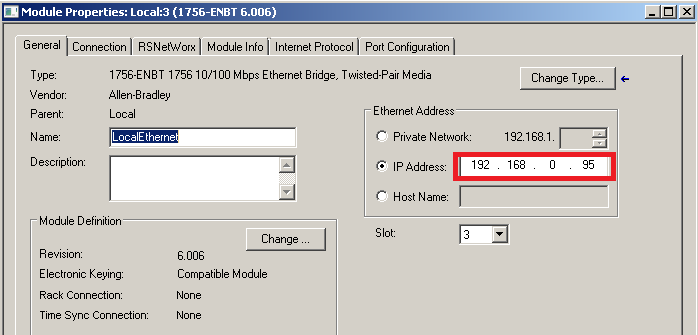
You will also need to know the subnet mask, and any other information that needs to be entered, such as a gateway, and DNS servers. The most common configuration is a subnet mask of 255.255.255.0. Then, the gateway, DNS, and host are left blank. If you are unsure of what your plant uses, consult your plant standards, or system administrator. Another method would be to follow steps 2 and 3 below to read the information off the OLD module. Then replace the module, and follow steps 2 and 3 again to assign the information to the NEW module.
Step 2: Find the Ethernet module in RSWho
Once you have communication with a module in the chassis, you can drill through the module to the backplane. Then, drill across the backplane. You will see the Ethernet module that you need to configure.
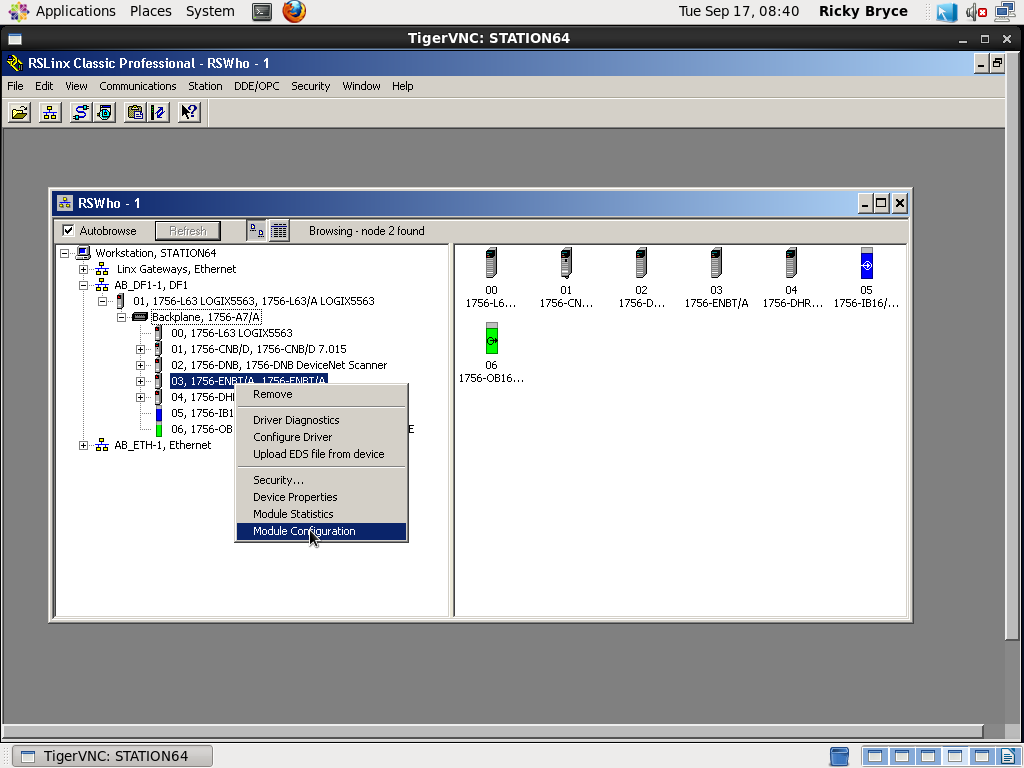
Once you find your Ethernet module, right-click the module, and choose “Module Configuration”.
Step 3: Assign the IP Address
Next, click on the “Port Configuration” tab:
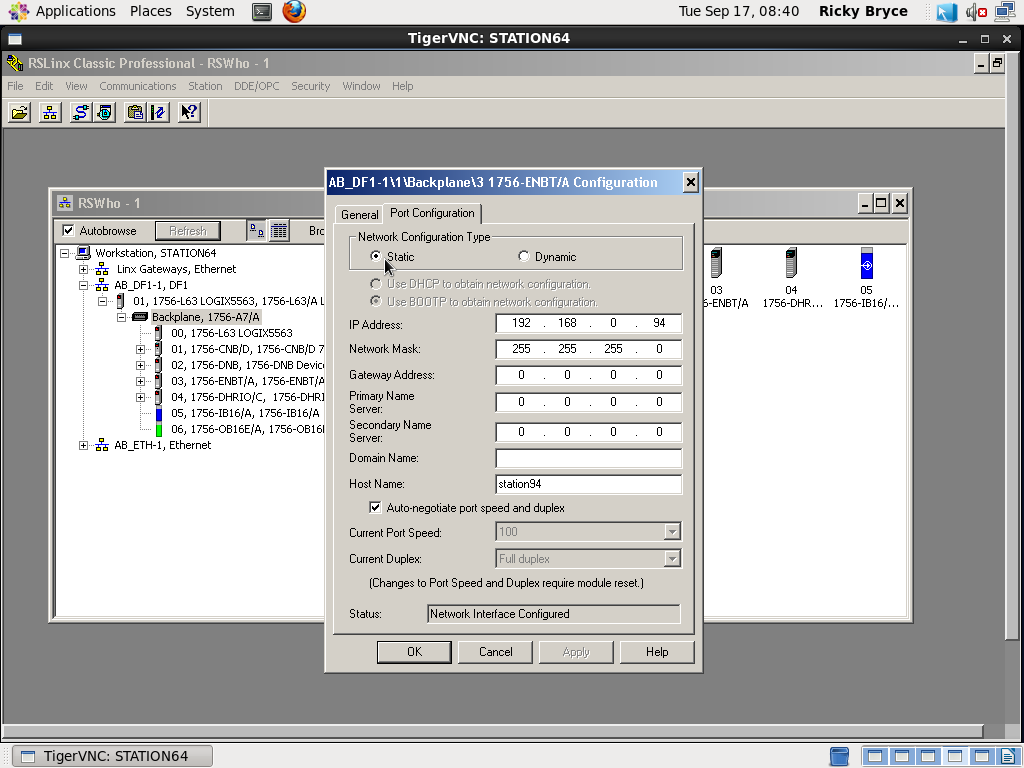
Here, you can assign the IP address of your replacement module with the information we gathered in Step 1. Be sure to hit “Apply” then “OK”, then look at your module in the chassis. The IP should be scrolling across the alphanumeric display.
Note: If all of the fields are “Grayed out”, be sure you selected “Static”.
Warning! An incorrect IP address can be very disastrous! Be sure you have the proper information, and read all warnings!
For more information, visit the Controllogix category page!!
— Ricky Bryce
Pingback: Creating a FactoryTalk View project, and setting up communications.