
Introduction to the Altairduino – 8800 Kit
In this section, I wanted to show you the Altairduino – 8800 Kit. I’ve always been interested in vintage computers. My first computer was the Commodore 64. I bought this from COMB magazine. Modern computers are fast, and reliable. However, by going back to a vintage machine, you learn how computers really work. For this reason, I purchased the Altairduino Pro kit from AdWaterAndStir.
I could tell that Chris put a lot of effort and thought into putting this kit together. It’s well with the price.
What’s In the Package
The pro kit is very reasonable, and comes with the Arduino Due board. Additionally, it has a nice acrylic case. You will also receive a VT-100 Emulator kit, among all of the other components you need to build the Altair 8800. The standard kit is less expensive, but does not have the acrylic case, or VT100 Emulator. However, with the standard kit, there is a wifi serial interface. Both kits come with the SD Card. This contains your floppy and hard drive images.
Building the Altairduino – 8800 Kit
Whenever you think of building modern computers, there is no soldering involved. In other words, computer builds have become “wussified”. This kit is straight forward, though. The instructions are very good. Simply start by soldering the resistors, and transistors. You will find the build instructions here. Simply download the PDF document for the version you have.
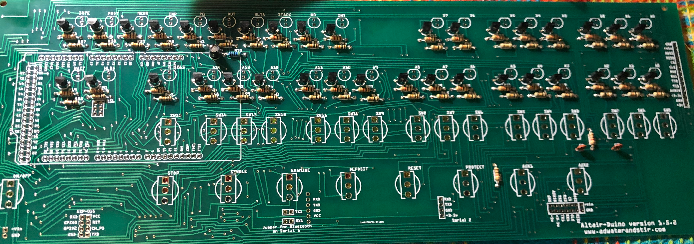
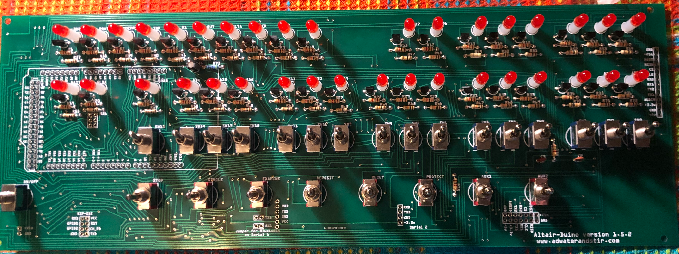
Next, you just add the switches, lights, and headers. Be sure to wear glasses or goggles while clipping the leads, and be sure you have the polarity of the LED’s correct. In like manner, pay attention to the direction that you mount the transistors.
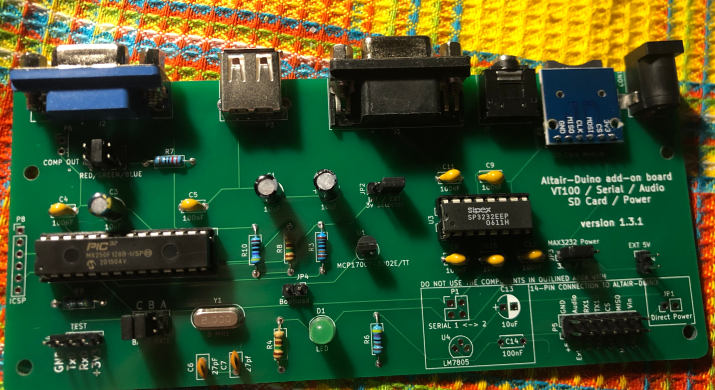
The next step was to put together the VT100 Emulator board with SD Card reader, etc.
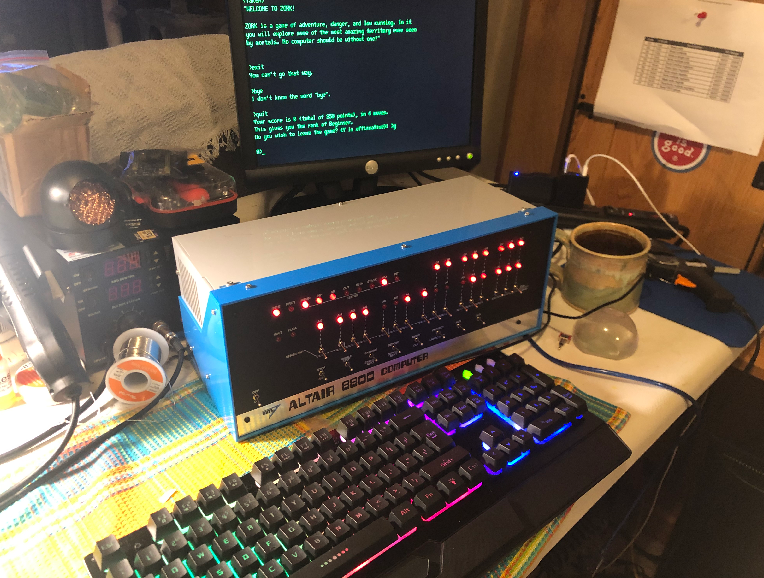
At last, you have a nice computer system!
Booting the Altairduino — 8800 Kit
The AltairDuino defaults to using the USB Connection (Programming Port) as your default port. Simply connect with a terminal program such as PUTTY at 115200 baud.
On the other hand, if you wish to set the VT100 emulater at startup, Turn on Switch 0. Hold Deposit (up), and turn on power.
Displaying ROM and Disk Images
There are some programs already on your machine. These are in a ROM image. Likewise, there are some programs on the SD card images.
To list the ROM Images, be sure all address switches are off. Now, simply press Stop | Reset | Aux 1 Down.
On the other hand, if you wish to display the floppy disk images, turn on only switch 12. Stop | Reset | Aux 2 Down.
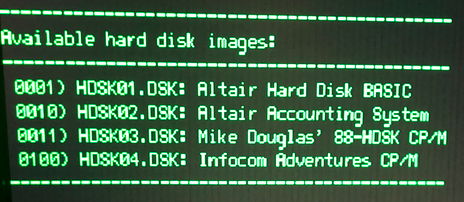
In the same way, to access the hard disk images, be sure switches 12 and 13 are on. Next, press Stop | Reset | Aux 2 Down.
Running the Hard Disk Images
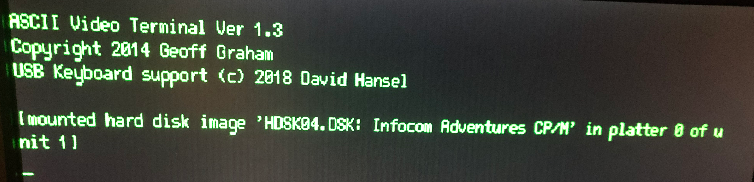
For example, let’s say we want to boot to the Inforcm Adventures CP/M Drive. Simply set the least significant switches to 0100. This is a “4” In Decimal. Next, turn on switch 12 and 13. Hit Stop | Reset | Aux 1 Down. At this point, you mount the Hard Disk Image.
Next, we need to tell the ROM which bootloader to use. Let’s look at our ROM List again.
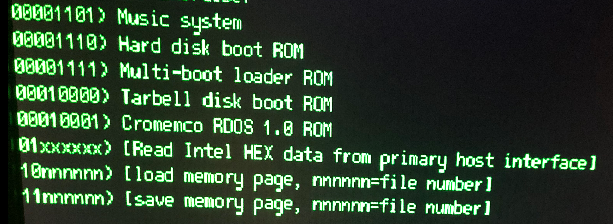
As you can see, to boot our Hard Drive image, we need to enter the bit patter of 1110 into the least significant bits. Be sure these are the only switches that are still on.
Now, press Aux 1 to boot.
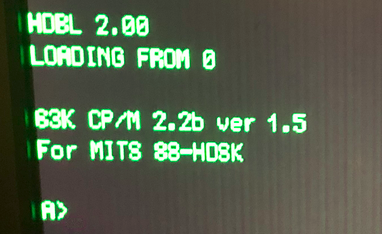
At this point, simply type DIR to get a directory of the files on the drive. Type the name of the program at your prompt, and the program will run.
Running Floppy Disk Images
The procedure to run a floppy disk is similar. However, instead of switches 12, and 13, use only switch 12. With all other switches off, AUX 2 Down displays a directory.
Be sure Switch 12 is still up. Enter the disk image you want to mount in the lease significant switches, then press AUX 2 Down. This will mount the disk.
Another difference is that you will need to run the floppy boot loader from ROM once the image is mounted. With all other switches off, set your least significant switches to 1000. Press Stop | Reset | Aux 1 Down, and the image will boot.
Running ROM Images
ROM Images are easy to load. After you power up, simply be sure all of the switches are off. Press Stop | Reset | Aux 1 Down to list the ROM images available. Enter the bit pattern of the image you wish to load. You will enter this patter in the least significant switches. Press AUX 1 Down to load the image. For example, let’s say you want to run “Kill the Bit”. With all other switches off, hit Stop | Reset. Your least significant switches will be set to 0010. Press AUX 1 Down, and the program will run.
Summary
This machine will take you back in time. Additionally, it’s a great way to learn how the first computers worked. It will take a good part of the day to build. Your time, money, and efforts will be well worth it. One of the best things about this machine is that you will always be learning. That’s one thing that makes vintage machines so fun! To order the kit, go to AdWaterAndStir.
Special thanks to Chris Davis who put the kit together, David Hansel for putting together the Emulator, and Geoff Graham for the VT100 Emulator design.
— Ricky Bryce