
Introduction to beginning a FactoryTalk View SE project.
FactoryTalk view is HMI (Human-Machine Interface Software). This software allows you to set up objects on a screen that interact with memory location in the equipment’s processor. The first thing you might notice when beginning a FactoryTalk View SE Project is that something appears to be missing. Specifically, there are no HMI displays, Alarm Server, or Communication server in the new project. You will especially notice this if you are used to FactoryTalk View ME. Through this post, I will walk through the steps of getting these servers installed, and how to set them up. In this case, we’ll just create a simple project that displays a “Hello World” screen. Other posts on this site will discuss how to add other objects on a display to interact with the PLC. I’m using version 11. If you need to upgrade your software, and are in support, visit the Rockwell Automation website.
Create a new project
Let’s start off by opening FactoryTalk View SE. Notice we have several options for our project.
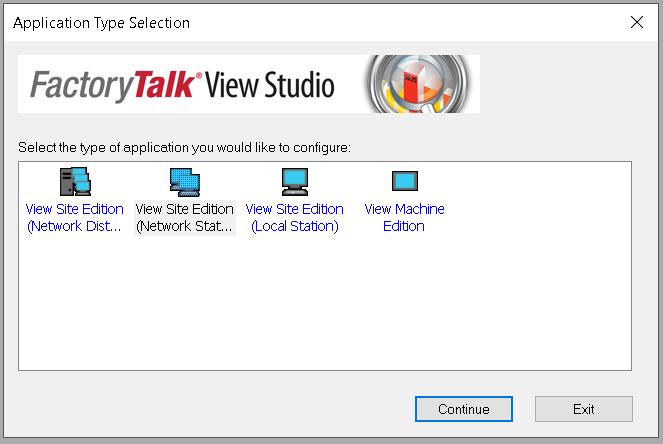
Network distributed is for different services to be running on different servers of your network. In contrast, for a network station, your services will all run on one server of your network. For a local station, everything will run on the same computer. The last option, Machine Edition is a different software package that allows you to program a PanelView Plus terminal.
In this case, I’ll just choose “Network Station”, then press “Continue”.
As I have said, the Explorer Tree has few options.
Add the HMI Server
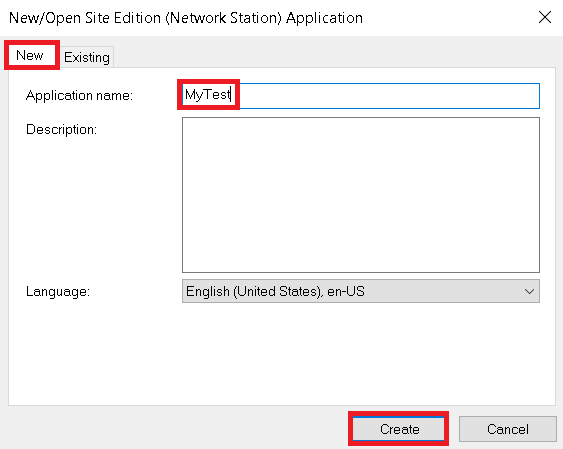
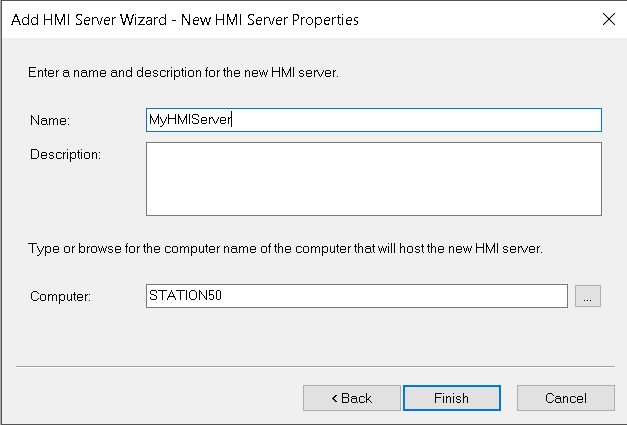
First, let’s add the HMI Server. I’m going to right-click on the name of the project. This is called “MyTest”. Choose “Add New Server”, then “HMI Server”. Choose to “Create a New HMI Server”, then click “Next”. I will call this “MyHMIServer”, then click “Finish”.
I’m not going to use any of the default displays in this project. I selected “Clear All”, then press “OK”.
At this point, you will notice we have a lot more folders in the Explorer tree.
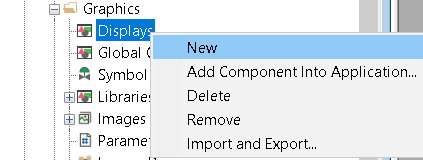
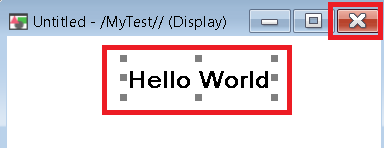
At any rate, We’ll just add the text “Hello World” to the screen, and close the display screen. When we close the display, name it “Main”.
Add the Communication Server
At this point, we are ready to add the FactoryTalk Linx communication server. If you have a special need, you can also add the RSLinx OPC server.
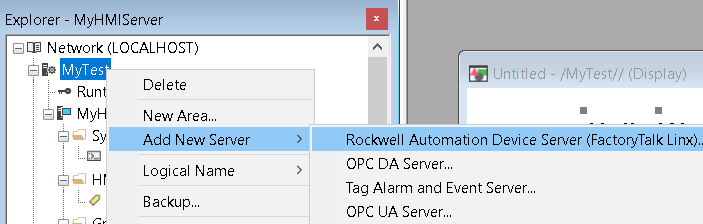
Right-click the name of the project, “MyTest”. Choose “Add New Server”. Specifically, for this project, choose “Rockwell Automation Device Server”.
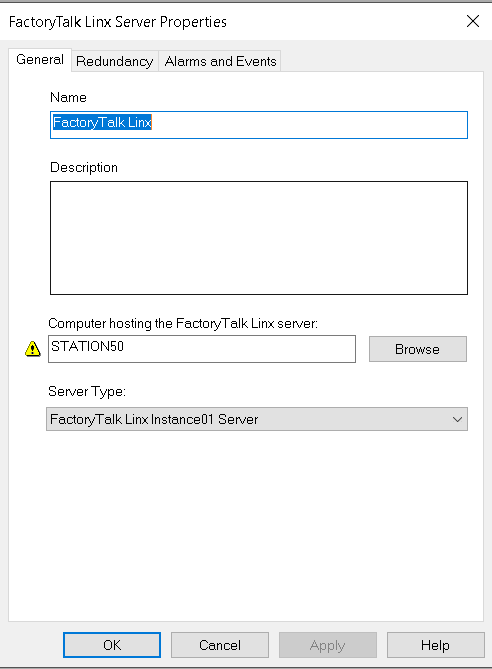
After that, we’ll leave the next dialog box at default, and press “OK”.
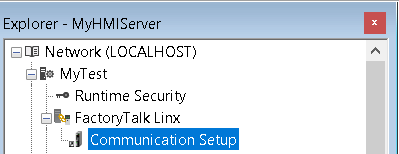
At last, we’ll configure the communication path. Under FactoryTalk Linx, open “Communication Setup”.
Let’s add a device shortcut called PLC. Be sure this shortcut points to your PROCESSOR! When finished, press “Apply” then OK.
Add the Alarm and Events Server
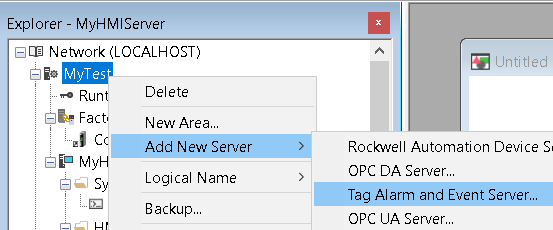
If you need alarms in your project, at this point, we will add the alarm and event server to your project. With this purpose in mind, right-click the project name “My Test”. Choose to “Add New Server”, then choose “Tag Alarm and Event Server”.
We’ll just name it “AEServer”, then click OK.
Congratulations! Your project is now started. You are ready to add other graphic displays, alarms, or other features of FactoryTalk View SE.
If you need information about FactoryTalk View ME, visit the FactoryTalk View ME Category Page!
— Ricky Bryce