
Introduction to ControlLogix Local I/O
ControlLogix Local I/O is input and output modules are modules that are in the same chassis where the processor resides. This is the definition of the Local Chassis in ControlLogix All tags for all modules in this chassis will begin with the word “Local” in the Controller Tag Database.
We will be adding a connection to our Local Input and Local output modules. The processor needs to read the status of the inputs that we have wired to the Input modules, and control outputs.
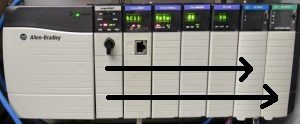
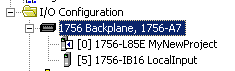
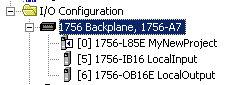
Presently, processor is in Slot 0. Count the slots, and you will find that the Input module resides in slot 5. The Output module resides in slot 6. At your location, the I/O modules could be in any slot.
Gather the information
Studio 5000 is going to ask for a name of each module. In addition to this name, we need to know the slot number, the firmware revision, and the catalog number. Use RSWHO, and look at the properties to get the firmware revision of each module. Another method to get the firmware revision is to enter the IP address into your web browser. Once you see the status page for the Ethernet module, click “Browse Chassis”. In this case, I’ve found the following information about each module:
Slot#       Name           Catalog #     Revision
   5        LocalInput     1756-IB16     2.6
   6        LocalOutput    1756-OB16E    2.4
Add the Input module
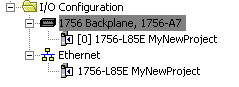
Now, we need need to add these modules to the I/O configuration tree. These modules reside on the backplane of the local chassis, so right click on the backplane, and select “New Module”. First, we will add the 1756-IB16
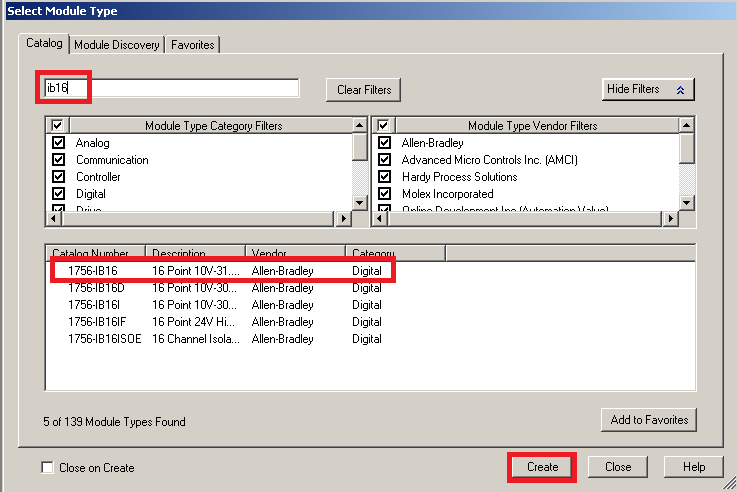
Then, type IB16 in the filter box to narrow the modules that appear. Next, select 1756-IB16 as the catalog number. Finally press, the Create button to create a connection to this module.
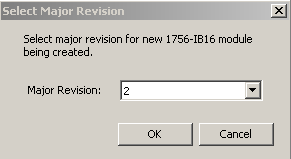
Next, select the major revision. The major revision is the part of the revision that is before the “.” in the revision number. In our case, this is 2.
Now, press OK again.
Finally, you see the 1756-IB16 Configuration box. Name the module “LocalInput”. The module is in slot 5 (in our case). The minor revision is 6. Here, I’ll choose “Compatible Keying”. There are three options for electronic keying: Disable (any revision will work as a replacement). Exact Match: The module can only be replaced with a version 2.6. If you choose “Compatible Keying”, the module can only be replaced with a version 2.6 or higher. Once everything is set up, press OK.
Note: modules can be upgraded to a new revision using the ControlFlash utility.

Add the Output Module
Now, you see the 1756-IB16 module in your I/O Configuration tree. Next, add the 1756-OB16E module. Again, right click on the backplane to select a new module.
Next, type OB16E in the filter box, select your 1756-OB16E module, and then press “Create”.
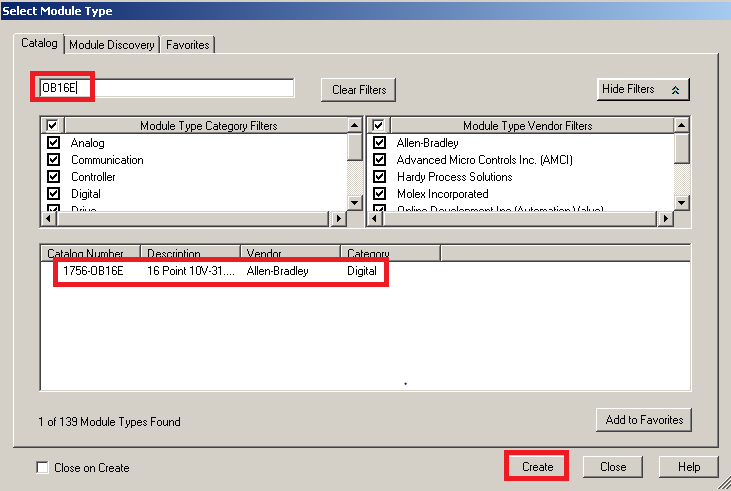
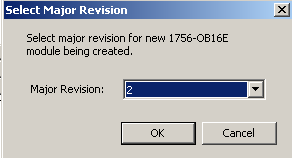
Still, the OB16E has a major revision of 2.
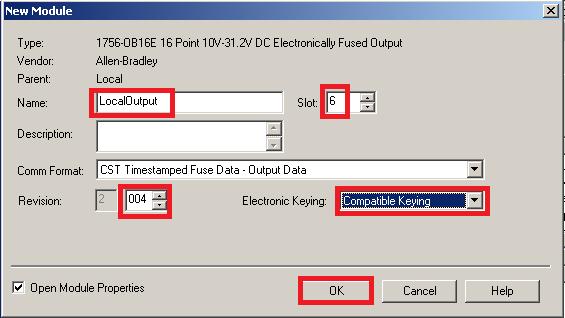
Next we see the dialog box for adding the 1756-OB16E module. Name the module “LocalOutput”. Presently, the output module is in slot 6. Still, the minor revision is 4. Select “Compatible Keying”. Then, press OK.
Finally, both the Input and output modules are in the I/O Configuration tree.
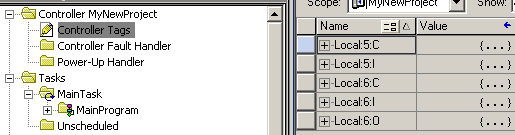
In addition, go to Controller Tags, and you see that the tags have been created for the I/O modules.
To test your work, disconnect any prime movers, and download to your processor:
- Click Communications | Who Active
- Browse for your PROCESSOR.
- Select your PROCESSOR.
- Click “Download”
Be sure the processor is in Remote Run (REM RUN) mode, and open Local:5:I.Data. Here you an test your switches to see if they respond in the Controller Tag Database. To test outputs, open Local:6:O.Data, and manually place the value of 1 into the Controller tag (assuming we don’t have any logic yet). The output should energize.
Summary of ControlLogix Local I/O
Keep in mind that we must add a connection to any module we wish to use in our project. It’s important to realize that all tags for modules in the local chassis will be begin with the name “Local”. Obviously, you can set up aliasing, but the base tags will start with the name local.
Before adding the modules, be sure you know the slot numbers and firmware revisions. If the module is new out of the box, then you can simply look at the sticker on the side of the module. On the other hand, if a module is not sealed in the box, we aren’t sure of the firmware revision. You can usually change the firmware revision of most any ControlLogix module using the ControlFlash utility. There are a couple of ways to know what a module’s revision is for sure. One way is to go to the properties of the module in the RSWHo screen in RSLinx. The other way is to use your web browser. If you have an Ethernet module in your chassis, simply enter this IP into your web browser. click “Browse Chassis” to see all of the revisions.
For more information, visit the ControlLogix category page
— Ricky Bryce