
Introduction to Altair 8800 with Arduino Due
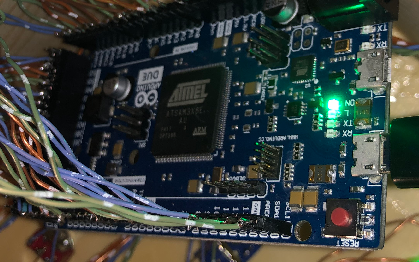
In this section, we’ll discuss how to set up the Altair 8800 with Arduino Due. The Altair was a home computer from 1975. Another option is to use the Arduino MEGA. However, the MEGA is slower, and will not have all of the options available with the DUE. In this case, I set this up by hand. Thanks to Mr. Hansel, the code is available here. To compile the code, I simply added the sdfat library (1.1.4). Additionally, I added the dueflash library. If you do not wish to build every part on your own, you can order a kit here. I’m sure with the kit you would get much better quality components than the cheap switches you buy online.
Building the Face of the Altair 8800
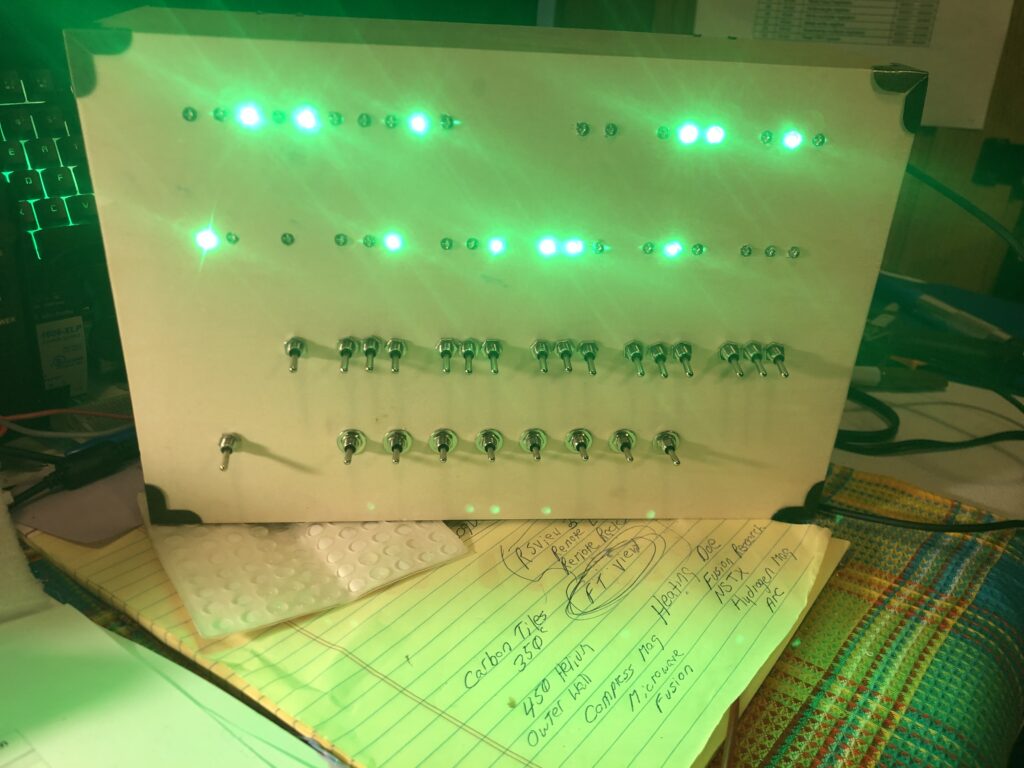
I found a wooden box at my local Wal-mart store that was large enough for the faceplate. Using OpenOffice Calc, I printed out a template that I could use to drill the holes. I simply aligned the template, and used a center punch to mark the holes.

Add the Switches and LED’s for the Altair 8800 with Arduino Due
The original design calls for red LED’s, however, I decided on green LED’s. The LED’s are 5mm. The switches I’m using for address and data are MTS-102. Be sure to order extras in case you destroy some while soldering. Additionally, I used MTS-123 switches for the functions. When you wire these switches, they are active low. In other words, you ground the input for an ON condition. When the switch is off, the internal pullup resistors on the Due will reverse the state.
It’s important to realize that the DUE alone will not supply enough current for all of your LED’s. In this case, I used a ULN2003 driver. My project requires six of these. You will have a few spare outputs. Another option is to use transistors, such as the 3904. In my project, I’m adding a 220 Ohm resistor in series with each LED’s. The ULN2003 will interrupt the GND of the LED’s. In other words, wire 5v through the 220 Ohm resistor to the + of the LED. The cathode of the LED connects to the output of your driver.
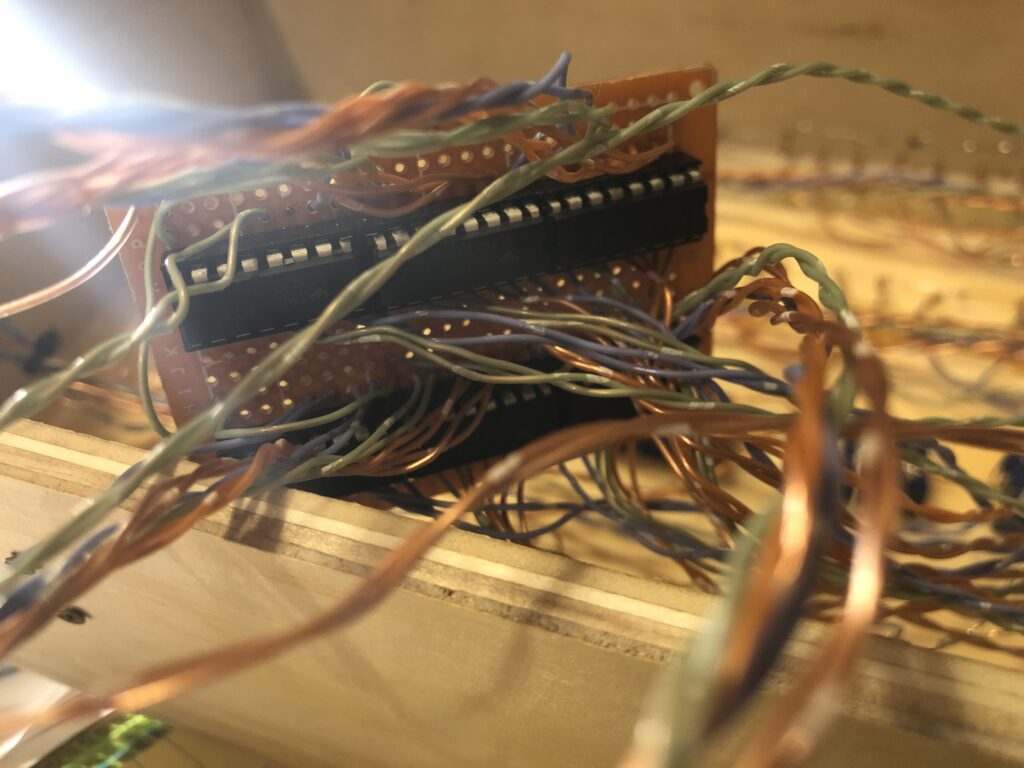
Wiring to the Due
The wiring diagram to the Due is with the Source Code. Basically, you will use almost every pin. In this case, I used headers. I did not want to solder directly to the DUE. This also gives you the ability to easily replace the DUE if you ever need to.
Between RESET and GND, be sure to connect a 4.7uF capacitor in series with a 470 Ohm resistor. There is a known issue with powering up the DUE. Adding these two components to your circuit will overcome the power up problem by holding the DUE reset for a longer period of time.
Upload to the DUE
Before you upload, be sure to install DUE support. Do this in the Boards Manager. Like I said before, you will also need the dueflash library. Likewise, you need the SDFAT library. I used version 1.1.4. I tried the latest version of SDFAT, but it would not compile. Go into the config.h file, and modify any options to customize your project. When you upload the file, it will take longer than usual. Remember, the DUE has a lot more capability than a standard Arduino. Go into the config.h file to modify any options before you upload.
Test Your Project
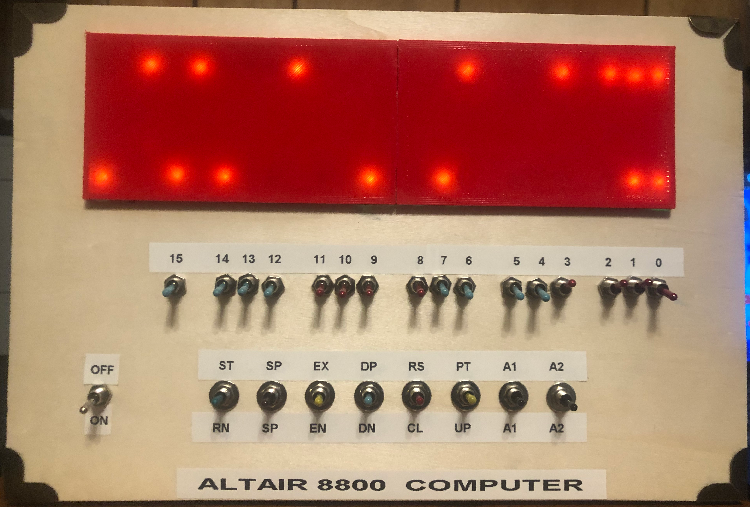
The code that you upload to the DUE comes with some programs that you can run. The manual tells you how to run each of these applications. One program is an old game called “Kill the Bit”. Run this by setting switch 1 (and only switch 1) high as you press AUX 1 down. Reset the Altair, and hit run. A light will race across your display. The object is to press switch 8 at the exact moment that light 8 comes on. If you miss, then you will have two lights to try to kill.
Other Connections for Altair 8800 with Arduino Due
For your drive images, you will want to connect an SD card. The documentation on these connections is here. Just scroll to the bottom of the documentation. Simply use an extra Mini to Micro SD card adapter for this. In this case, I just soldered the wires directly to the SD Card adapter. Additionally, you will need to place the disk images onto this SD Card. I formatted the SD Card in FAT32, then copied the images over. You will find the drive images files here.
As a final touch, I put some “Shades” over the LED’s. Without this feature, the LED’s were too bright, and unpleasant to look at.
Summary of Altair 8800 with Arduino Due
In short, if you like older computers, you will love this project. This project is simple to put together, however, it’s a little bit time consuming. All you need to do is gather the materials and put it together. The code pretty much works straight from the sketch you download. This project will teach you how computers actually work without the smoke and mirrors in modern software.
For other projects, visit the Advanced Category Page!
— Ricky Bryce