
Introduction to SLC-500 Online Editing
When performing SLC-500 Online editing, you are making the changes to the program while the process is running. However, you must be careful. Be sure to fully understand what effects your changes will have on the system.
It’s important to realize that your key switch must not be locked into RUN. If your keyswitch is in RUN mode, you will not be able to accept your edits.
Basically, there are 5 steps to performing an online edit, and we will walk through each of these steps.
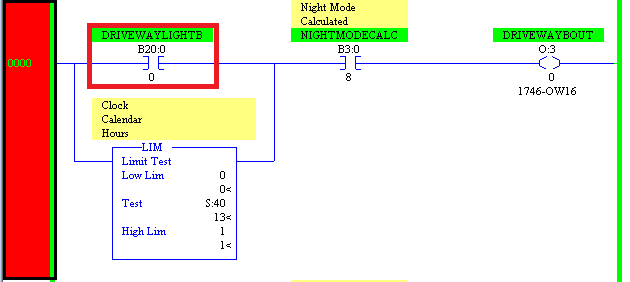
In this case, I have an XIC on a runt that I want to change to an XIO.
Step 1 — Start Rung Edits
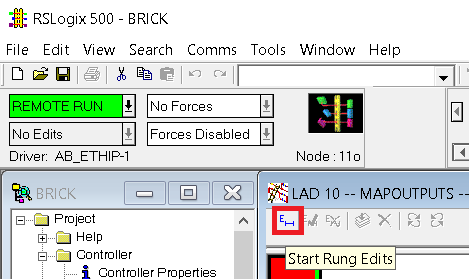
The first step is to put the rung into edit mode. Simply double click the rung number, or be sure you select the rung and click “Start Rung Edits” icon in the online toolbar.
Notice that RSLogix 500 made a copy of the rung for us to work with. Look at the power rails also. The top rung has “e” in the margin indicating edits. The lower rung has “r” in the margin. This indicates the rung will be removed. We will be making our edits to the top rung.
Step 2 — Make Changes
Now that our rung is in edit mode, we are ready to make changes to the top rung. I’m simply going to change the XIC to an XIO.
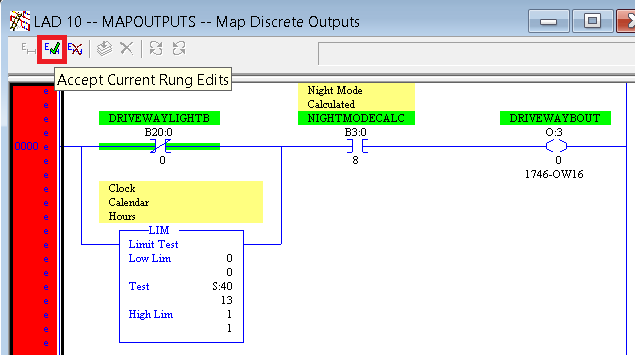
Step 3 — Accept Rung Edits
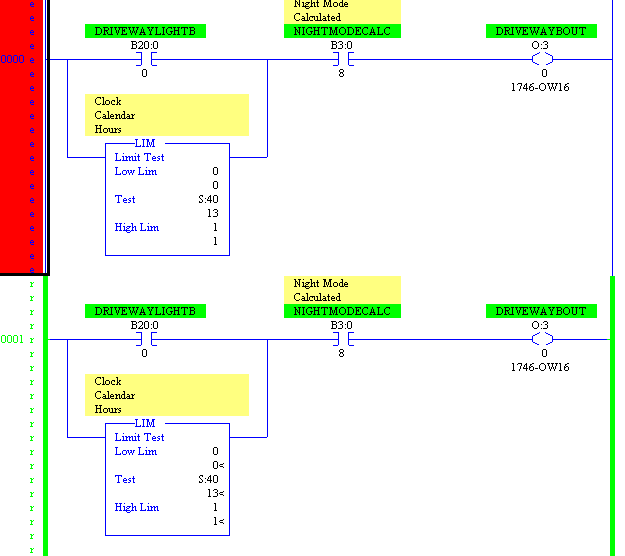
When we accept the edits, we send the changes to the processor However the old rung will still be active. Look at your power rails to determine which rung the processor is executing. You will also notice the lower case letters in the margin have now become upper case. Be sure the rung we are changing still has focus (click the rung number), and choose “Accept Current Rung Edits”.
Step 4 — Test Edits
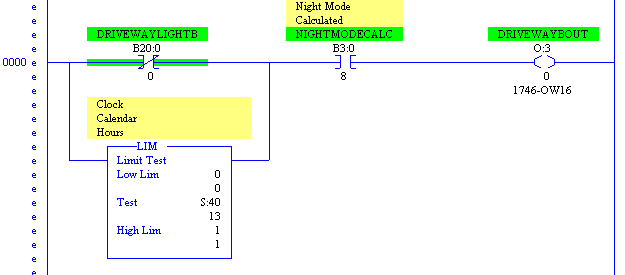
When you test your edits, the new rung becomes active. It is possible to damage equipment and/or personnel if your logic is incorrect. Be sure your logic is safe to test, and click the icon “Test Edits”.
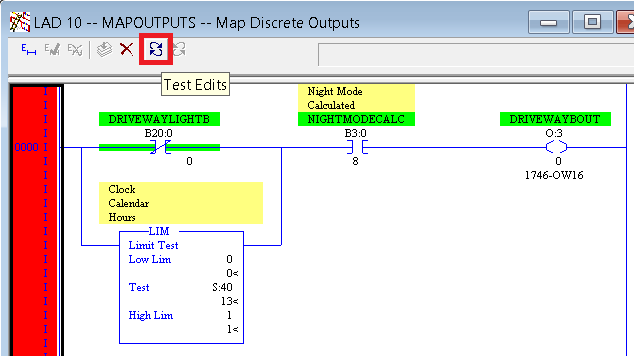
If you do not wish to keep the changes, click “Untest” (to the right of test), then cancel edits (to the left of test). After you test edits, you will notice the power rails are now green (by default).
Step 5 — Assemble Edits
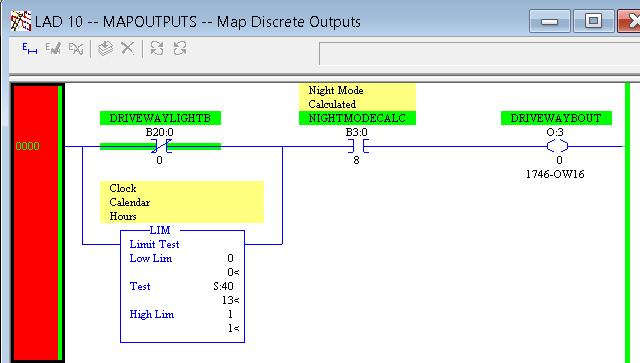
At last, you are ready to assemble your edits. Click the icon to assemble edits in the online edit toolbar.
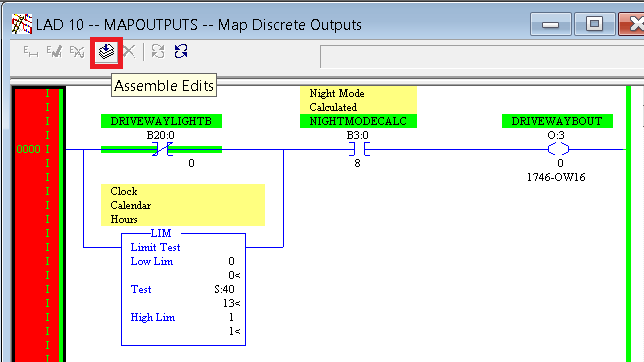
Finally, your changes are complete. Be sure to save your work if this change is permanent.
For more information on the SLC, visit the SLC-500 category page.
— Ricky Bryce