
Introduction to Building the Kim Uno (Kim-1)
Building the Kim Uno (Kim-1) is fairly easy, but a little bit time consuming if you don’t use a PC board. The Kim-1’s technology from 1976. It’s fun to program, however, you do have limited memory. The Kim Uno emulates a 6502 processor using the Arduino Pro Mini. In this case, I’m using an Atmega328. You will find the technical details here. A special thanks to those involved in building the emulator and schematics. Because of their hard work, we can all enjoy the experience of 1970’s style computers.
What You Need
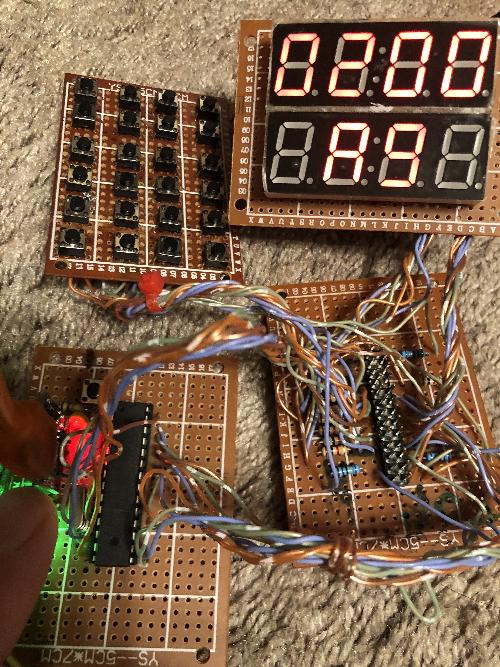
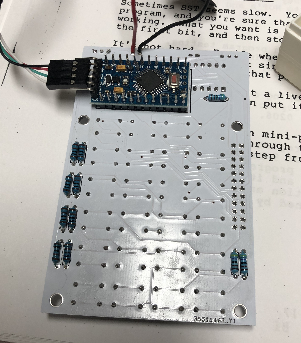
It’s important to realize that you can purchase a kit, which takes much less time to build. I purchased a kit on ebay for a different unit. The build time is about 1 hour. If you are building the computer from scratch, there are some components you need to gather. First, you will need a processor. Any standard 328 Arduino, such as the UNO, Nano, or Pro-Mini will work. The build instructions call for a pro-mini, so be sure to adjust the pinouts for the unit you decide to use. Use this link for your schematic. You will also need some prototype paper to solder your components.
In addition, you will need two ‘3461BS’ displays, which are common anode. In my case, I used a larger display that had a colon in it. That feature seemed to interfere with the operation of the Kim Uno, so I simply removed the DP connection from the display. You will still need the DP connection from your buttons to the processor, though. Just realize that your decimal points on the display will not work in calculator mode if you do this.
You will also use 24 tactile buttons, Eight 1K resistors, and three 2K resistors. In this case, I simply used CAT5 cable to make all of the connections. Most importantly, you will also need about 5 hours set aside to get things up and running, unless you buy the PC Board. Obviously, I have to take a break after about every 20 connections or so, which is a good idea. In order to connect to the processor from USB, I installed a 6 pin header. This allows for a connection from a USB-TTL adapter.
Install the Firmware after Building the Kim Uno (Kim-1)
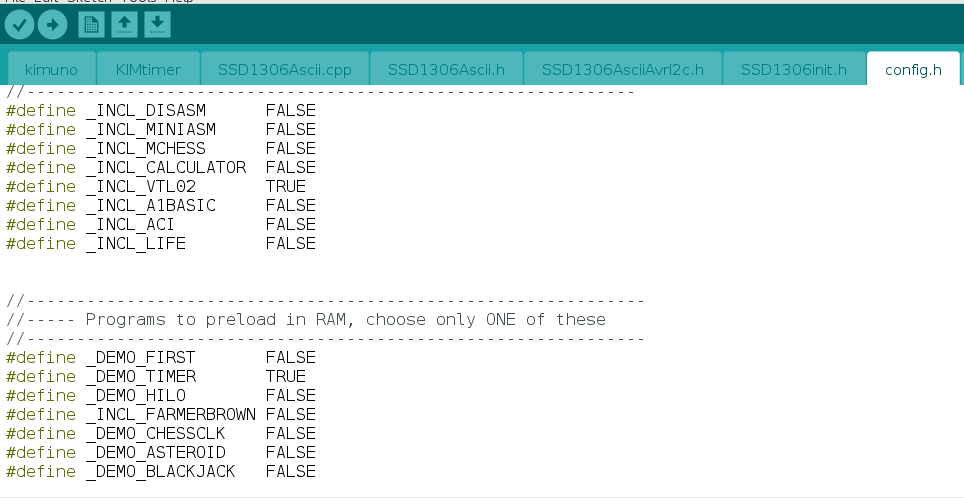
Download the firmware from this link. You will need to decide which programs to install. At any rate, I will install VTL02, which is a language similar to BASIC. I also installed the Timer into RAM. The starting addresses for each application are on the ROMS tab. Keep in mind, the timer starts at 0200, and VTL02 starts at DC00.
Upload your Project
In the Arduino IDE, sure to select the COM port and correct board that you decided to use. Upload your sketch. If your board does not have an automatic reset feature, then reset the board manually before you upload. Simply hold the reset button in, until the IDE shows “Uploading”.
Connect to a Terminal
Programming the Kim-Uno via terminal is much easier than entering the project from the keypad. In this case, I used a Raspberry Pi with a USB-TTL Cable. It’s important to realize that the TX pin on your cable goes to RX on the Kim, and vice-versa.
If you happen to use the Windows operating system, you can install PUTTY to communicate with your Kim computer. Although you can also install PUTTY on Linux, I like to use Minicom. Simply sudo apt-get update. Then sudo apt-get install minicom. The output of dmesg tells me that the KIM is on /dev/ttyUSB0. To start minicom, just type minicom -D /dev/ttyUSB0. The KIM’s serial settings default to 9600/8/n/1. To adjust the serial settings within minicom, just press CTRL-a, then z. Select P from the menu for parameters. Look through other settings in the menu to see if there are any other tweaks you would like to make.
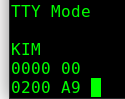
That’s it! You should be communicating. Don’t forget to use caps lock for your hex characters. Remember that <tab> toggles between terminal mode, and keypad mode.
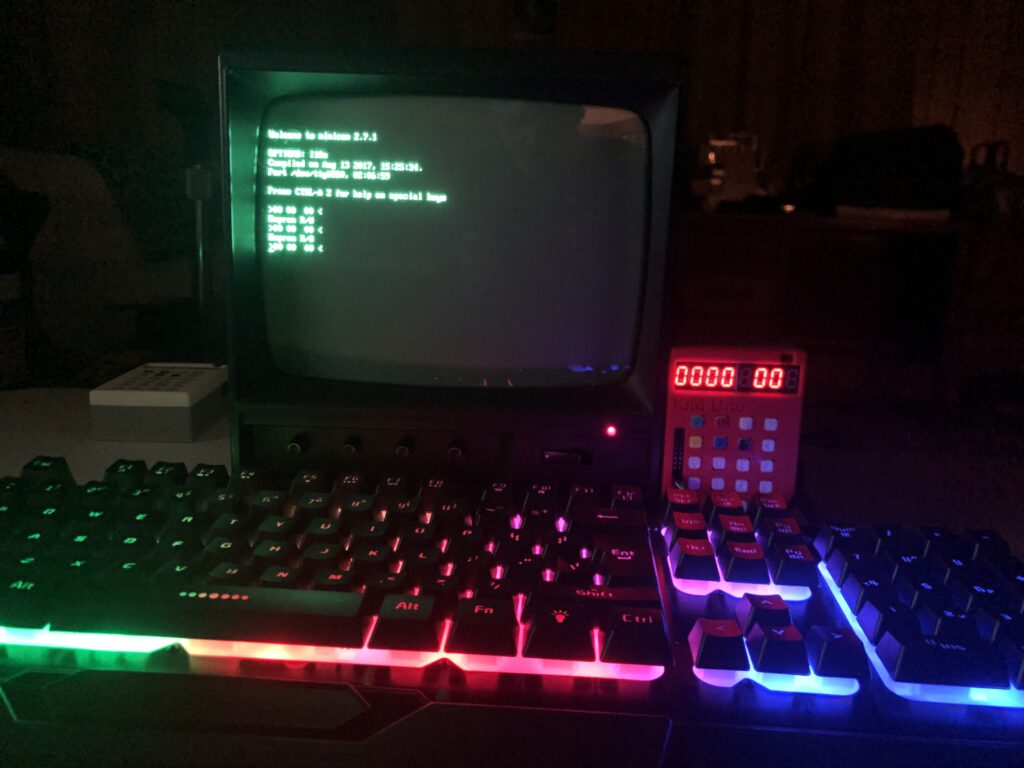
Kim Uno with Raspberry Pi Terminal using Minicom
Using Your Terminal
There are a few things you need to know while running the terminal.
- Be sure your caps lock is on, and you probably will want to enable local echo.
- Type any address, such as 0200, then press SPACE to go to that address.
- Enter will advance to the next address.
- While on any address, simply type the data for that address, then press “.” to accept your changes.
- G will be the same as “Go”, and runs your program. (CTRL-G) in keypad mode.
- CTRL-R is your RESET
- Other commands are in the Kim Uno’s Manual.
Gerber Files for Building the Kim Uno (Kim-1)
Additionally, to save time (and space), you can have a PCB made. You will find the gerber files here. This makes the project much simpler. I’ve also built one using this method, in which I ordered the parts on Ebay.
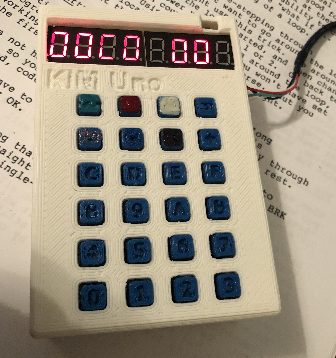
Just be sure to use the build guide. As you can see, my segments F and G are dim. This was a result of me putting 4 resistors in the wrong place. I eventually removed the resistors, and put them in the right locations, and the display lights up nice and even now! Additionally, if you have a 3D printer, simply print out a case that is listed on Thingiverse.
Summary
In summary, this is a great project. If you are interested in learning how vintage computers work, you will enjoy this project. The First Book of Kim is another resource that will help you get started. As you start to enter programs, and modify them, you will learn a lot about how these older computers worked.
To view other posts on the Kim-1, check out the category page!
— Ricky Bryce