
Introduction to Creating a New Motion Project
In this post, we will talk about creating a new motion project in Studio 5000. We will use an emulator processor to build virtual axis in the next series of posts. With Studio 5000, we will build this project based on the Allen Bradley ControlLogix platform.
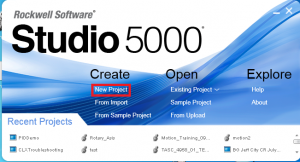
Open Studio 5000
First, open Studio 5000. This is located under the start menu in the Rockwell Software folder. However, if you have a shortcut on your desktop, you can use that as well. On the splash screen, be sure to click “New Project”.
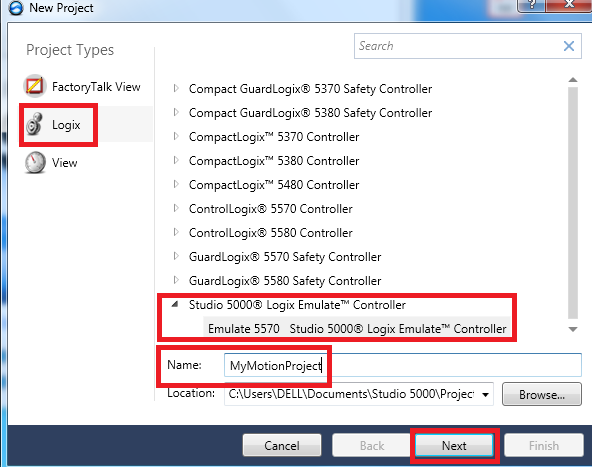
Secondly, select “Logix”, then choose the type of processor you have. In this example, we have an Emulator. Be sure to name your project, then click “Next”. If you do not have Emulate 5000 installed, then you will need to use an actual (hardware) processor to see motion on the axis! For our purpose, the default location of the project file will be fine. Emulate 5000 is a package that is typically included in the full version of Studio 5000, and is great for testing projects, and simulating code.
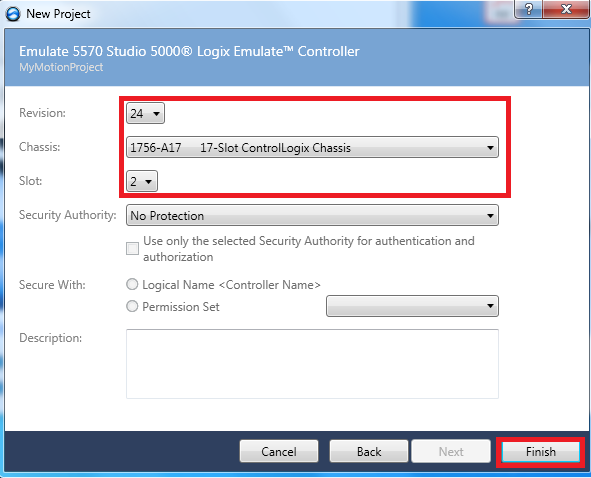
Third, select the revision of your processor, chassis size, and document the slot number that your processor is in. Then, be sure to click “Finish”. We will not use any security authorization for this project.
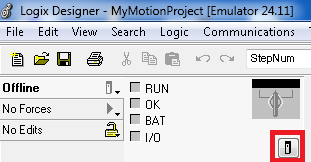
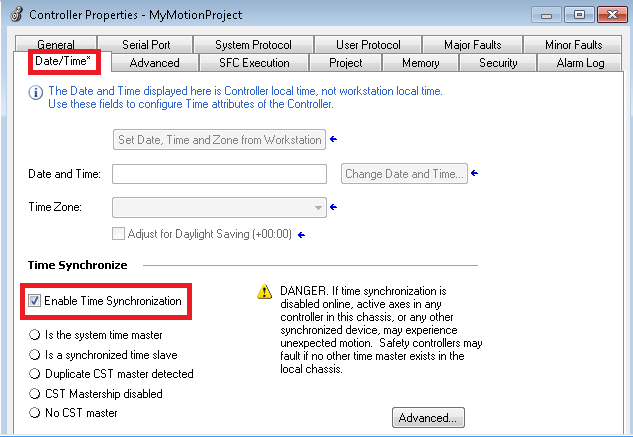
Fourthly, your project is now open, however, we need to make one more adjustment before adding the motion groups. We need to enable time synchronization. This will allow the processor to be the master of the timed events. In fact, the project will not work properly if we forget this step! There are several ways to do this. However, the easiest way is to click on the Controller Properties icon as shown.
On the Date/Time tab, be sure to enable time synchronization as shown. It is equally important to be sure to read the danger message!!
You are now ready to move on to creating a virtual axis.
— Ricky Bryce