
Introduction to PlantPAx 4 Motors
The standard process library contains PlantPAx 4 Motors. These motor objects allow us to control and monitor the feedback of all motors in our process. We might also need to add interlocks and permissives in our logic. Another key point is that the HMI will provide an easy way for maintenance to troubleshoot the conditions that could prevent the motor from starting. In this post, we’ll import the P_Motor instruction in logic, and configure the HMI display for this motor object. In this example, we’ll just have a single speed motor.
Add the Logic
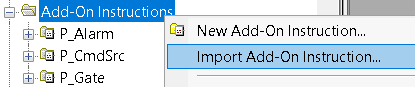
First, we need to import the P_Motor instruction in logic. With this intention, right-click the “Add-On Instructions” folder and choose to “Import Add-On instruction”.
Select the P_Motor instruction from the process library. Click “Import”.

Once the instruction is imported, just leave the settings at default. At this time, we are now ready to add the logic to control and monitor the motor. To demonstrate, I have created another function block routine. By all means, don’t forget to add your JSR to this function block routine from the main routine!
To demonstrate, we’ll set up the logic as shown:.
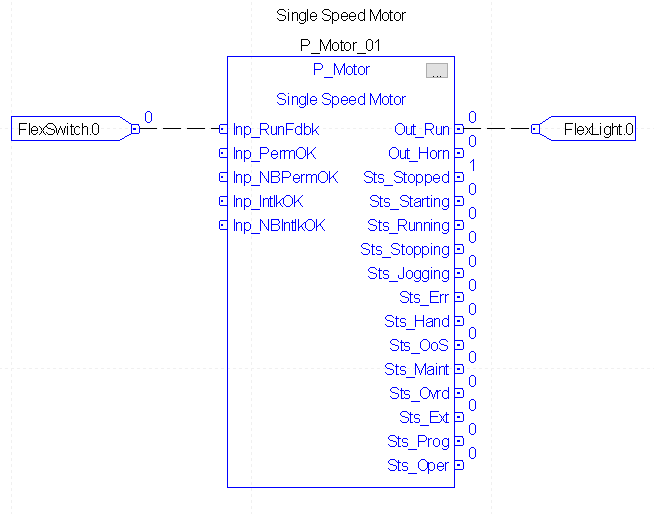
As can be seen, we have an output to control the motor, and we have feedback from the motor starter. However, we are missing the command to control the motor. To make these commands visible, click the ellipsis in the upper right corner of the instruction.
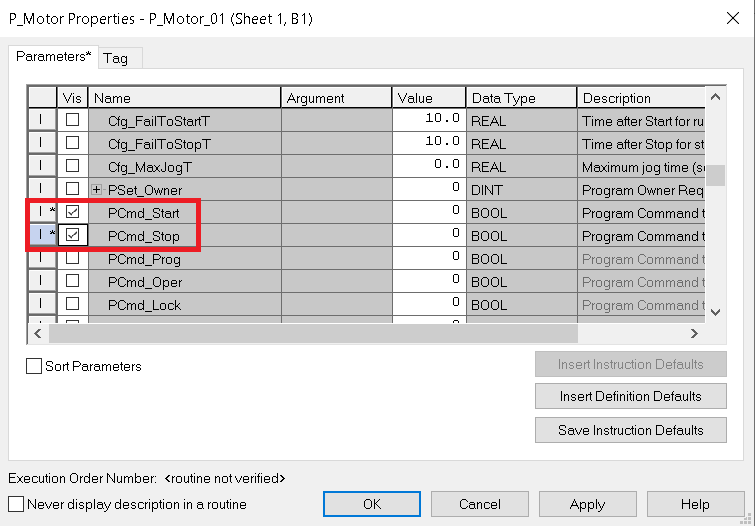
Turn on the PCmd_Start and PCmd_Stop visibility option. This allows us to tie tags directly into the instruction.
At last, we will add the inputs to start and stop the motor.

Finally, download your work, and take the processor to run mode.
Add the P_Motor faceplates
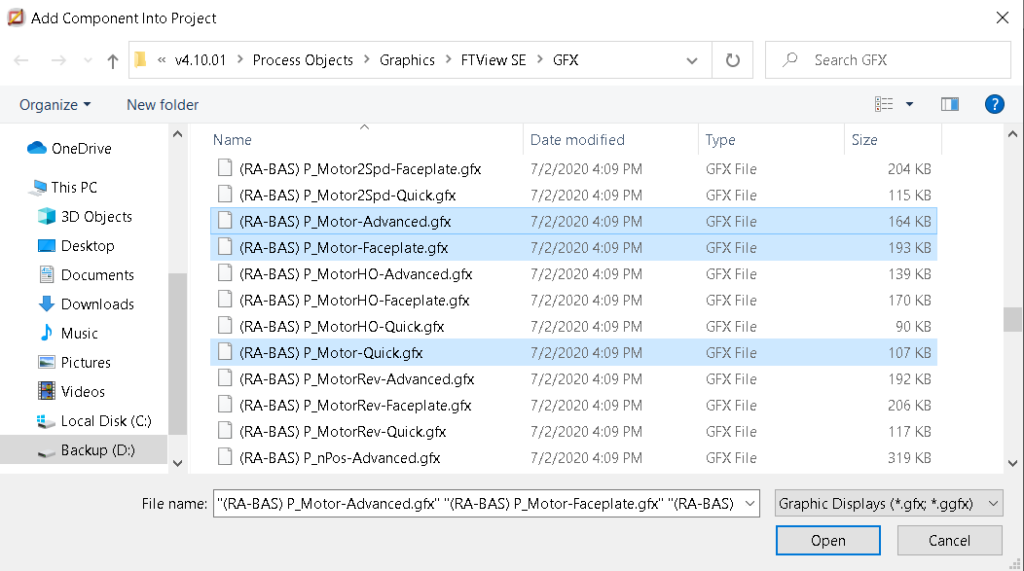
Right click “Displays” under “Graphics” to “Import Component into Application”. In the GFX folder of the processor library, we will import P_Motor-Advanced, P-Motor_Faceplate, and P_Motor-Quick. Likewise, it might be a good idea to import P_Runtime as well (not shown), so we can monitor the total runtime of the motor.
Next, open a display for motors. Then open the global object display for the P_Motor Graphics library. We’ll drag motor object onto our Graphic display screen for the operator.
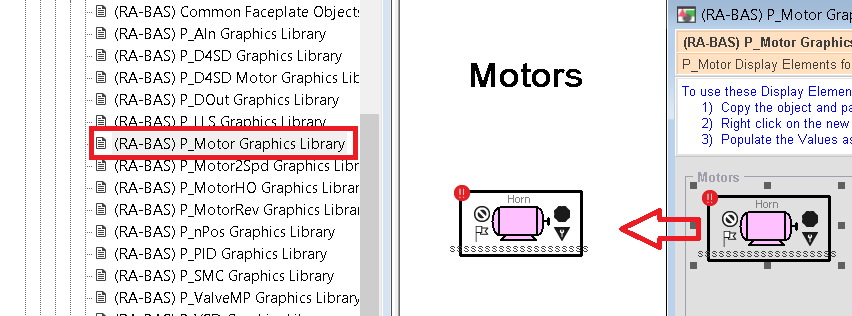
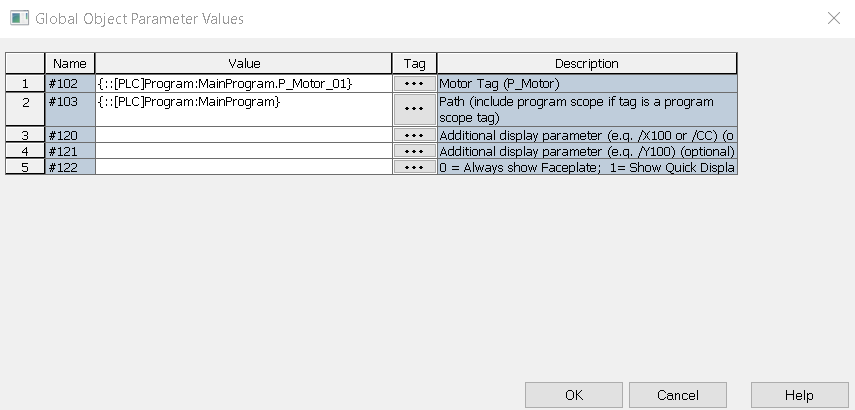
Right click the motor object, and set the global object Parameter values.

In this case, the tag is a program tag under the main program. The name of the tag is P_Motor_01. Click the Ellipsis to open the tag browser to find your tag for parameter #102. Also, set parameter #103, which is the path. Parameter #103 will allow PlantPAx to locate other objects for this motor, such as interlocks and permissives if used.
Launch the SE client
Close your display and save the changes. Launch the SE client. Be sure you have a way to navigate to the display that your motors are on. Also be sure that you have a way to log in.

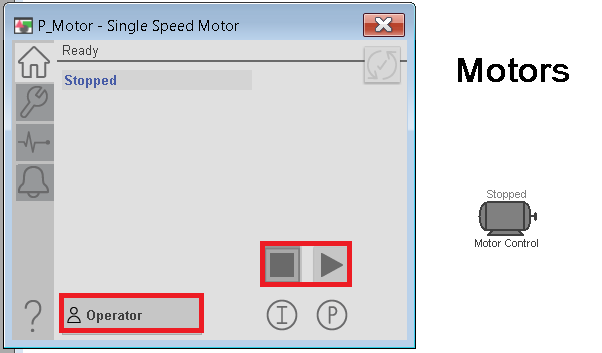
At this point, login to your application, and start or stop the motor in operator mode. You will see the status of the motor change on the display. With this in mind, realize that you must be very careful if performing this on actual equipment. Always take all safety precautions. Especially when energizing a prime mover.
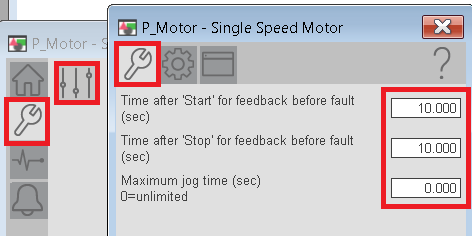
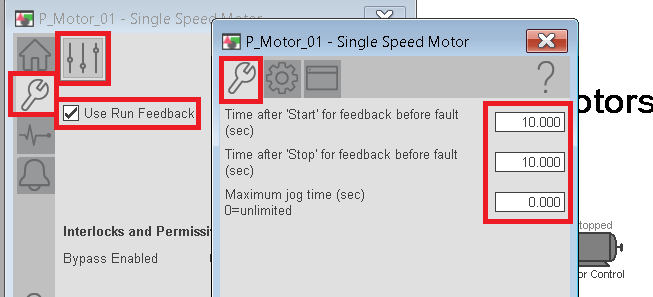
If you are using feedback from the motor, set up the fault timers. This is the time delay for feedback failure after the motor starts or stops. Go to Maintenance, Display, Advanced Display Properties, Maintenance to adjust these values.
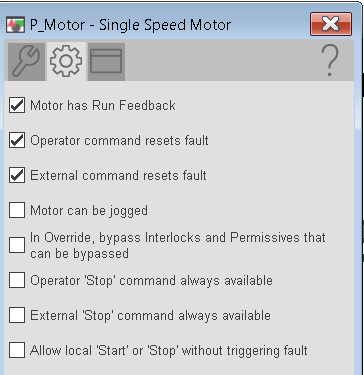
Similarly, on the Engineering tab, set addition options such as looking for the feedback, and how you can reset faults.
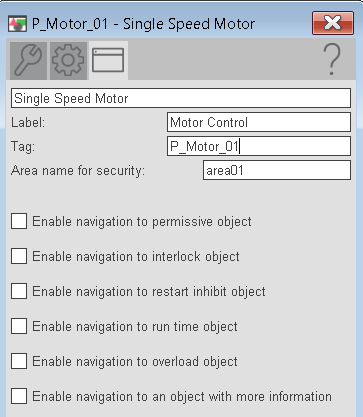
On the HMI Configuration tab, document the label, tag, and allow navigation to other objects that are associated with the motor. If you use permissives and interlocks, you may want to enable navigation to these objects.
You are ready to test your project. Recall that FlexSwitch.1 starts the motor, and FlexSwitch.2 stops the motor. In this case, we are using FlexSwitch.0 to represent the feedback.
Let’s configure the object to use the run feedback.
Put the object in program control mode, and be sure to reflect the actual feedback state to avoid a fault. Next, turn on the motor without changing the feedback. Navigate through your faceplates to find out why the fault occurred.
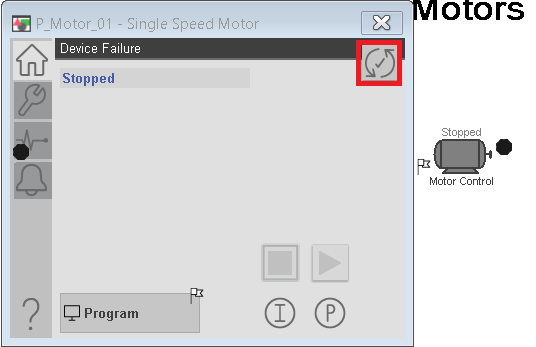
Resetting PlantPAx 4 Motors (Device Fault)
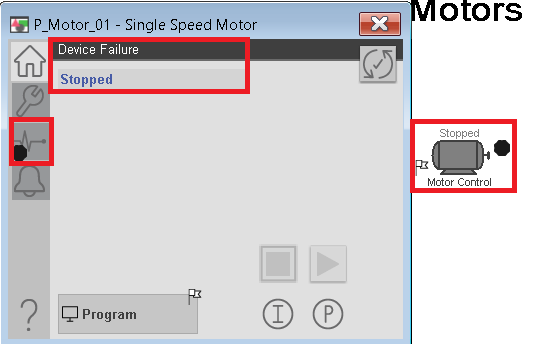
Notice the motor has stopped, and we have a device failure.
Shut off the motor, and it’s feedback. Reset the fault.
For more information on other PlantPAx objects, visit the category page!
— Ricky Bryce