
Introduction to starting a new project in the SLC-500
Before starting a new project in the SLC-500 system, there are a few things we need to do to set up the processor regardless of the processor type. We will set up the path to your processor, configure the I/O, and the channels. In the SLC-500, the processor will fault if the I/O is not set up properly. Likewise, if you don’t configure the communication channels properly, you may not be able to communicate with the processor after your download.
There are several reasons you might create a new project. You might be setting up some new equipment. Another reason is just to check some logic changes before implementing them in a production processor. This document is for example only on a processor that is not connected to any prime movers.
Create a new Project
The most modern software to program the SLC is RSLogix 500. This is the software we will use in these examples.
To begin, be sure you configured the necessary drivers in RSLinx. If you are connecting through serial (and using a null modem cable), configure the DF1 Driver. If you intend to communicate through Ethernet only, use the BootP server to assign an IP address to a 5/05. Then, configure the Ethernet Devices driver. If you have a 5/04, and intend to communicate through a 1784-U2DHP, then that is the driver you need to configure, etc. If the driver needs to know a COM port, you can find this under windows device manager.
Next, let’s open RSLogix 500 (I’m assuming that you’ve installed that already). If you do not have a shortcut on the desktop, you can open RSLogix 500 from the start menu. This is under Start | Rockwell Software | RSLogix 500.
Once RSLogix 500 is open, click on File | New. Be sure to name your project, and select your processor from the list provided.
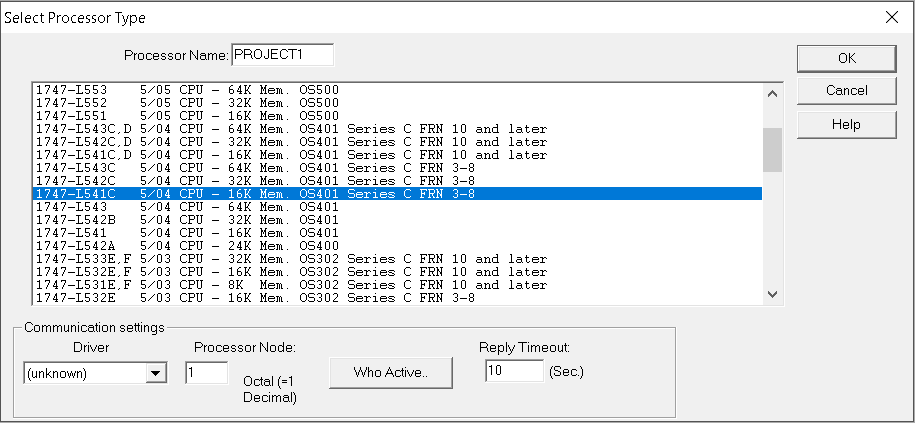
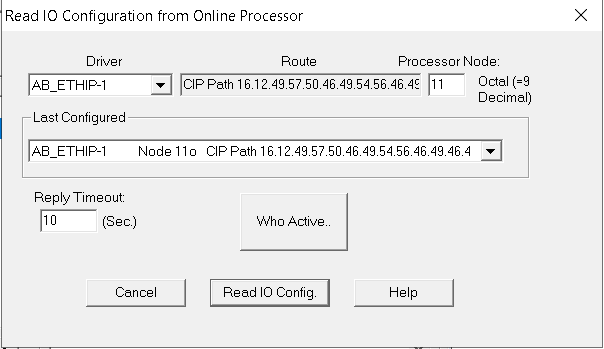
Afterwards, click the “Who Active” Button. This is located at the bottom center of the screen. This allows us to browse for the processor. In this case, I’m going through a ControlLogix gateway to access a 5/04 on a Data Highway Plus network.
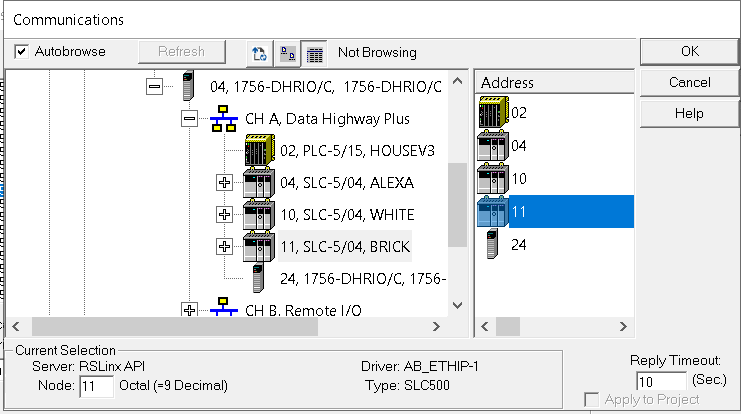
Once the path is set up, and your processor is highlighted press OK. Press OK again to build your project.
I/O Configuration (When starting a new project in the SLC-500)
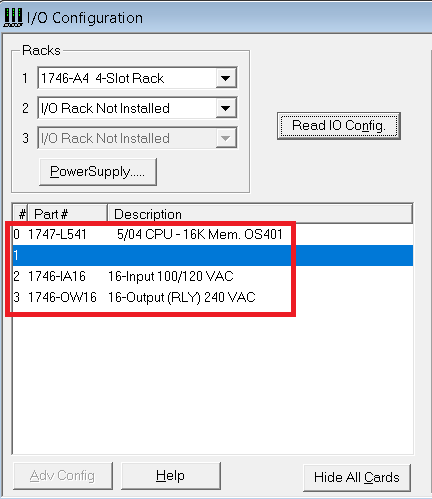
The first place we will go is to I/O Configuration. We will read the modules from the chassis automatically. If you are not connected to a processor, then you will need to drag the correct catalog numbers into the correct slots. Click “Read IO Config”.
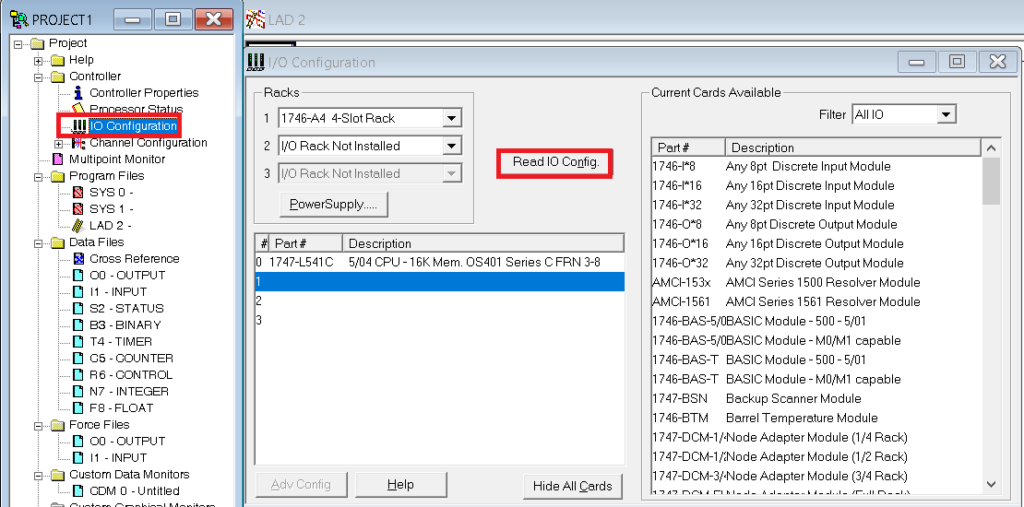
Your path should be correct to read the I/O Configuration automatically. If it’s not, click “Who Active” to browse for your processor again. Next, click “Read IO Config”.
Obviously, RSLogix found the correct modules. If you happen to have a 1747-SN module in your chassis, then you will need to set up the G file on this module to prevent the processor from faulting. We don’t have that in this example, so we’ll just close the I/O Configuration box.
Channel Configuration
Emphatically, we need to go into Channel Configuration. We need to set the up the communication for both Channel 0 (defaults to DF1 Serial), and for Channel 1. If you are connected to channel 0, and change the communication rate, you will loose communication when you download. You will have to reconfigure the DF1 driver. Likewise, if you change the Node address for channel 1, and download, you will loose communication if the node number does not match the old node. If this happens, you can go into Controller Properties, and change the controller communication path for the project.
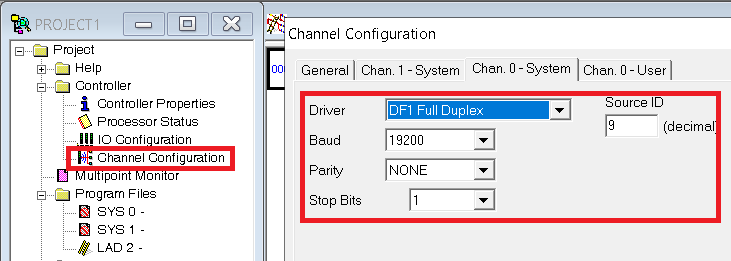
As shown above, I’m leaving channel 0 at 19200 baud. On the Channel 1 -System tab, I’m going to change the node address to match the current node number of the processor. This will be Node 11. My network baud rate is 57.6k. If you have a 5/05, then set the IP address, subnet, etc.
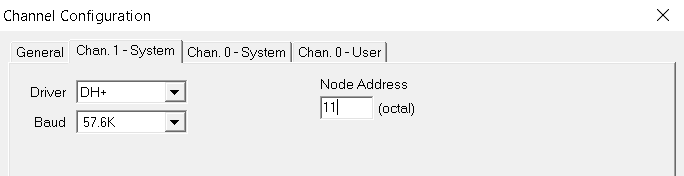
Be sure to hit apply, then OK.
You are now ready add some basic instructions! To test your work, just go to Comms | Download from the menu bar to send your project to the processor. Then go to Comms | Mode | Run to put your processor in run mode.
For more information, visit the SLC-500 Category Page!
— Ricky Bryce
Pingback: ControlLogix DF1 Messaging to SLC 500 - Bryce Automation