
Introduction to Assigning an IP Address to the 1794-AENT
In this section, we will be Assigning an IP Address to the 1794-AENT using the BootP Utility. If the IP address is already set, and we don’t know it’s IP address, we will reset it back to factory defaults, then re-assign a known IP address.
Important note: If your IP address will be in the subnet 192.168.1.x, you can simply set the last octet using the three dials on the newer modules if you like. You may need to cycle power after doing so. On the other hand, if you have an older module, or if your target address is different than 192.168.1.x, then follow the procedure below.
If you have switches on your module, and wish to use BootP/DHCP, simply set these switches to an invalid number. A value greater than 255 should enable BootP/DHCP Mode. Once again, you may have to cycle power.
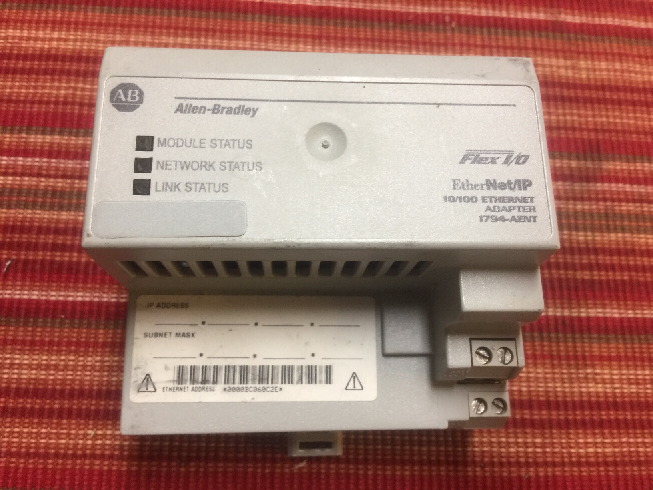
In this case, I have an older module, so I’m going to run the BootP Utility.
Get the MAC ID
Before we begin, be sure to write down the MAC ID. We also refer to this as the “Ethernet Address” or “Hardware Address”. You will need this to reset the module, and to re-assign the IP address.
You will find this address just below the bar code. This is a 6-byte code embedded by the device manufacturer.
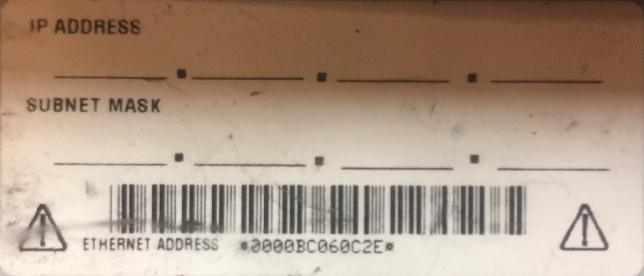
In this case, the Ethernet Address is 00:00:BC:06:0C:2E.
Run the BootP Utility (Server or Tool)
We will use the BootP Server to reset the module, and to re-assign the IP address. In essence, once we reset the module, the module will request an IP address. The BootP Server then assigns an IP address to a particular MAC ID. Let’s reset the module first.
The first time you run the BootP Server, it might ask for some network parameters. The main field is the Subnet Mask. This is usually 255.255.255.0. If you are unsure of your network settings, ask your network administrator.
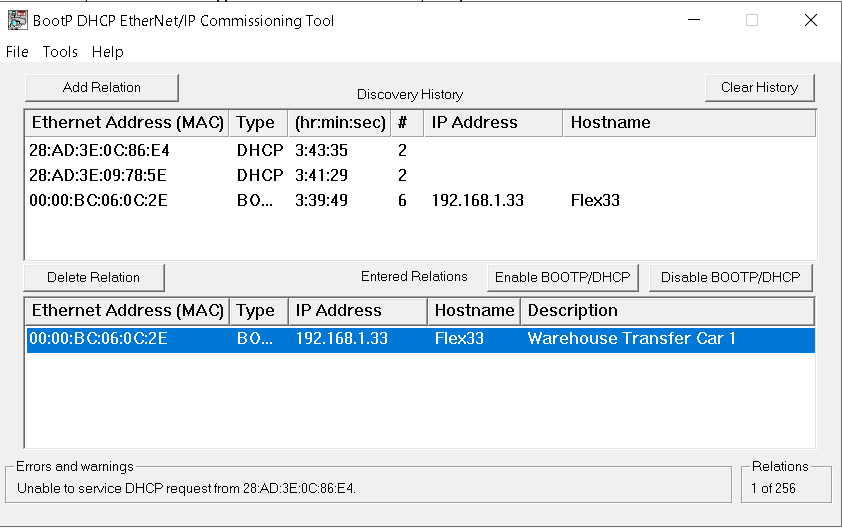
Once we have the BootP tool open, add “New Relation”. Be sure to enter the MAC ID, and the IP address that you want to assign to this module.
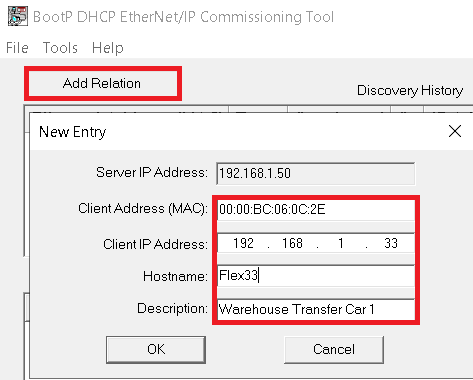
Emphatically, BE SURE that you entered the correct MAC ID. Assigning the IP address to the wrong device could have disastrous results!
Press OK.
If your module is already at defaults, the IP address should be assigned now. Skip the next paragraph of this document.
If you are re-assigning an IP address to an existing module, we’ll reset the module back to factory defaults. Right click the MAC ID you just entered into the relation list. Reset the module’s network settings back to factory defaults.
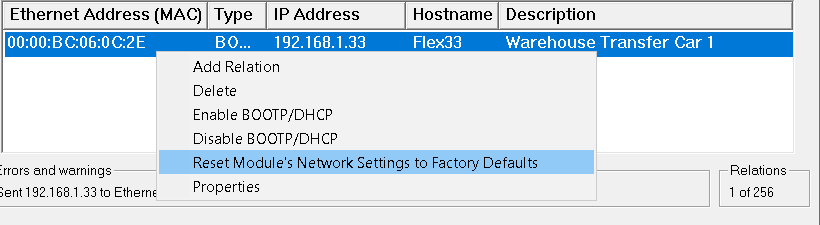
Now that the module is reset, and has requested an IP address, it should be assigned now.
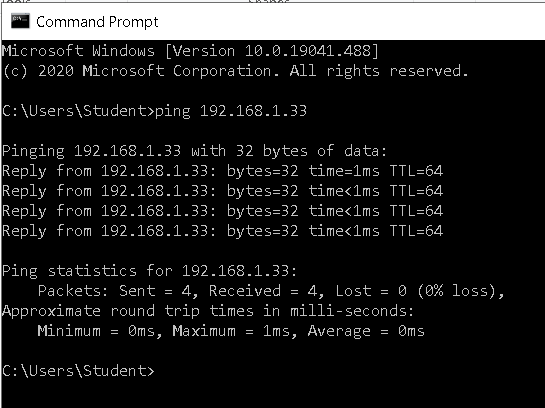
From the command prompt, you might want to ping the module to verify communication on the network.
Disable BootP after Assigning an IP Address to the 1794-AENT
At this point, you are ready to disable BootP in the module. In short, if you do not do this, the module will loose it’s IP address on the next power cycle.
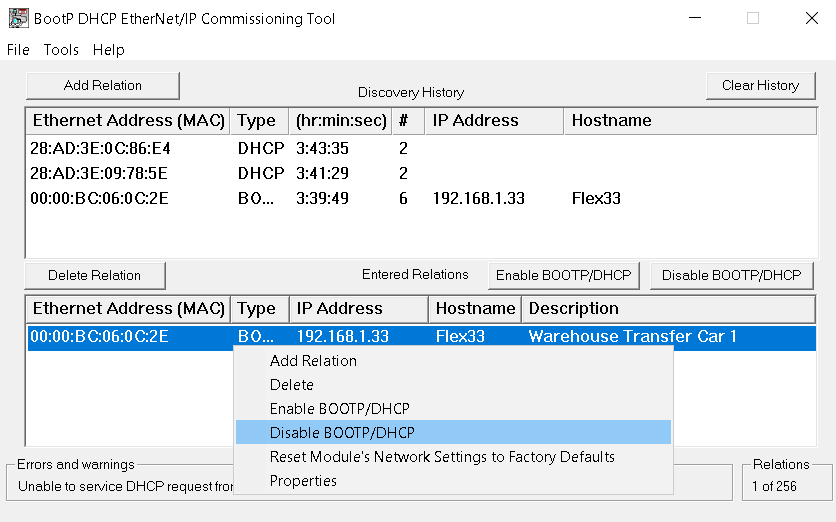
Right click the MAC ID in the relation list, and “Disable BootP/DHCP”.
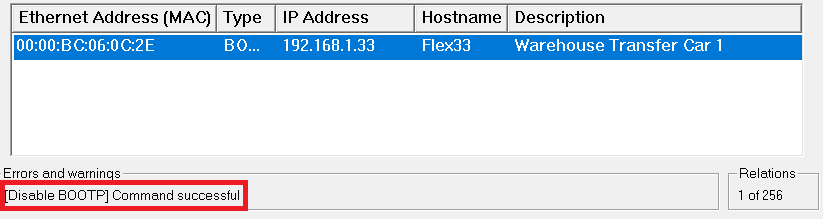
Of course, be sure the command was successful. If not, just try it again.
Summary for Assigning an IP Address to the 1794-AENT
In short, to assign an IP address to the 1794-AENT, just run the BootP utility. Connect the AENT to your Ethernet Switch. You will see the MAC ID of the AENT Module. Double click the MAC ID, and assign an IP address. After that, right click the MAC ID in your relation list to disable BootP.
Keep in mind you can use this utility to assign an IP address to many other devices as well. Once the IP is assigned to non-Rockwell devices, though, you might have to use a different method to make the IP static. Even with some Rockwell products, you may need to use a different method to make the IP static. Once the IP address is assigned, though, you can communicate to the device on your network. I even use this utility to assign an IP address to the WIFI modem in my AltairDuino!
For more information, visit the ControlLogix Category Page!
— Ricky Bryce