
Introduction to FactoryTalk View ME Navigation
You’ve seen pictures of the old control centers with many panels that contained various gauges, push buttons, and other indicators. In modern times, most of those devices can simply be placed on display screens. The operator needs to be able to quickly locate the control that he is looking for. To accomplish this, you will usually organize your projects into different display screens. In this document, we will discuss FactoryTalk View ME Navigation. If you are interested in how navigation works on FactoryTalk View SE, Look at the FactoryTalk View SE Navigation document.
Once we add other display screens to the project, you will need to add navigation buttons. This allows the operator to move between different screens in your project. Once the operator gets to a display screen, don’t forget to allow the operator to navigate back to the main screen.
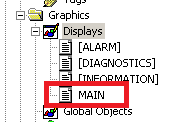
If you expand “Graphics” in the Explorer tree, and you will see that we have a main screen. By default, this is the screen that will come up first when the project is first started. You can change this screen under “Startup” in the explorer tree.
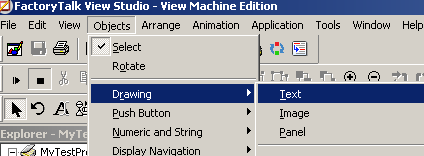
Next, let’s right-click “Displays” to add a new display screen. We’ll add a text object to this screen called “Pump Control”. To access the Text object, click on Objects | Drawing | Text.
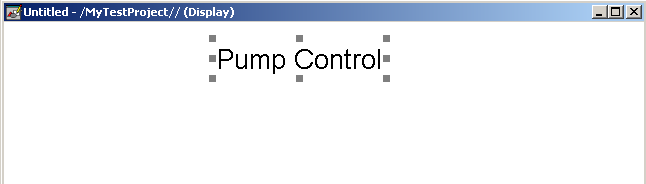
We will add the text to the top of your new display screen as shown. You can change the size, color, fonts, etc… on the same screen that you are typing the text. If you wish to change this later, you can access the properties screen by double clicking the object. Another way to access the properties screen is to right click the object and choose “Properties”.
Add Navigation Buttons
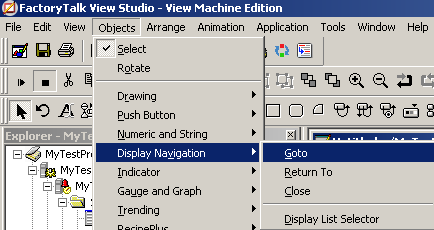
When the operator is on this screen, we need to have a way for the operator to navigate to the main screen. Choose Objects | Display Navigation | Goto. Draw the “Goto” object on your display screen.
On the “General Tab”, click the elipsis next to the Display text box. Configure this object as shown so when the operator presses the button, he will be taken to the main screen.
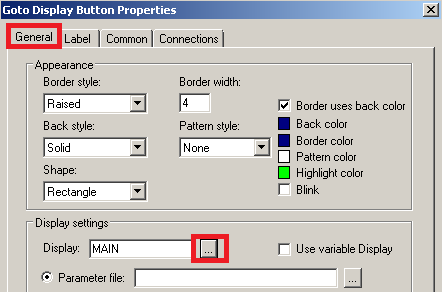
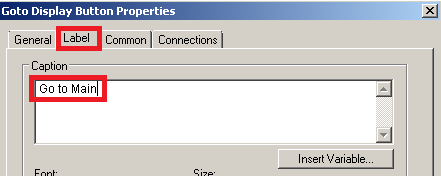
Even though we told the object to go to the main screen once the button is pressed, we have not told the operator the purpose of the button. We will do this under the “Label” tab.
Your object should appear as shown:
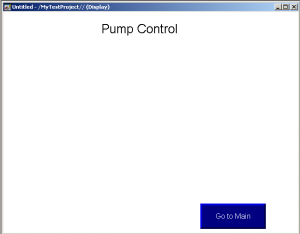
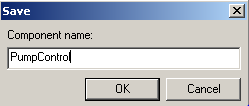
Now, we will close the display with the X in the upper right hand corner, and save the screen as “Pump Control”
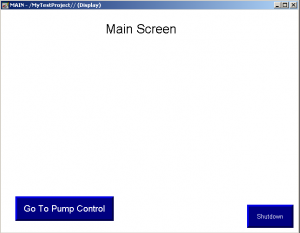
We have now saved the Pump Control Screen. Follow the same procedure to add a goto button to the Main screen. Set the display to “Pump Control” (on the general tab). The label for the operator will read “Go to Pump Control”. Don’t forget to add text to the top of the main screen as shown. This tells the operator which screen he is currently on.
Test your project
To test your navigation, press the “Test Application” button in the standard toolbar.

Another way to add the navigation buttons is to copy them from one screen and past them on another, making basic changes to the properties of the object. This helps to maintain a consistent size across all of your screens.
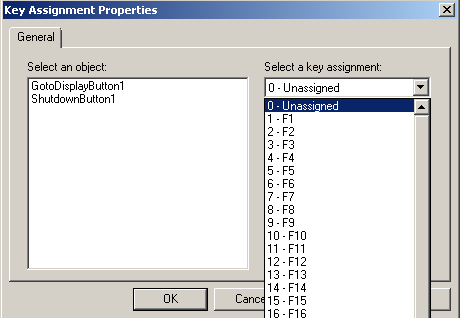
If you have a Panelview Terminal without a touch screen (keypad only), you will want to relate the objects to function keys. If you need to establish this relationship, please include the function key in your object label for the operator. This tells the operator which function key to press to navigate between screens. To relate the objects to function keys, right click any blank area on the display, and choose “Key Assignments.
Next, learn how to set up a FactoryTalk View Push Button object!
— Ricky Bryce
Pingback: Creating a FactoryTalk View project, and setting up communications.
Pingback: Configuring FactoryTalk Security, and adding the Login and Logout buttons