
Introduction to SLC-500 Advanced Diagnostics
The SLC-500 Advanced Diagnostics feature allows you to quickly locate an output in your SLC-500 Project. This is most effective if the project is organized, and documented well. Instead of randomly searching through logic to find your output, you will be able to find them in an orderly manner. Basically, Advanced Diagnostics asks 3 questions to narrow your search. This feature will ask in what routine your logic is located, what section of that routine, and lastly, what output in that section you wish to navigate to.
A Practical Example
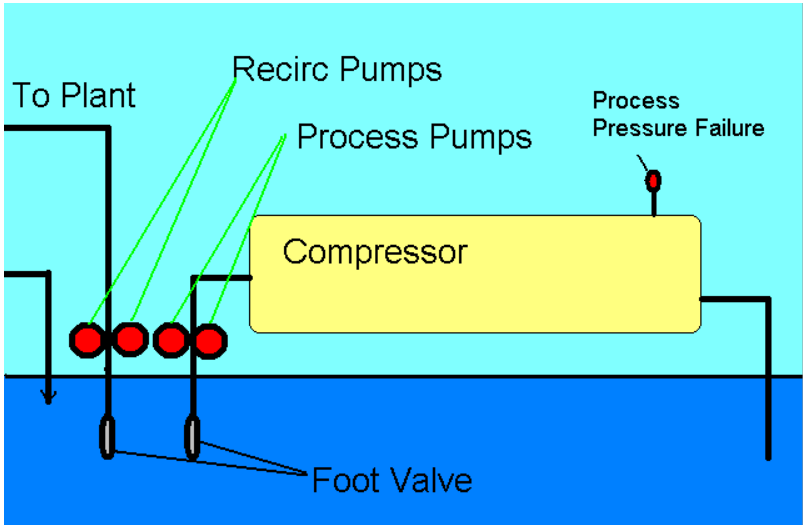
In this example, we are going to search for a way to clear a process pressure failure alarm. This is a chill water system. We’ll use advanced diagnostics to find the output. Once we find the output, we can look at the conditions on that rung. This will tell us the reason that our failure bit will not clear. We’ll assume that we’ve already fixed the problem causing the low pressure, and now we are just read to clear the alarm.
Starting Advanced Diagnostics
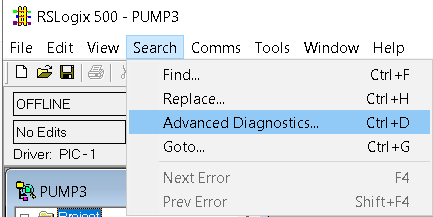
From the menu bar in RSLogix 500, click on Search | Advanced Diagnostics.
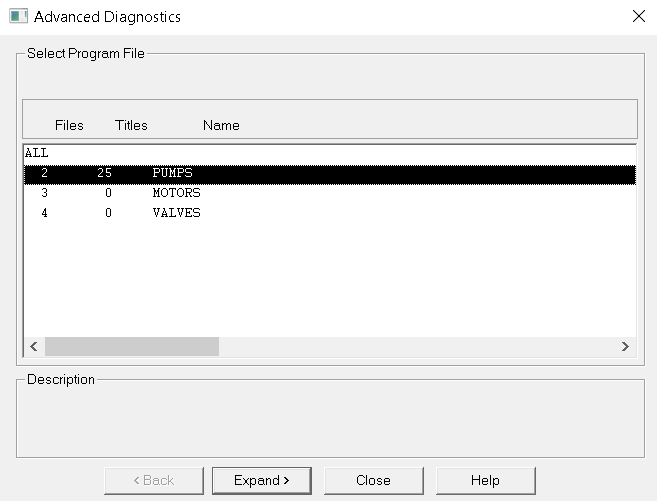
At this time, RSLogix 500 will ask what routine we wish to find the output in. Since this is a failure alarm on the process pump, we’ll double-click the “pumps” routine.
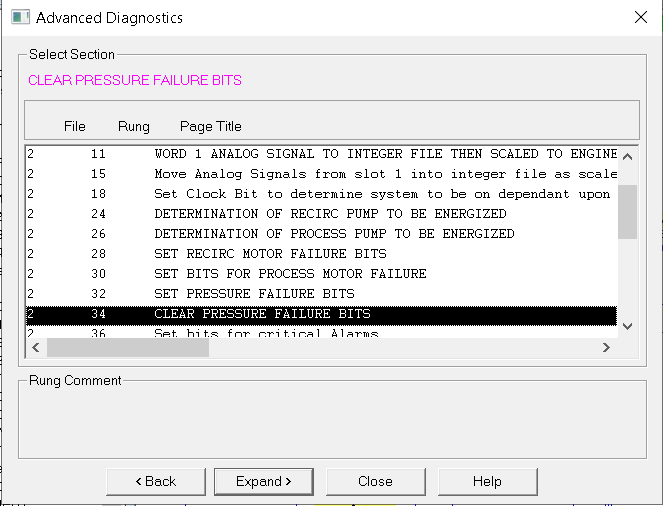
Next, we see that page titles that are in this routine. In RSLogix 500, the programmer adds Page Titles to mark sections of logic. In this case, we need to “Clear Pressure Failure Bits”.
At last, we will choose the output type instruction that we are looking for. In this example, we have a OTU (Output to Unlatch) instruction that will shut off the process pressure failure bits.
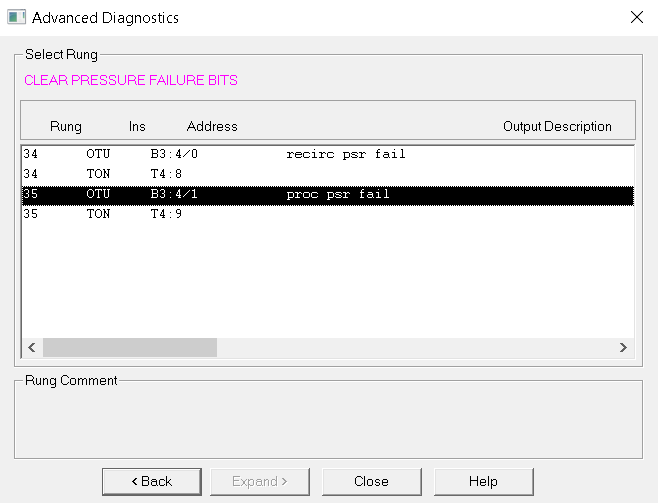
Advanced diagnostics takes us to the output in logic.
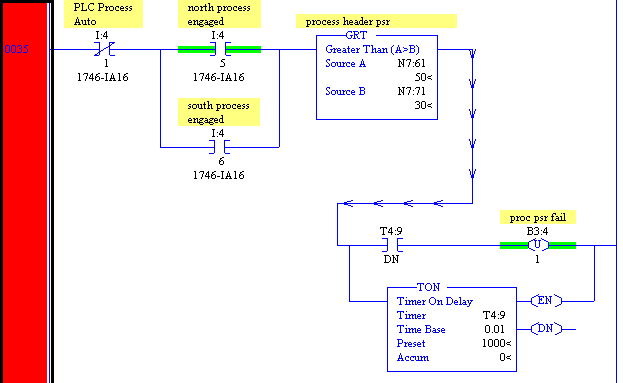
At any rate, by looking at this rung we can see what we need to do to unlatch the process pressure failure bit. First, we have to NOT be in auto. In other words, we will go to manual mode. Next, one of the pumps must be engaged, and we will need to have at least 51 lbs of pressure. Finally, just wait for 10 seconds. Remember for timers in the SLC, you must take the preset times the time base, and that is the number of seconds for the delay.
If you ever need to navigate away from this rung, and need to come back… Write down the ladder number, and rung number that we are in. After that, you can just click Search | Goto, and enter the ladder and rung, and immediately return to this position. When using the goto utility, your search is in ladder:rung format. In other words, if you want to go to ladder 10, rung 2, you would enter “10:2” in the Search | Goto box.
Integrating Advanced Diagnostics into the project tree.
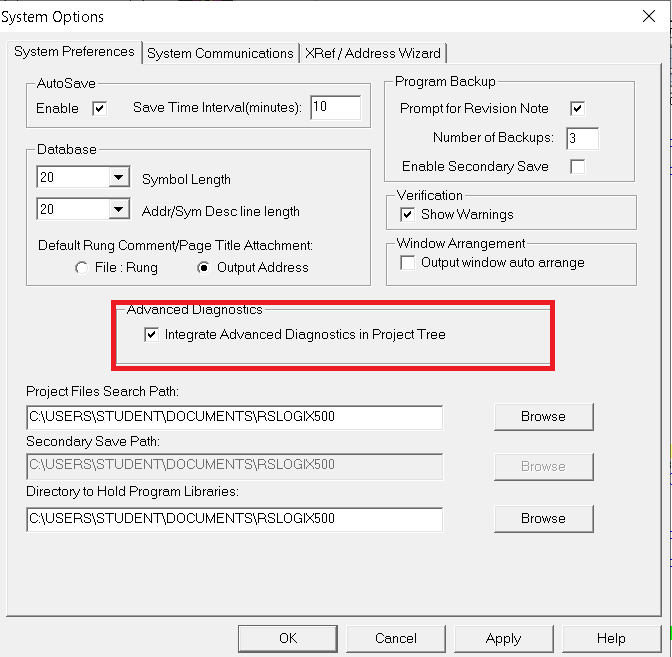
To make your job even easier, you can integrate advanced diagnostics into the project tree. To do this click on Tools | Options in the menu bar. Check “Integrate Advanced Diagnostics into the Project Tree.
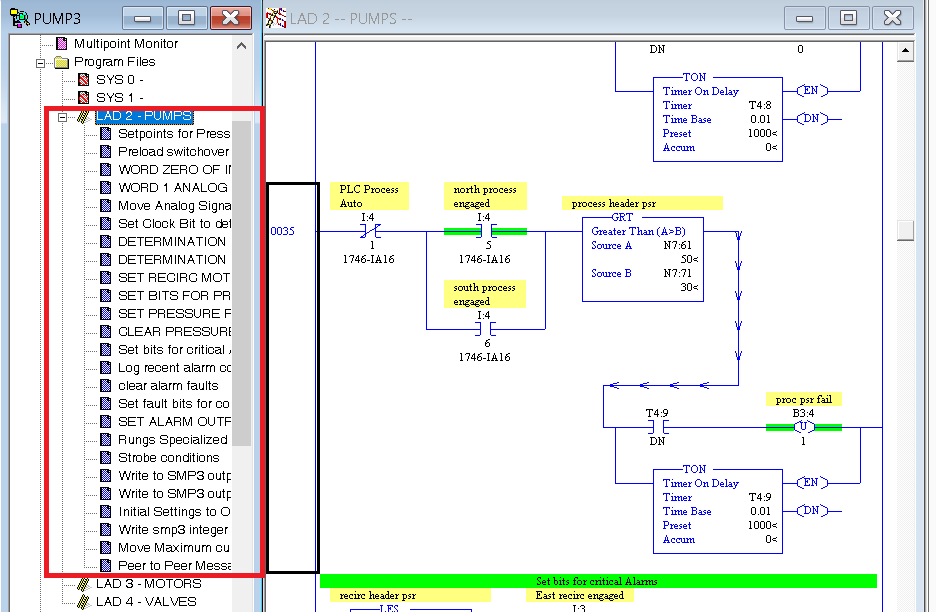
Now, you can navigate through the page titles in the project tree.
For more information, visit the SLC-500 Category Page.
— Ricky Bryce