
Introduction to PlantPAx 4 Permissives
In general, a permissive is a condition which must be met before something else happens, such as turning on an output. An example of a permissive would be a pump that can only start if there is no pressure on a line. In this case, pressure=0 would be the permissive condition. The permissive condition can go false once the output is energized.
Permissives in Logic
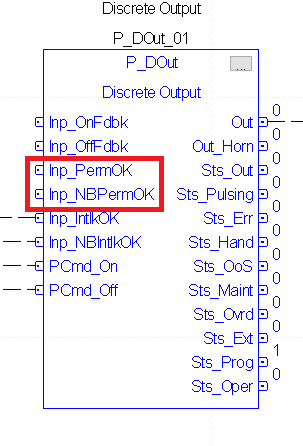
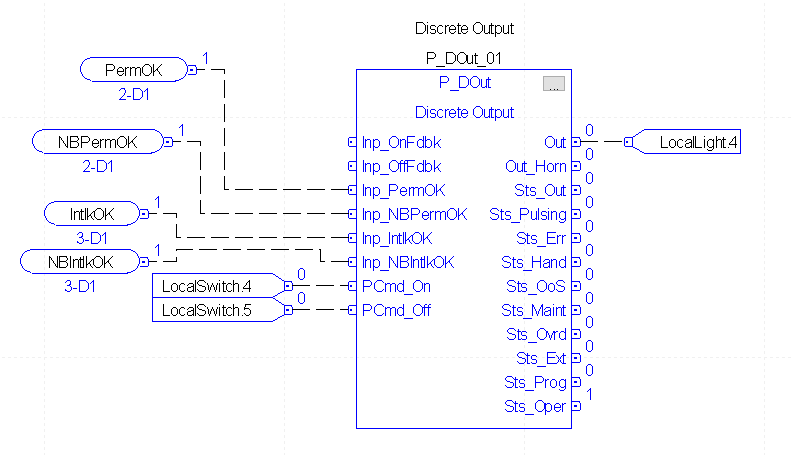
As an illustration, look at our Digital output instruction (P_DOut). This is one of the instructions that we have the ability to add a permissive conditions.
To begin, lets import the P_Perm add-on instruction. To do this, right-click “Add-On Instructions” and “Import Add-On Instruction”.
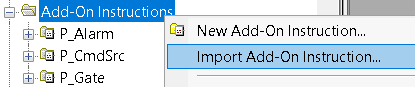
Select the P_Perm instruction, and choose to Import. Afterwards, we’ll leave the settings at default.
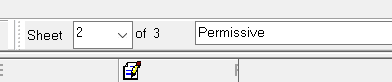
For the purpose of organization, add a new sheet to the same routine your P_DOut instruction is in. Title this sheet “Permissive”.
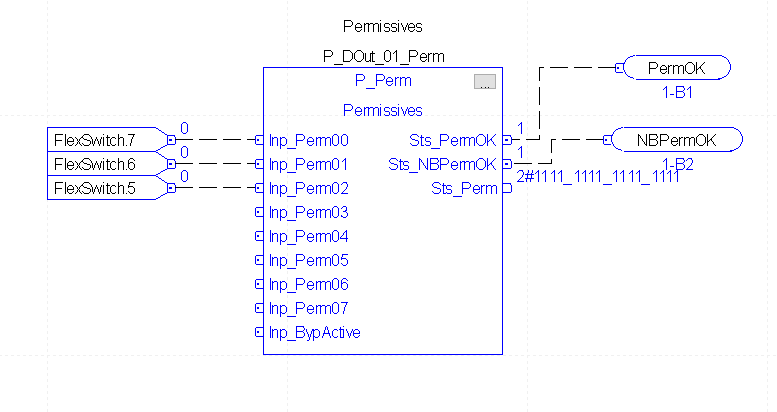
At this point, add the P_Perm instruction to your sheet as shown. We’ll add three permissive conditions. In this example, you will need 3 Input references, and two Output connectors as well. The routine will not verify until we add input connectors to the P_DOut instruction. Above all, go to the properties of the tag. Name the tag exactly the same as the tag that you tied to, with the addition of “_Perm” after the tag name. By using this convention, PlantPAx will be able to find the permissive instruction.
Now let’s go to the P_DOut instruction to add the Input connectors.
Download your work, and go to run mode.
Add the P_Perm faceplates
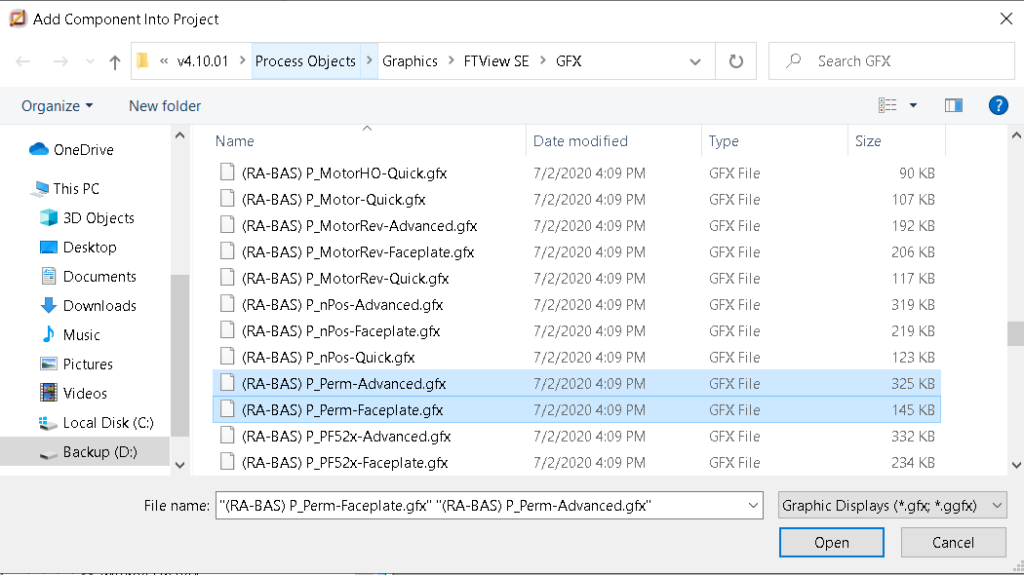
At this point, we are ready to import the faceplates. Right-click “Displays” under “Graphics”, and “Import component into application”. At the present time, we only need to import P_Perm-Advanced, and P_Perm-Faceplate.
Now, Launch your SE client, and log into your application.

Using the Faceplates
With one of the permissive conditions shut off, double click the output object on your display. Notice that at a glance there are 4 locations that indicate our permissives are not OK.

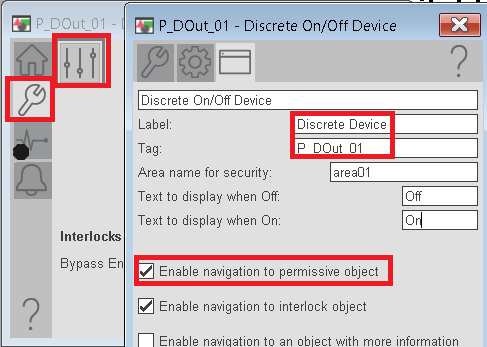
In order to more easily troubleshoot the permissives, we need to enable navigation to the permissive faceplate. Go to Maintenance, Display Advanced Properties, then to HMI Configuration. As can be seen, from here, you will document the label and the tag for the P_Dout instruction. You will also enable navigation to the PlantPAx 4.1 permissives object.
At this point, open the Permissive faceplate. Under Maintenance, Advanced Properties, label your interlock conditions, the OK state, and if we are allowed to bypass them.
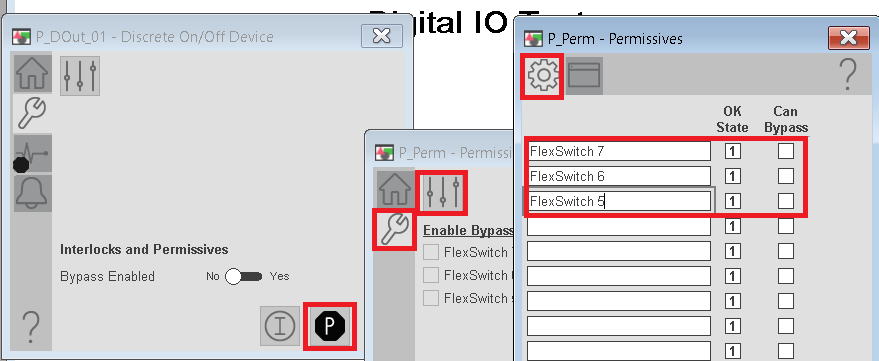
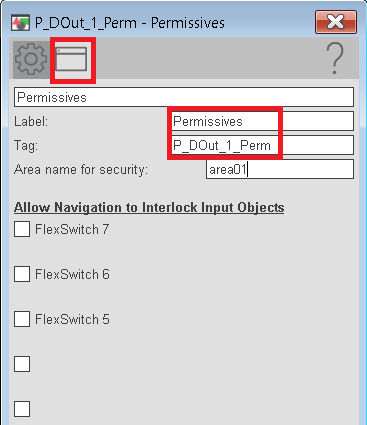
Finally, under HMI configuration, adjust the label and the tag for the P_Perm object.
You are ready to test your work! Shut off the output, and one of the permissive conditions. At last, open the HMI faceplate to troubleshoot the Permissive condition that is preventing your output from energizing.
For more information, visit the PlantPAx Category page.
— Ricky Bryce
Pingback: PlantPAx 4 Motor Operated Valve (P_ValveMO) - Bryce Automation
Pingback: PlantPAx 4 Motors (P_Motor) - Bryce Automation