
Introduction to FactoryTalk View Sliders
FactoryTalk View Sliders allow an operator to input data. This is a graphical way for the operator to easily see the limits of a tag. Operators will simply slide a “knob” to select a value. Not only does this limit the operator to a certain range, but also allows them to visually see where their setting lies within that range. From the library, you can select a vertical or horizontal slider. In this case, we’ll just set up a simple horizontal slider. This slider allows the operator to select a numeric range from 0 to 100.
For example, we’ll use FactoryTalk View ME. The procedure to add a slider is very similar in FactoryTalk View SE. I’ll assume that you have already created a project. You also need to have communication set up in your project to communicate to the processor. This allows you to write to a tag in the ControlLogix.
Create Your Tag
Before we begin, let’s create a tag. We will do this in Studio 5000. I’ll simply go into Controller Tags, and create a tag called “OvenTemp”. This will have the DINT data type.
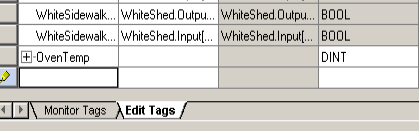
It’s important to realize this tag should reside in the processor. Not just in the offline image. That way, we can browse for the tag easily from FactoryTalk View.
Get the Slider Object
At this time, we’ll go into the Libraries of FactoryTalk view. The library contains many different images that we can use in our project. We can also animate these images. Most of the images in the library have many objects within a group. We simply select the object within the group that we wish to animate. It’s important that the objects most commonly used will usually have an example tag.
At any rate, let’s open “Sliders” in the FactoryTalk View Library.
Configure the Animation
Find the correct object in the group to animate
This is the hard part. Like I said before these objects are grouped. The group has many objects. We only want to animate the handle of this slider. One way to do this is with the Objects Explorer. You can just turn off parts of the group until you see the handle disappear. At this point, you know the name of the object to animate.
In order to get to the object explorer, simply click “View” in the Menu Bar. Next, choose “Object Explorer”.
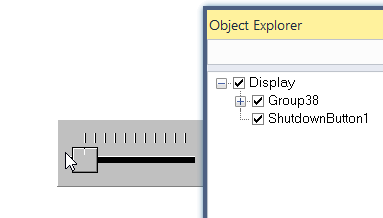
At this point, select your slider. Left click the slider to select it. After that, the group ID of the object will highlight in the object explorer.
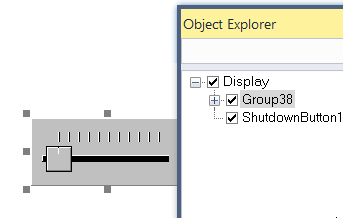
Now that we know which group the object is in, we’ll expand the group. To do this, click the + next to the group. In this case, it’s Group 38, but yours will be different.
Now we’ll deselect each group, one at a time, until the handle disappears.
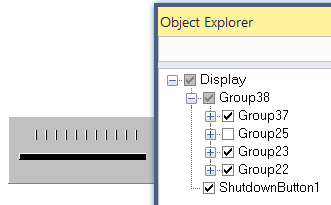
As you can see, our handle is in Group 25. Again, yours will probably be different. Let’s select the group again to make it visible. Next, right-click group 25, and go to Animation | Horizontal Slider.
Configure the Tag
You will notice there is already a sample tag in the horizontal slider. This is good news. Rockwell usually adds a sample tag to the most commonly animated object. We need to delete this sample tag though. After you delete the sample tag, click the “Tags” Button. You will see the tag browser. Refresh all folders, then find your online folder. After that, highlight your online folder, and select the tag you wish to write to.
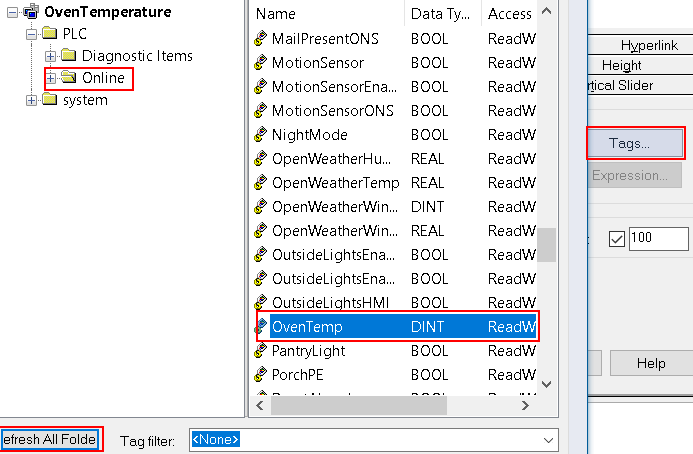
Press OK.
At last, we are ready to configure the dynamics of the animation. By default, the slider is 100 pixels in length from left to right. Fortunately, this is default for the pixel offset.
Next we need to configure the value of the scale. When the slider’s handle is to the left, we want to write 0 to the OvenTemp tag. Likewise, when the slider is to the right, we want to write 212.
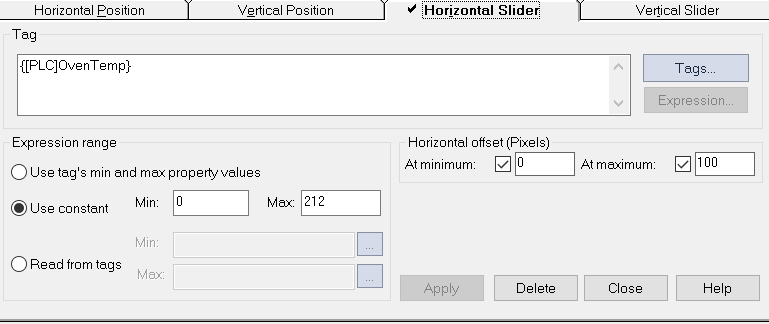
Press Apply, and Close.
Test your Display
We are ready to test your display. To test the display, click the “>” button in the standard toolbar. You could also do a full test run of your project. To run the application, click the icon of the running man in the standard toolbar.
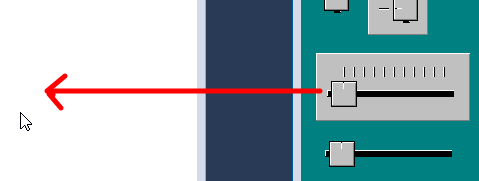
Slide the handle to the left, and you should see the tag change in the processor.
It’s also a good idea to add a numeric display next to the horizontal slider. That way the operator can see the exact value of the tag.
Check out this post to add a numeric display object.
Summary
To summarize, we simply grab the Horizontal Slider object from the Library. After that we animate the knob. Simply point it to a tag in the processor, and specify the range of values you wish to write.
— Ricky Bryce