
Introduction to RS232 to DH+ Passthru on the SLC 5/04
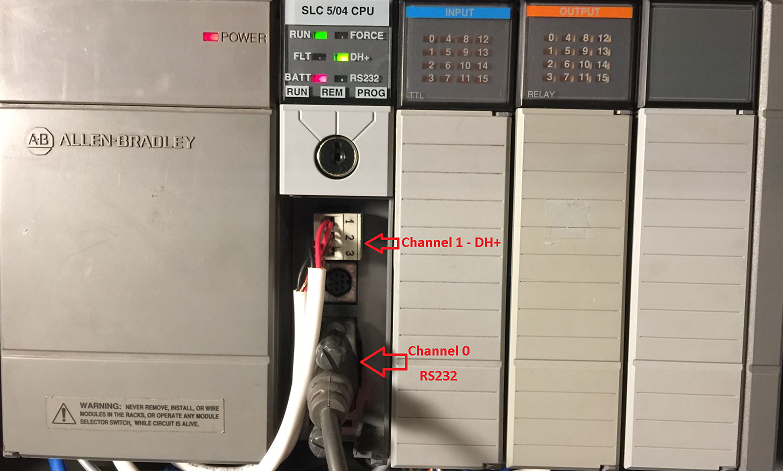
With RS232 to DH+ Passthru, we will connect through the serial port on a processor, and access the DH+ network. With this in mind, another option would be the 1784-U2DHP. However this device might cost around $2,000 to purchase. In this case, we will simply use an existing processor to access the DH+ Network through a Serial cable. The disadvantage of course is about half the speed of a typical DH+ network. For example, this processor is connected to a DH+ network, and we have a NULL modem cable connected to Channel 0. Note: The recommended (proper) cable to use on DH+ is Belden 9463. Remember this is just for example only. Your application and safety considerations may be different, so always take all precautions.
Configure Channel 0
Under “Channel Configuration”, on the General tab, be sure channel 0 is in “System” mode.
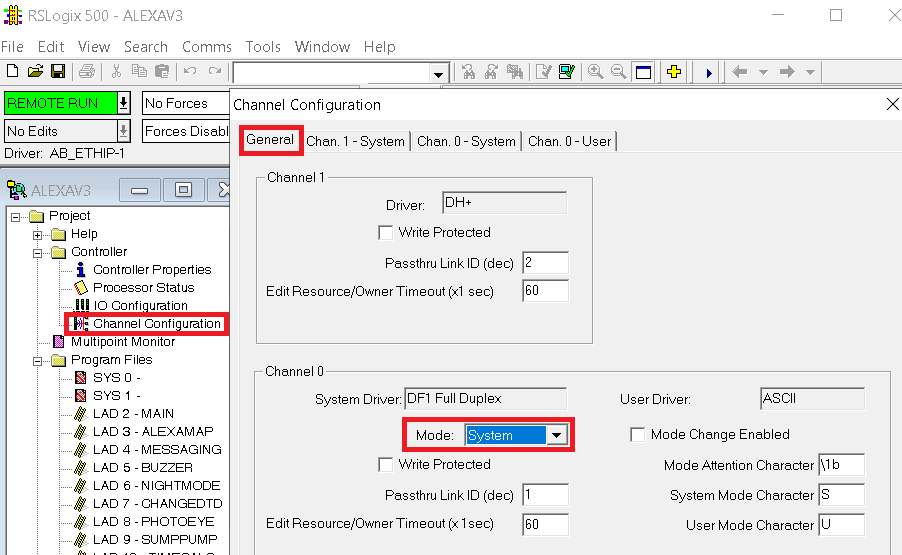
On the “Channel 0 System” tab make note of the system settings. We will need those later. Obviously, the main parameters are 19,200 baud rate, no parity, and one stop bit. Also remember our error detection mode is CRC. It’s important to realize that when you hit “Apply” and “OK”, the processor must go to program mode to accept the changes. Obviously, you will want to wait until your system is down to do this.

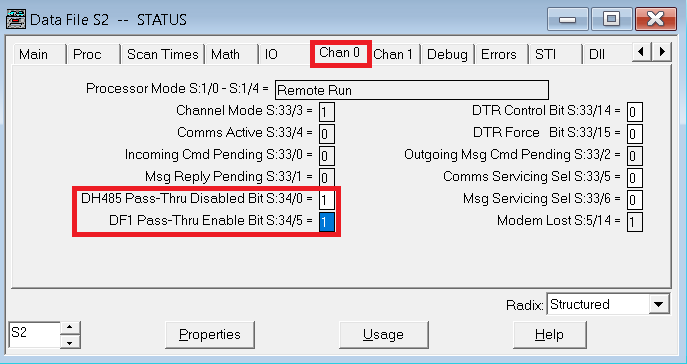
Our next step is to configure the passthru. On the Processor Status file (S2 Data file), Disable DH485 Passthru, and enable RS232 passthru. Be sure to hit enter.
Configure the RSLinx Driver
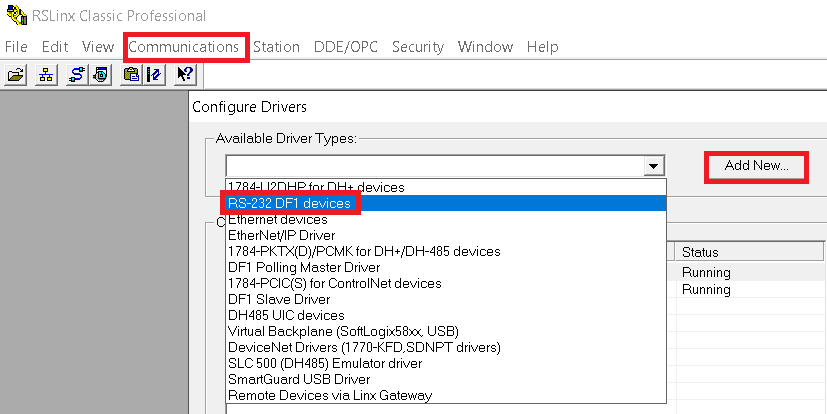
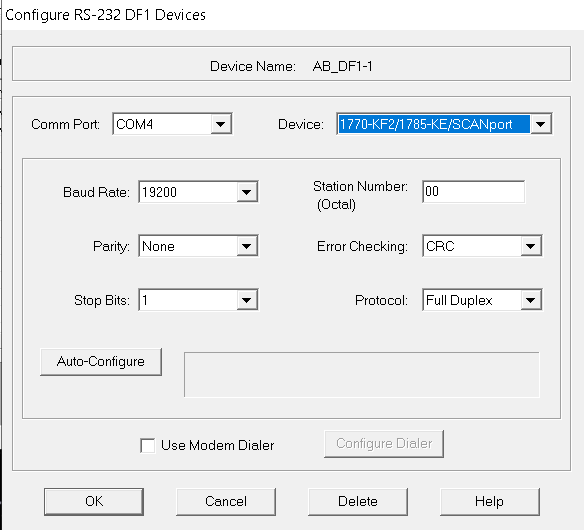
In RSLinx, go to Communication | Configure Drivers. Choose the RS232 DF1 Device driver, then “Add New”.
At this point, you will need to know the COM line that your serial cable is on. In this case, I went to “Device Manager” under Windows, and found that my USB to Serial adapter is on COM 4.
In this case, I chose the 1770-KF2 driver. This is the device the 5/04 is emulating. Enter all other settings as we saw them on channel 0 – system’s configuration. Note: Autoconfiguration will not work, so be absolutely sure your settings are correct, then press OK. If your settings are not correct, that will cause a lot of problems when you try to browse the network later on.
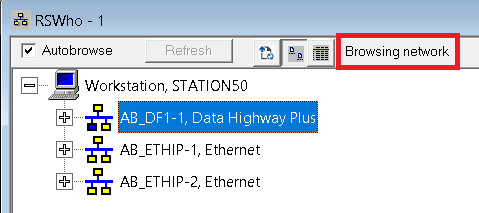
Hit OK, then go to the RSWho Screen. (Comms | RSWho). Open your DF1 Driver.
In my case, I was stuck on “Browsing Network”.
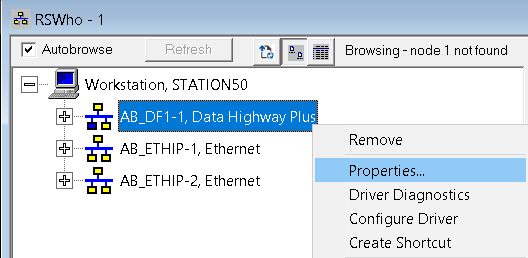
Then, I went to the properties of the driver in RSWHo.
Then I configured the properties to browse node 0 to 63.
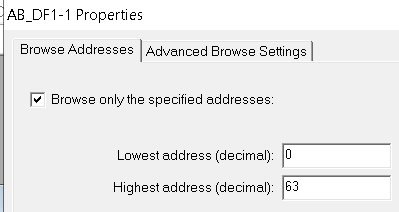
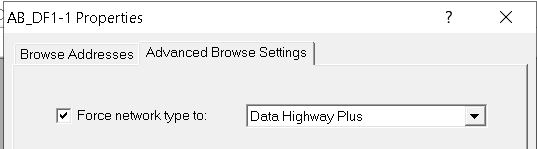
Under “Advanced Browse Settings, I forced the network type to DH+, then be sure to hit “Apply”, then “OK”.
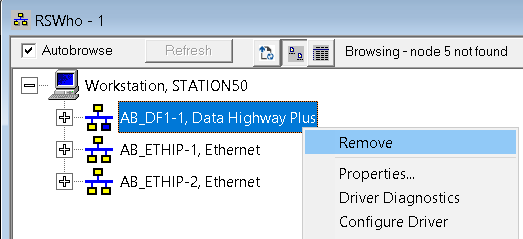
Next, I removed the DF1 Driver from RSWho (and only from the RSWho screen, not the driver configuration).
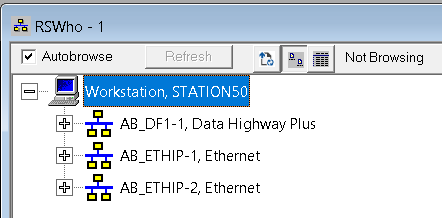
Finally, I clicked on the Workstation, to let RSWho re-discover the driver.
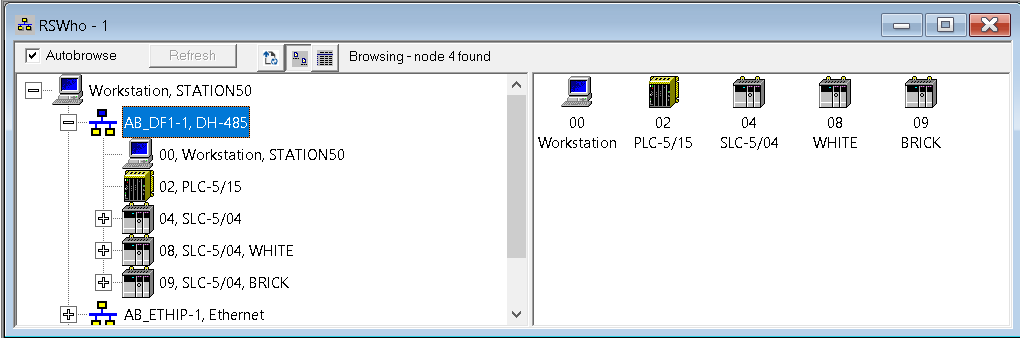
At last, I opened the driver, and all of the nodes appeared.
For more information on the SLC, visit the Category page.
— Ricky Bryce