
Introduction to the SLC 500 Power Supply
The SLC 500 Power supply supplies power to the local chassis. The power supply typically does not power inputs or outputs. This is a switching power supply, so it will provide quite a bit of current for the size compared to the linear power supplies.
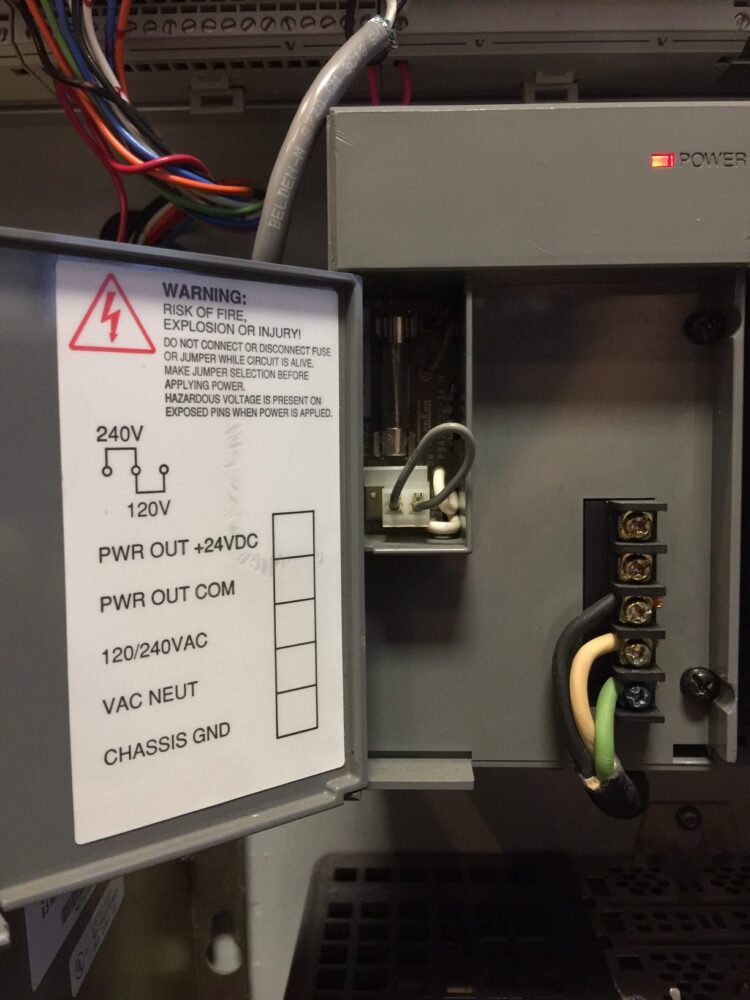
This is an image of the 1746-P2 Power supply. You need to size the power supply according to how much load is on the chassis. RSLogix 500 software has a tool built in to the I/O Configuration to compare the loading of different power supplies based on the modules that are in the chassis.
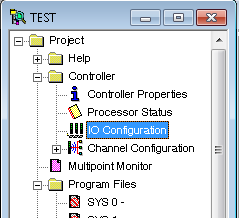
To access this tool, go to I/O Configuration in the project tree.
Next, be sure all the I/O is configured correctly for the chassis. This ensures the load is being calculated properly. Then click the Power Supply button.
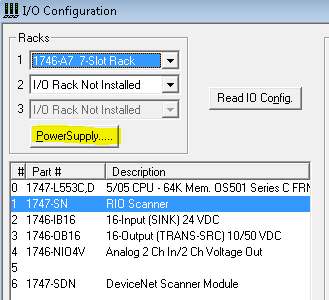
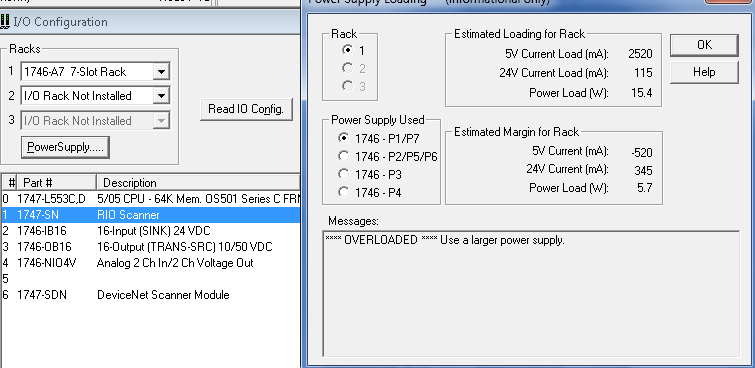
Here, we can see that a 1746-P1 Power supply, will be overloaded. Remember that RSLogix cannot electronically determine what power supply you are using. You must manually select the power supply that you have.
Let’s try a P2 Power supply based on this configuration (since that is what we have).
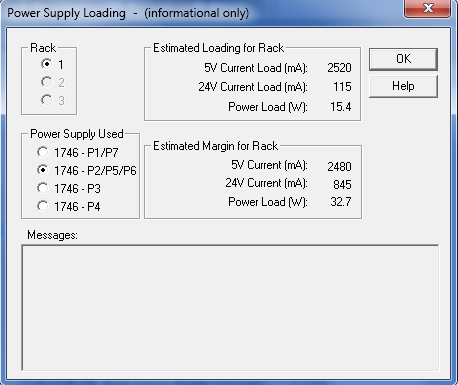
If we had a 1746-P2 Power supply, this would be large enough to power the modules in our chassis, and we can see that we have a margin of 2480 mA on the 5v supply, and 845 mA left on the 24v supply for additional modules.
The SLC-500 can have up to 3 chassis for local and extended local I/O, and each additional chassis must have it’s own power supply. You can check the power supply for each chassis using this tool.
Troubleshooting the Power Supply
If we overload the power supply, it will shut down. If this happens you will measure a supply voltage coming into the power supply, but the power indicator will be off. You can reset the power supply by powering down the chassis for one minute. If you have a shorted module, however, the power supply could shut down again. To check for a shorted module, remove all of the modules, and if the power supply powers up, you can re-insert the modules one at a time. Be sure to power down before removing or inserting a module.
If you blow a fuse on the power supply, this usually indicates the power supply is defective, and needs repairs.
Replacing the Power Supply
To replace the power supply, be sure to power down your system. Remove the supply cables coming into the power supply. On the right side of the power supply (with the door open) there are 2 screws that you can loosen. The power supply will then come off the chassis. Be sure to check the voltage jumper when you replace the power supply. This must be set for 120v or 240v. Tighten the screws that hold the power supply in the chassis. Finally hook up the supply leads, and then re-power the chassis.
— Ricky Bryce