
Introduction to Serial Server over Ethernet
There are many applications in which you need a Serial Server over Ethernet solution. You might have a serial device out on the plant floor, that you need to access remotely. One solution to this problem is a Serial over Ethernet server.
Basically, you will place the serial server near the serial field device. Remember that your typical limitation will be 50 feet. Next, simply connect the serial server to your plant network over Ethernet. Finally, when you install the software on your PC, you will simply create a virtual serial port on your PC that extends to the serial device on the plant floor.
Examples of field devices that use serial are Panelviews, ControlLogix processors (L1 to L6x), and the enhanced PLC-5 processors.
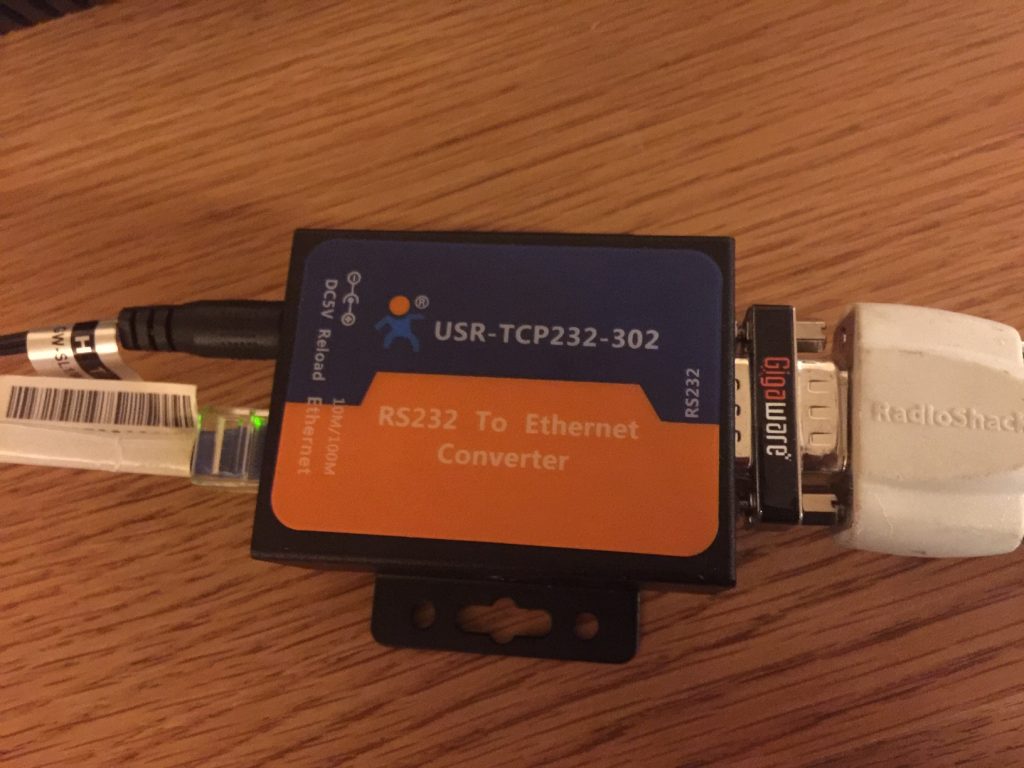
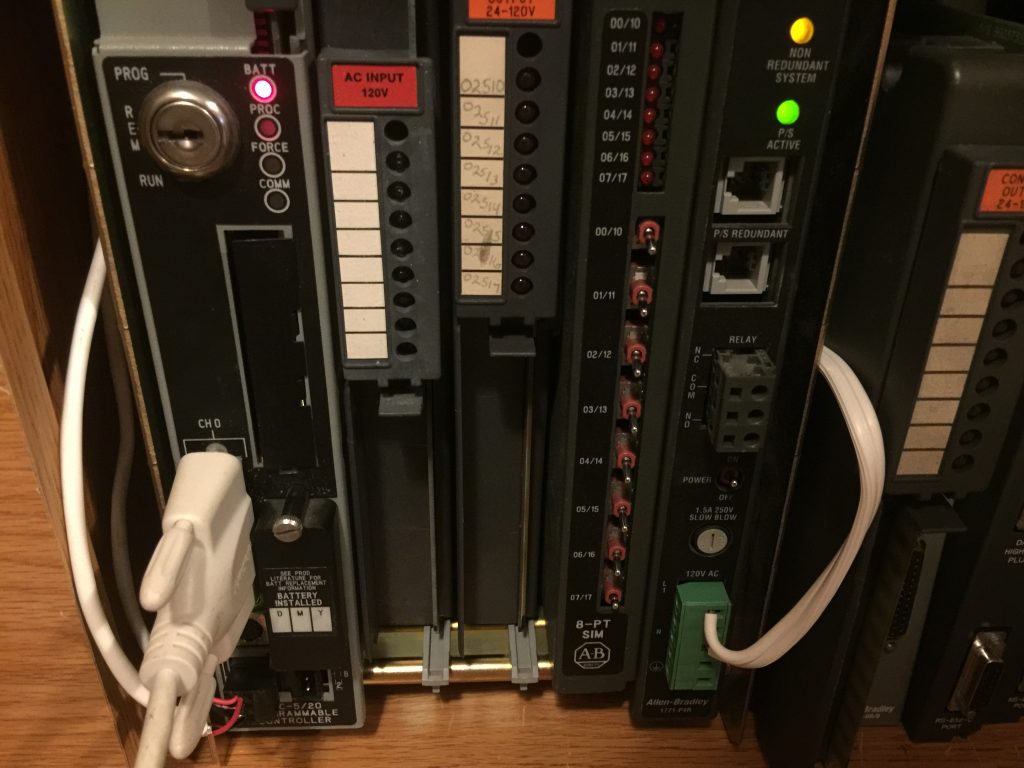
The server that I chose for this particular post is the USR-TCP232-302. This device shipped with a “wall wart” power supply, and cost around $23. I connected the Ethernet port to my home router. At this point, I connected the serial port to an enhanced PLC-5 processor (Channel 0). As can be seen, I needed to use a gender changer to connect my serial cable. It’s important to realize that I used a straight serial cable for the connection to the PLC-5… (NOT a null-modem cable).
Set up the Serial Server
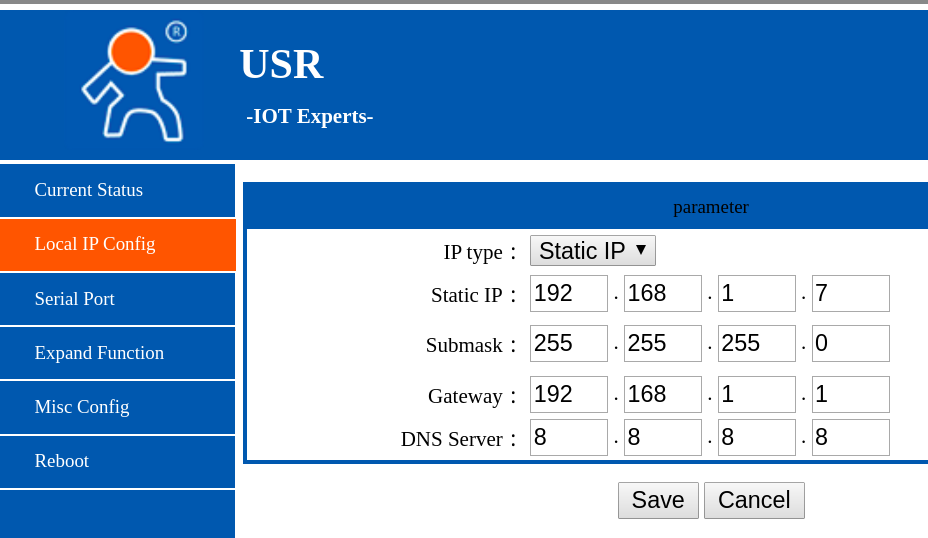
The server’s default IP address was 192.168.0.7. Be sure your PC is in the correct subnet to access it’s web page. Unless you already have a good understanding of Ethernet, read this post on addressing.
To access the web page of the USR-TCP232-302, enter it’s IP address into the web browser. The default username is “admin” and password is “admin”. Be sure to change this for security reasons!
At last, change the IP address of your USR-TCP232-302, so it is in your regular subnet. Don’t forget to change the IP address of your computer back to the subnet that you usually run on.
Reboot the device when asked.
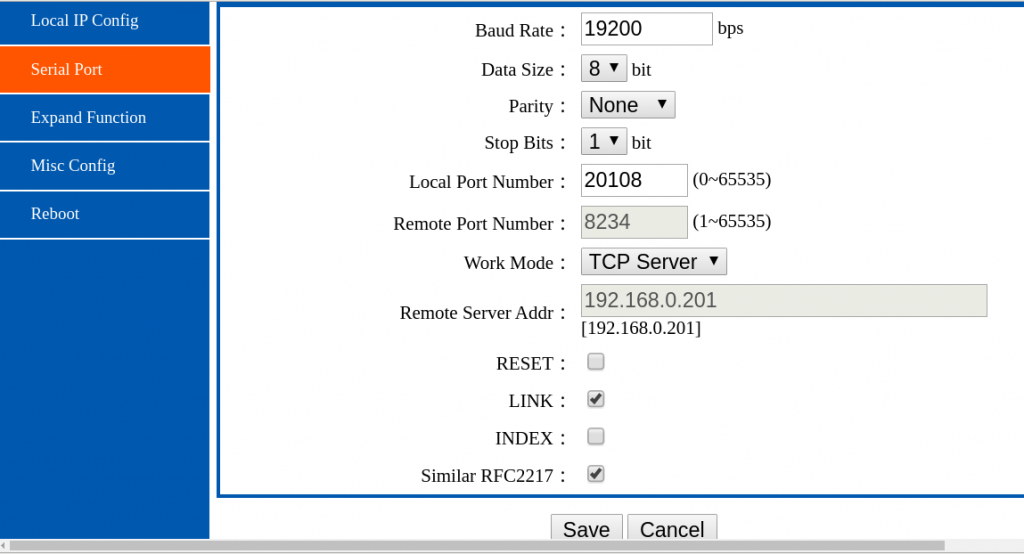
Another key point is that we need to check the configuration of the serial port. In this case, I set the baud rate (communication speed) to the same baud rate of the processor. I set the local port to 20108, because this is the port that the client software defaults to.
Install the software
You can download the software for this device from USR IOT’s web page. The setup is very straight-forward. After the software is started, just click the first icon, “Add Com”.
I configured my port as follows:
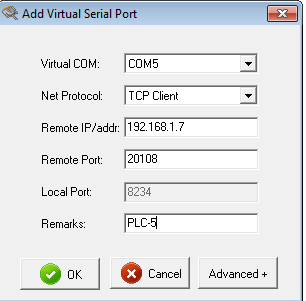
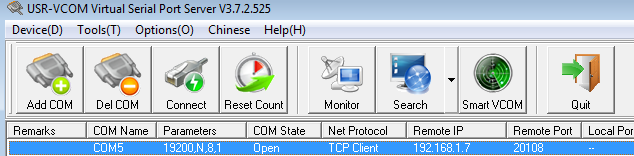
Above all, be sure the IP and Port are the same as what you set when configuring the USR-TCP232-302 on it’s web page. Click OK, and you will see the virtual COM port. Highlight this port, and click the “Connect” Button.
Configuring RSLinx Communication Server
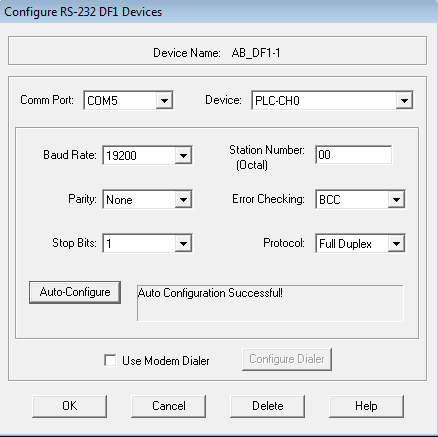
Now that the serial port is running, we’ll configure RSLinx to communicate to the processor through the serial server. In RSLinx, we’ll go to Communication | Configure Drivers, and add the driver “RS232 DF1 Devices”.

Select the COM port that you created. In this case, I will select COM 5. Then click “Autoconfigure”. You should get the message “Auto Configuration Successful”.
If the Auto Configuration failed, don’t panic. Go back to the USR-VCOM software, and be sure you clicked “Connect” after highlighting your virtual COM port, and try to AutoConfigure again. You can also enter the correct settings without an AutoConfigure, and try the driver anyway. It took a little patience for me, but once the driver was running, it seemed to be very stable.
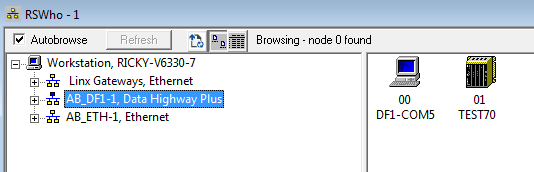
Finally, I’ll go to the RSWho screen, and you can see that I am communicating with the PLC-5/20 processor.
— Ricky Bryce