
Introduction to ControlLogix Message Speed
In this post, I’ll perform an experiment to test the ControlLogix Message speed. I’ve set up two processors as shown below. Basically, I’ll create a time stamp when I initiate a message instruction. Another FlexLogix processor will receive this message, and immediate send a message back. When we get the message back, we’ll mark another time stamp. By comparing these two timestamps, we’ll know how long it took a message to get across the network, and to receive data back.
Several factors will effect the timing, such as scan time and network delays. For this reason, I’m currently dedicating these two processors to this experiment only. They are also both connected to the same Stratix 2000 Ethernet Switch.
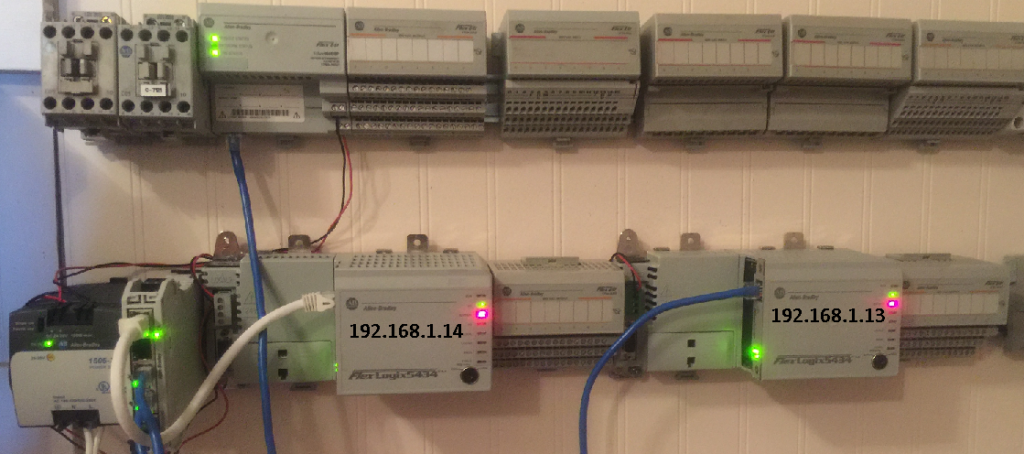
First Processor (192.168.1.13)
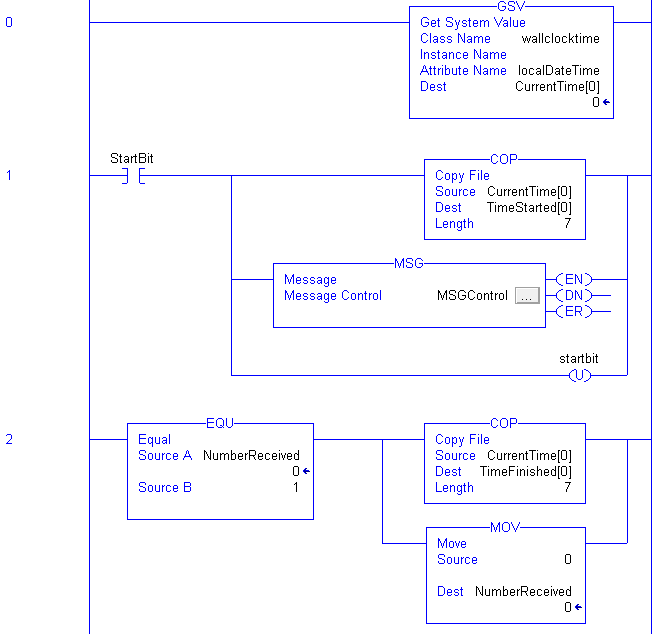
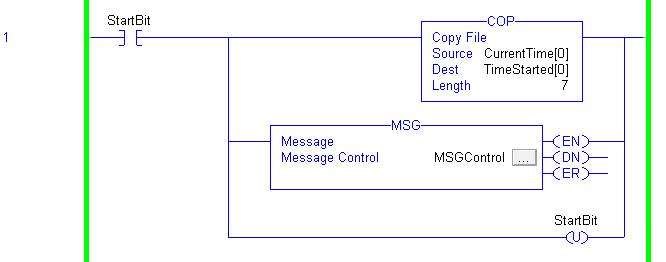
The first processor will initiate the message, and send the value of 1 across the network from the tag “NumberToSend”. This will happen when I toggle the “StartBit”. I’ll also log the exact time to the “TimeStarted” tag. I’m using a GSV instruction to get the current time from the processor.
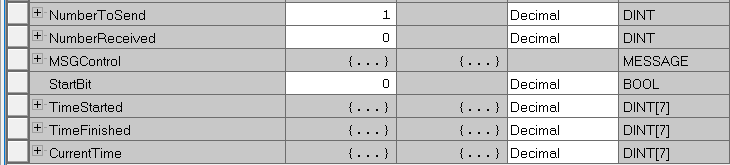
In Brief, I’ve created the following tags, and have placed the value of 1 into the tag, “NumberToSend”.
Afterwards, I wrote the logic in the first processor. Rung 0 gets the current time. In short, rung 1 takes a snapshot of the time and sends a message to the target processor. As can be seen, rung 2 waits for a message to come back, and takes another snapshot of the current time.
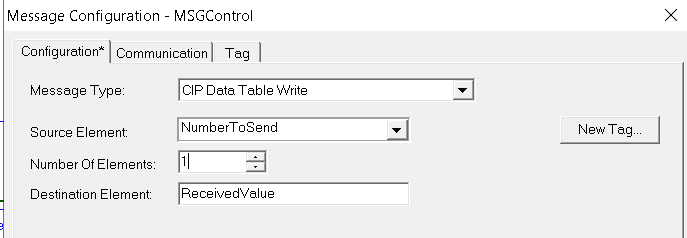
The message configuration is as follows:
Likewise, for FlexLogix, I’ve specified the path to the target. For more information on how to set up the path, visit the post on ControlLogix Messaging.

Then I’ve downloaded, and am in run mode.
Second Processor (192.168.1.14)
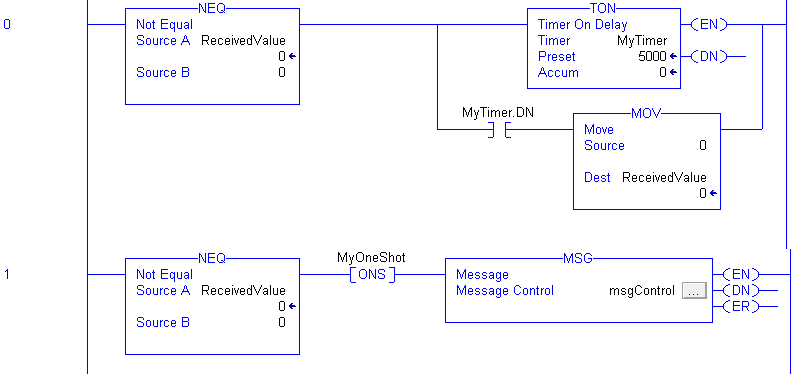
Similarly, in the second processor, I’ll create some tags. The msgControl tag is simply a workspace for the message instruction to store it’s status and configuration. The “ReceivedValue” tag will receive a value of 1. Once we get this value, we’ll send it back to the first processor. We’ll use “MyTimer” to clear the tag after 5 seconds, so we do not have to do this manually. I’ll use “MyOneShot” to ensure the MSG only fires one time in case I add other logic later on.

This logic will be a little more simple:
As an illustration, here is the configuration for the MSG instruction:
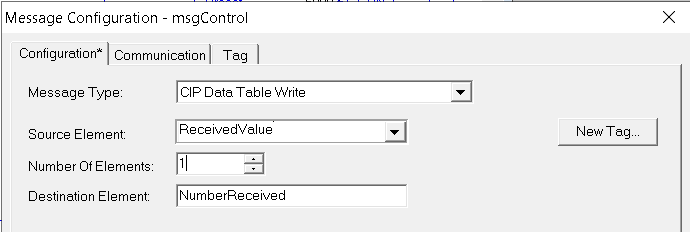
Of course, we also need to specify the path.

Now I’ll download, go to run, then go back to the first processor.
The Test
Next, I’ll toggle the start bit.
Now that we’ve ran our test, let’s look at the results.
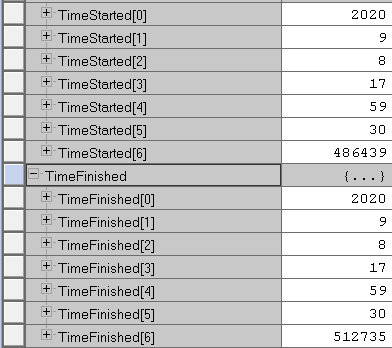
By subracting the TimeFinished Microseconds from the TimeStarted Microseconds, we can see the round trip time was 26 milliseconds.
By testing 5 more consecutive round trip times, I’ve gotten 21ms, 22ms, 19ms, 27ms, and 34ms. All of which are faster than light goes around our own planet!
For other posts on ControlLogix, visit the category page!
— Ricky Bryce