
Introduction to Converting RSView32 to FactoryTalk
Before Converting RSView32 to FactoryTalk we will need to install some software. First of all, I have RSView32 on a Windows XP computer. This is a 32 bit machine. Secondly, I have FactoryTalk View SE version 12 on a 64 bit computer. Thirdly, I am installing FactoryTalk View version 7 on the Windows XP Machine. The reason I am installing FactoryTalk View on the Windows XP machine is so I have the Legacy Tag Database Converter tool. If you don’t want to install FactoryTalk View on the Windows XP machine, you can probably download this tool separately.
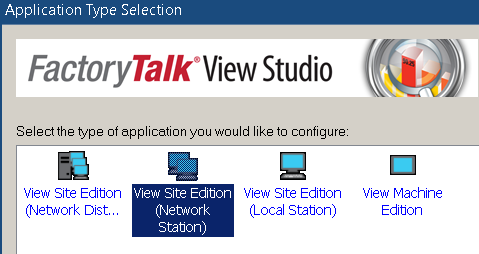
At this point, we’ll be Converting RSView32 to FactoryTalk View SE. We’ll go through several steps to accomplish this. In this case, we’ll be using a Network Station setup. This is one of the packages available from Rockwell. You can also migrate projects to Local Station, and Network Distributed as well.
After your conversion, be sure your project is working properly before depending on the implementation in any way!
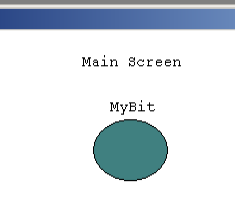
About the RSView32 Project
We’re going to keep this simple. My RSView Application simply has two tags. One standard HMI Tag, and an Alarm Tag. Additionally, I have a display screen which utilizes the HMI Tag. This allows us to walk through the steps involved in converting most any application.
Be sure you have a backup of your RSView32 project before you continue!

We just have a simple display called “Main”. This display is the initial graphic in RSView32.
Legacy Tag Database Conversion Utility
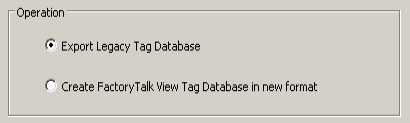
We will need to run the Legacy Tag Database conversion utility twice. First, we’ll run this on the 32 bit machine to Export the Legacy tag database.
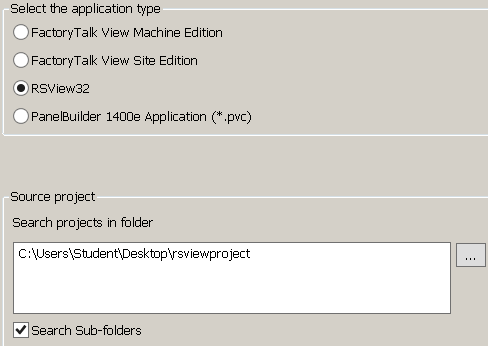
Click Next, and choose RSView32. Browse for your RSView32 project. I like to click the box to search the sub folders.

Click Next. You should see the RSV file for your project. Click Next, then Finish.
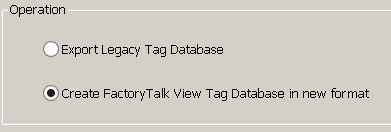
After that we’ll copy the entire RSview32 project folder over to your 64 bit computer. Run the Legacy Tag Database conversion utility again. This time, choose “Create FactoryTalk View Database in New Format”.
Click Next, and browse for your project on the 64 Bit macine.
You will see your RSView32 project. Hit Finish.
At last, we’ll be Converting RSView32 to FactoryTalk
Create a new Project
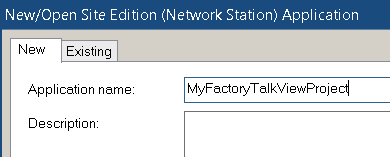
Before we begin, let’s open Factory Talk View SE. We’ll create a new “Network Station” Application.
Note: If you choose Local Station, you will have an “IMPORT” button when you create the file. Use that to import your HMI project. In this case, though, we have a “Network Station”. The procedure is very similar though.
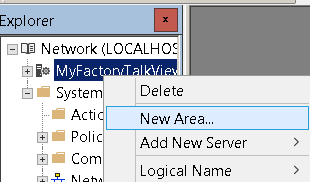
Let’s create a new Area.
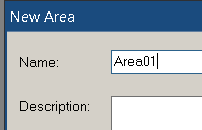
We’ll just call this area “Area01”.
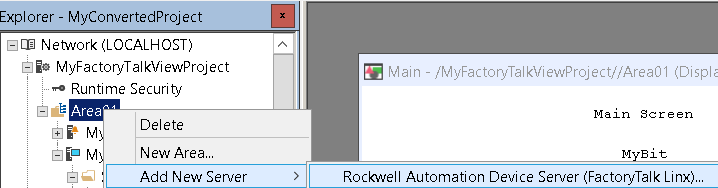
Next, right click Area01 in your explorer tree, and add an HMI Server.
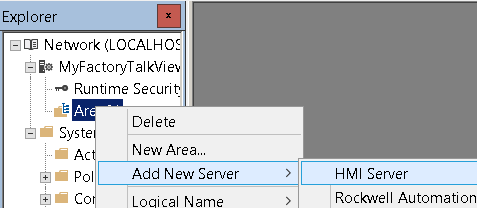
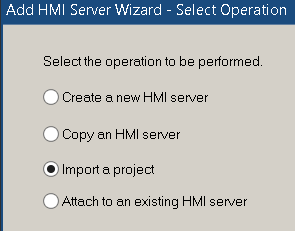
Choose to Import a Project.
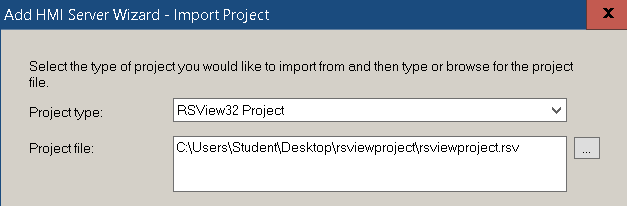
At this point, browse to your .RSV file that we copied from the 32 bit machine. Keep in mind that the tags in this folder are already converted. The exception is the alarm tags, which we’ll deal with a little later.
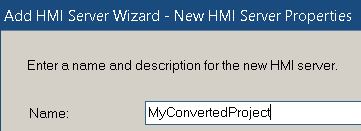
Name your project, then add a description if you wish.
Finally, click “Finish” to complete the Import.
At this point, we get this message:
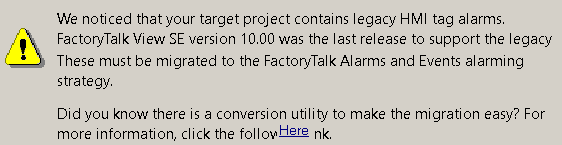
This means we need to run the FactoryTalk Alarm Migration tool. This should already be on your computer.
Run the FactoryTalk Alarm Migration Tool
It’s important to realize that the Alarm Migration tool is looking to convert the alarm tags that are already in your FactoryTalk View SE Application. This means that we must browse for the .SED file. Not the RSV File. In Windows 10 search bar, just type “Alarm Migration”. Launch the utility.
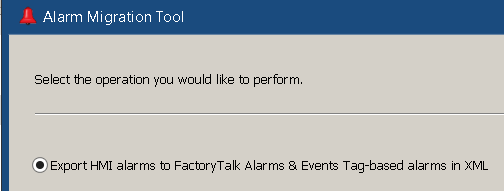
We’ll choose the first option. This is to export the tags in XML Format.
Browse to your FactoryTalk View HMI project. The default path will get you close. Just choose the folder of the project you just created when performing the import. You will find the .SED file in that folder.
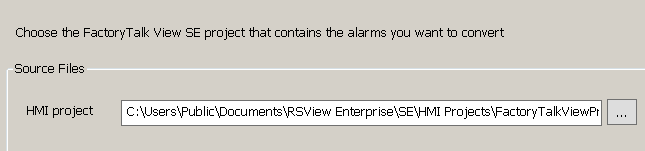
Click “Finish”. You can view the file contents if you wish to ensure your tags are in the file.
Create the Alarm and Event Server / Import your Tags
At this point we need to add an Alarm and Event server into our project. After that, we’ll import the Alarm tags. Remember, we will be importing the XML file that we exported using the FactoryTalk Alarm Migration tool.
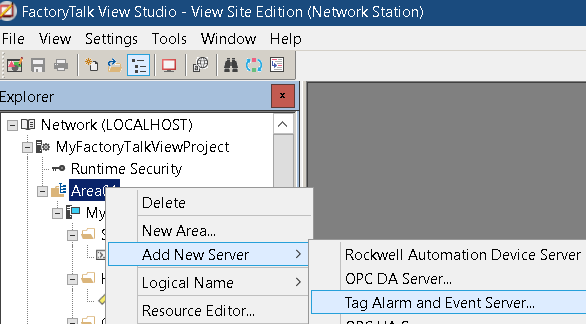
At this time, right click “Area01”, and add a new Alarm and Event Server.
Name your server.
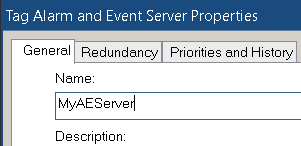
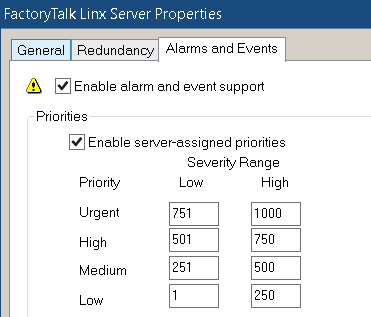
Go to “Priorities and History”. In this case, I’ll enable priorities.

Click OK.
At this point, are ready to import the tags.
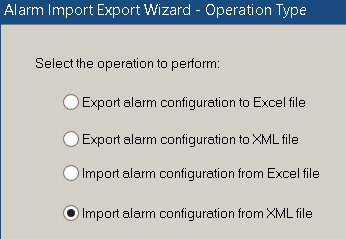
Right click your alarm server, and choose “Import and Export”.
Choose to Import in the same format that you exported from. In this case, it’s XML.
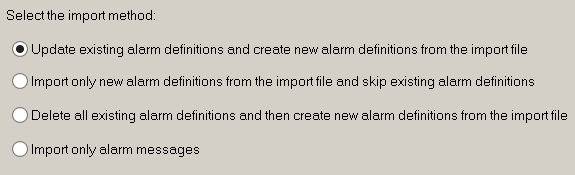
By default this exported to C:\Users\Public Documents\RSView Enterprise\SE\HMI Projects\YourNewAEServer\ In this folder, you will find the XML file that we exported earlier. I’ll just choose to update the existing tags, since there are none yet anyway.
Click “Finish”.
At this point, your alarms, displays, events, derived tags, macros, etc, should be in your project. You can browse through your project to verify this.

Set up FactoryTalk Linx
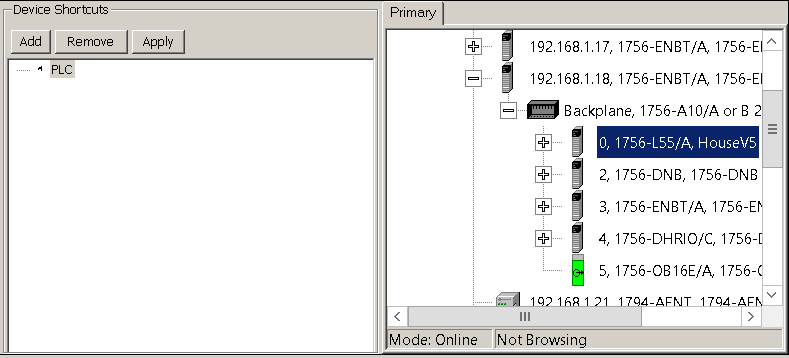
Our next step is to set up communication. Keep in mind that the name of our shortcut should be the same as the Node name in RSView32. That way, you shouldn’t have to change many objects on your displays. In this case, the node name was “PLC”. Therefore, that will be the name of our shortcut.
Right click Area01, and add FactoryTalk Linx as your communication server.
Under “Alarms and Events”, I’ll enable priorities.
Under FactoryTalk Linx, we’ll go to “Communication Setup”.

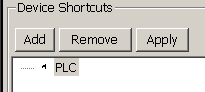
Add a Shortcut. The name in this case is PLC. Simply add whatever nodes were in RSView32. You can add more than one. Be sure the name of your shortcut and the path to your processor are highlighted at the same time.
Be sure to hit “Apply”. If you do not hit “Apply”, your changes will not likely be saved. The apply button is up where your add button was.
Create your Startup Macro
In RSView32, we had a green startup flag. You could check whatever services you needed at startup. This included Alarms, Derived Tags, Events, Data Logs, etc. We don’t have that in FactoryTalk View.
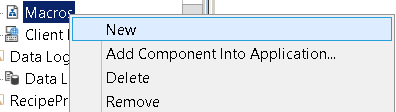
Obviously, to add a startup Macro, we right-click “Macros” and create a new Macro.
Double click the editor to bring up the command wizard. Enter any commands that you need. Here are some examples. Don’t forget to declare an initial display as well. That will save you from having to enter one on the client utility later on.
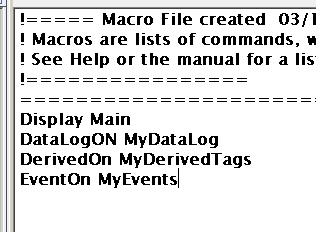
Save your macros as “Startup”

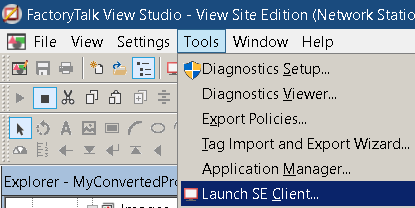
Launch the Client Utility
Finally, we are ready to create the client file. The client file is simply a file that the operator opens to run the FactoryTalk View Project. This client file contains the startup configuration. It also contains other configurations such as a timeout for logging out of FactoryTalk View.
Go to Tools | Launch SE Client. Another option is to simply click the icon on the toolbar.
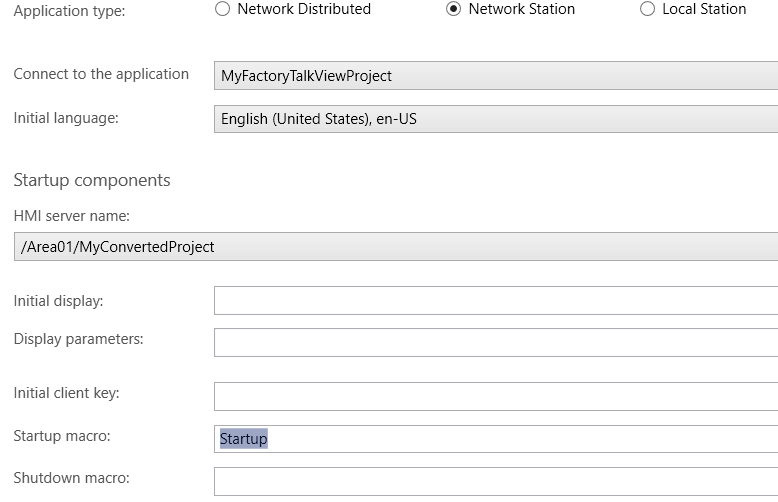
Create a new FactoryTalk Client Configuration file.

We’ll just leave the default name of “ClientFile” for now. Hit Contrinue.

In this case, we have a network station. Choose your file. Don’t forget to select your startup macro. Hit Save then Run.
Summary
In Short, Converting RSView32 to FactoryTalk is not that difficult. Simply export your tags on the 32 bit bit machine, and create them on your 64 bit machine. Use the legacy tag converter for this. After that, import your HMI Server. Then, run another utility to migrate your alarms. Import your alarms. Create your communications path in FactoryTalk View, and a Startup Macro. Launch the client utility, and your conversion is complete. However, if you are migrating to ControlLogix from PLC-5 at the same time, you will have some tag names to convert as well, which would be a different process.
For more information, visit the FactoryTalk View Category Page!
— Ricky Bryce