
Domoticz Sensor — Post Introduction
I’ve been experimenting with a Domoticz Sensor, and am documenting the project. I’ve used the Domoticz Server, a DHT22 Temperature and Humidity module, and the ESP8266-12F processor.
In this document, we will assume that you have the ESP8266 flashed with the EasyESP firmware, and have uploaded the arduino sketch with the proper SSID and password as we did in the last post. We will also assume that you have the Domiticz server installed.
User this document at your own risk, and always ensure you are familiar with proper safety procedures, and familiar with working in electronic devices.
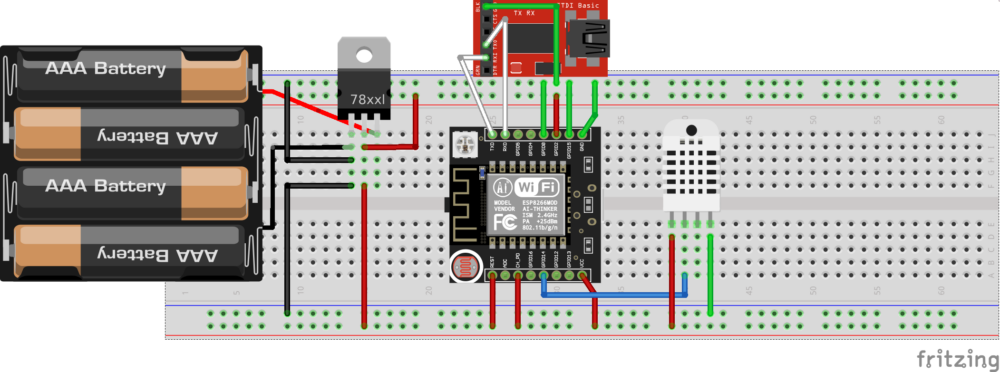
Wiring Diagram
We will use a 3.3v regulator (LM1117) to reduce the supplied voltage to a usable voltage that will not damage our processor. Notice that we have GPIO 0 high this time, with GPIO 2 also high, and GPIO 15 is grounded to set the proper boot mode. Also, be sure the enable pin (CH_PD) is high as well as the reset. The data pin of our DHT22 is connected to GPIO 14, and both the ESP8266 and the DHT-22 have VCC connected to 3.3v, and GND is connected to GND on the power rail.
Configuring Domoticz
 First, we will configure the domoticz server. Go to http://yourdomoticzserversIP:8080, and you will see the dashboard. Click on “hardware”, so we can add hardware. If you have already added some hardware devices, you might have to click on “Setup”, then “Hardware” on the menubar.
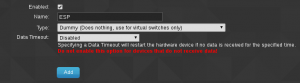 Next, we will add a dummy device named ESP. Ensure this dummy device is enabled.
Be sure to click the “ADD button to add the new hardware device.
![]() Next, we need to add a virtual sensor. On the dashboard, you will see your dummy device listed, and within the type column we will select “Create Virtual Sensor”.
Next, we need to add a virtual sensor. On the dashboard, you will see your dummy device listed, and within the type column we will select “Create Virtual Sensor”.
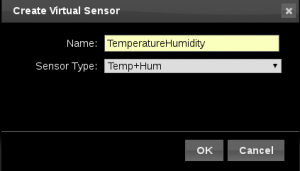 We will give this a name “TemperatureHumidity” and select Temp+Hum as the type, then click the OK button.
If you wish to view your data in Fahrenheit instead of Celsius, you can make this change by going to “Setup” then “Settings”. Under the Meters/Counters tab, you can change the scale to your preferences under the “Temperature” header.
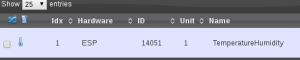 Next, we need to go to “Setup”, then “Devices”, and make note of the IDX number. In this case, the IDX is 1.
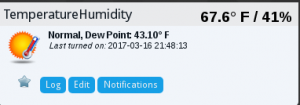 You can find your temperature sensor under the “Temperature” Tab of Domoticz, but this may not be the correct value yet. We will have to configure the ESP8266 module to read the temperature, and send the temperature into this display.
Configuring the ESP8266-12 (with ESPEasy firmware)
Let’s go to the ESP8266 web interface. We will need to know the IP Address of your ESP. You may have set this in the arduino sketch, but if the ESP8266 is dynamically receiving an IP address from your router, this might be a little more difficult. If this is your case, you can run network scanning software such as Angry IP Scanner to find the IP address (Scan then power down the ESP, and run another scan to see what IP drops), or you might find this information on the configuration screen of your router. We will enter this IP address into the address bar of your web browser to access the configuration screen for the ESP.
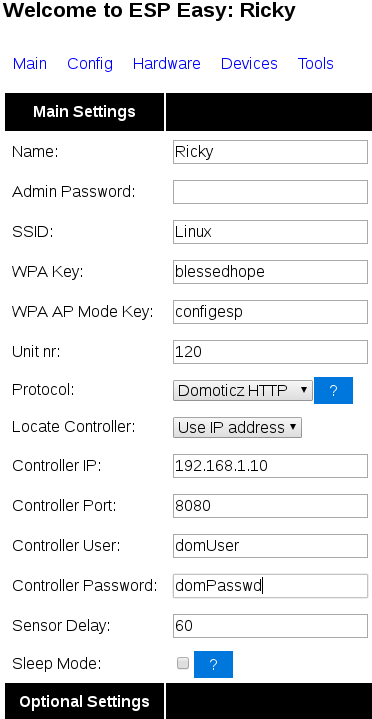
My “Config” tab is set up as follows: Please be sure to set up your SSID, and WPA Key which belongs to your own network. The “Controller IP” is the IP address of your Domoticz Server. If you have set up Domoticz with a username and password (recommended) with admin priviledges, you will want to add that information here as well under Controller User, and Controller Password. You can configure the Optional settings if you wish to use a static IP address for the ESP8266.
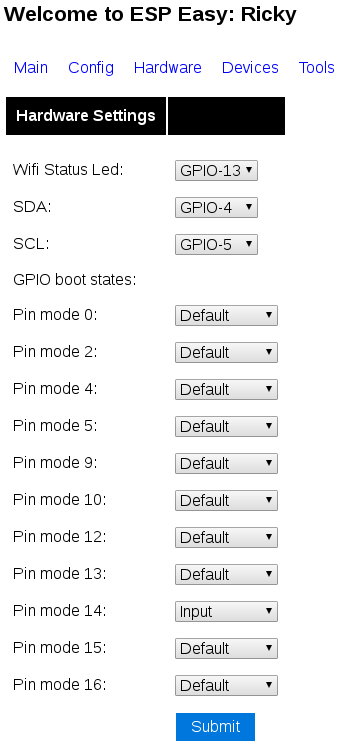
Here is my “Hardware” tab. I have an extra LED wired to pin 13 with a 1K resistor (physically).
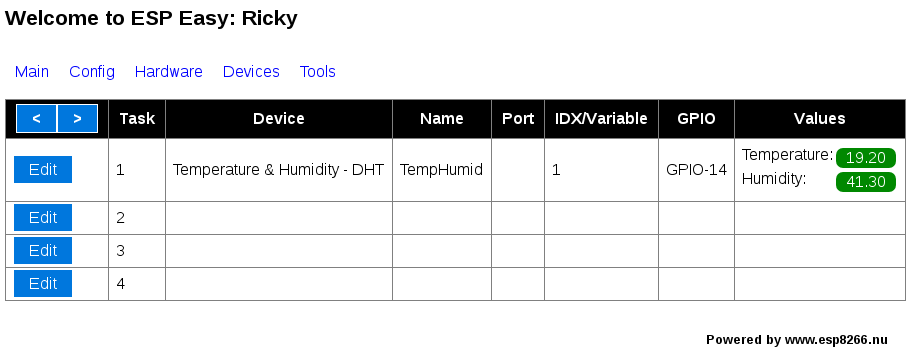
Under my “Devices” Tab, I edited the first devices as follows: (Be sure your IDX is correct for the Domoticz Sensor!)
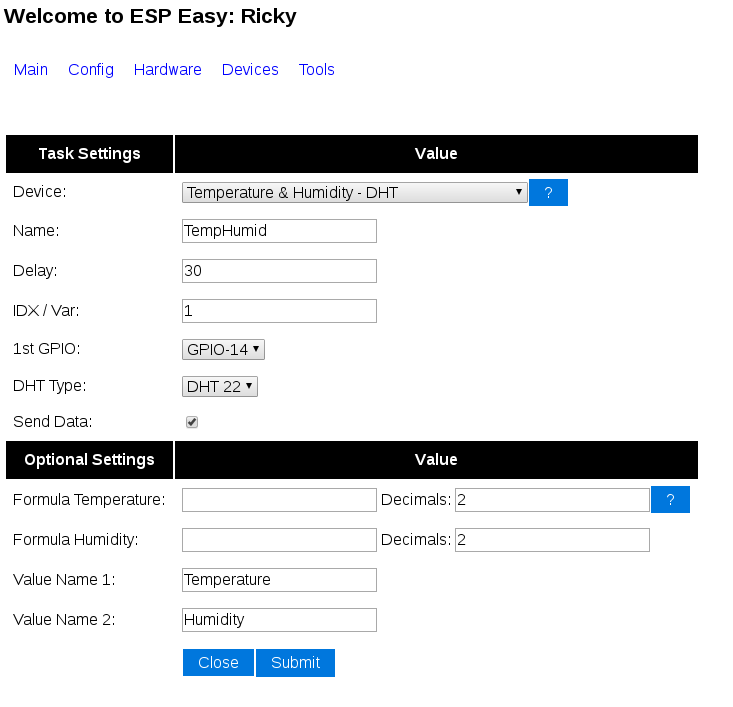
Press “Submit”, and you should be seeing the data from your DHT22 (In Celsius)
Back in Domoticz, you should be reading the correct temperature now!

— Ricky Bryce
Pingback: Nest Thermostat E to control your house temperature remotely.