
Introduction to the Nest Thermostat E
The Nest Thermostat E allows you to automate the heating and cooling systems in your home. With this thermostat, you can view and control your heating and cooling from anywhere in the world! I purchased this thermostat a few months ago, and wanted to share my thoughts with you. This thermostat is less expensive than the standard Nest Learning Thermostat, and has most of the features that anyone would need for it’s purpose.
Installing the Nest Thermostat E
Before removing your old thermostat, be sure power is off to your furnace, and take a picture of the current thermostat. Depending on who wired your thermostat, the color codes might not match up how you would expect. Be sure you know what color wire goes to the corresponding labels on your terminals. On my old thermostat, I had a jumper wire between Rc and Rh that was not needed on the Nest.
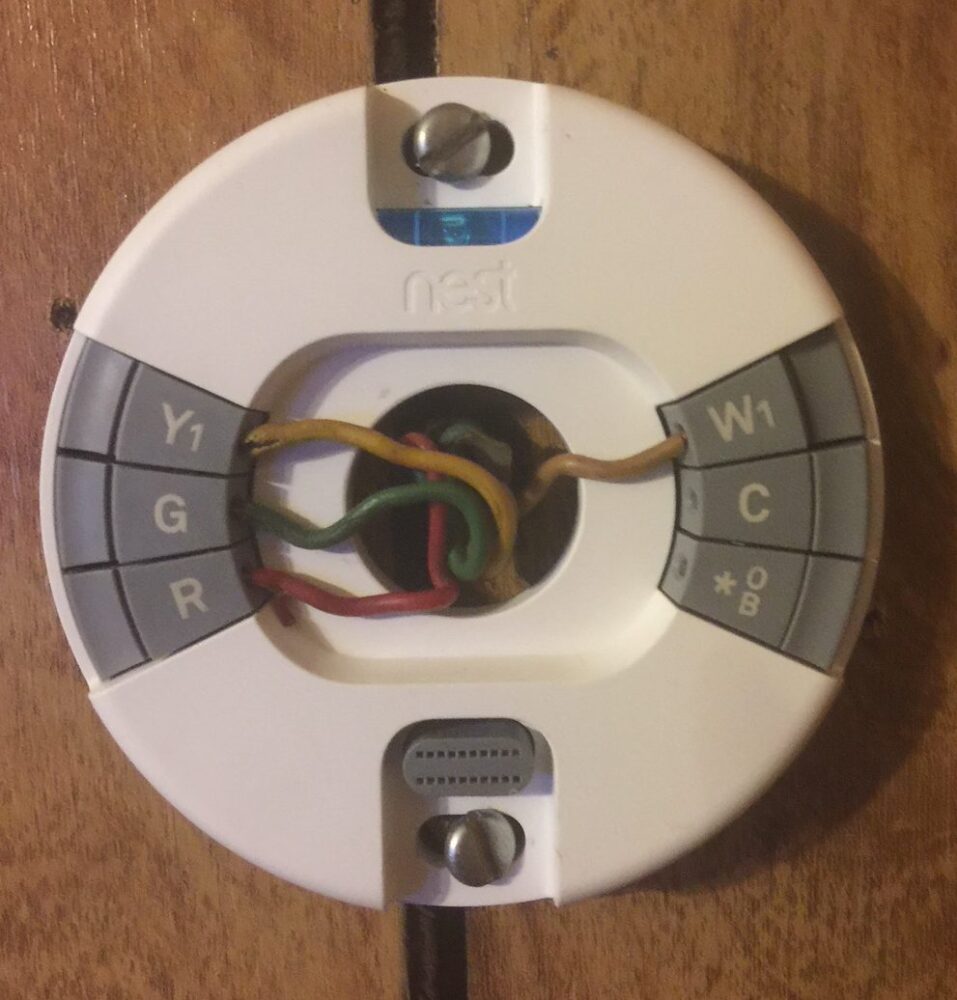
As you can see, the wiring is very straight forward, and you even have a level on the backplane to be sure you have it straight. Simply press down on the tab for each wiring block, and insert the correct wire. Not all systems are the same, so be sure to consult the nest documentation for your particular system. My thermostat did not require the C (common) wire to be connected. I think I will run new 5 conductor cable to the furnace though to help ensure there are no issues later on.
Powering on the Nest thermostat E
Once the wiring is complete, you can place the thermostat onto it’s backplane. When it boots up, you will have a few menu questions to answer, such as the language, your type of heating/cooling systems, and your wifi connection information. This went very smoothly when I installed my thermostat. However, i installed a thermostat for my mother, and the battery was reading low. With a low battery, the thermostat will not connect to wifi. I also noticed the display only turns on when you change a setting on the Nest. Normally, I have the display set to activate when someone walks by.. After leaving the thermostat plugged in until the next day, the thermostat was charged, and could be set up just fine.
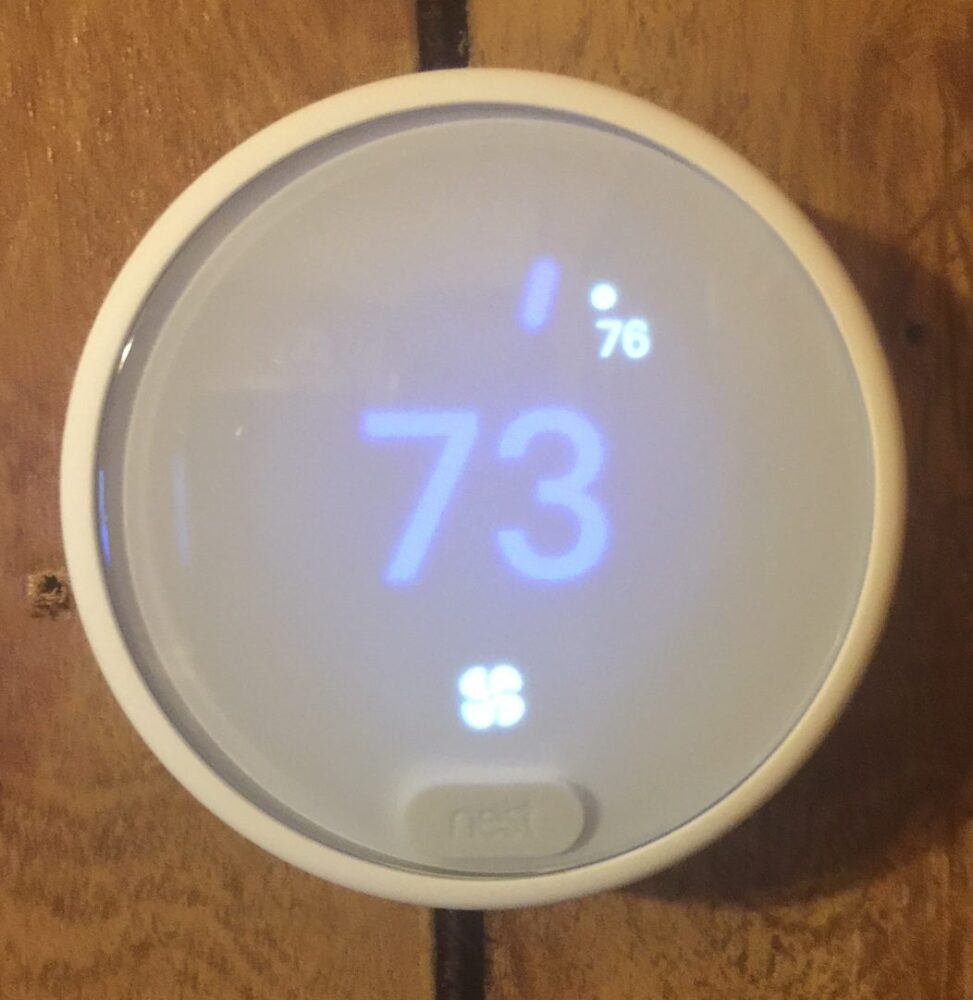
You will notice by design, the Nest Thermostat E has a “Frosty” appearance. By turning the outer circle clockwise or counter-clockwise, you can set the temperature. The setup menu can be accessed by pressing the “nest” button on the front.
Using the Web to control your Nest.
When you sign up for an account on nest.com, you will need to add your nest device. This will ask for a code from your nest. This ensures that you are adding the right nest thermostat to your account. During setup, you have the option to generate this code. If you have a nest that is already set up, you can generate a new code by pressing the configuration button on the front of your nest. Then just go to the “gear” icon (which is settings). Under settings, you can find the Nest App item to generate your code. Once your code is entered, you can control the Nest Thermostat E remotely.
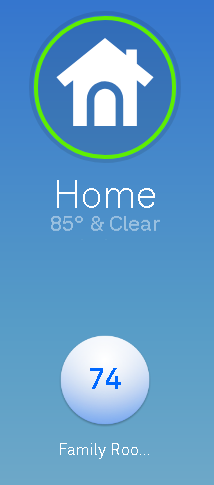
Here, I will just click the circle that is showing 74 degrees.

Now you can control the temperature on your thermostat from anywhere! Notice the up and down buttons at the bottom of the circle area that shows the temperature setting. Those are hard to see sometimes, depending on what device you are using.
You can also access other settings by clicking the gear icon in the app or in the web browser.(shown on the upper right).

Other Integrations
Nest has an app that you can install on many phones, which is a nice feature. This makes your thermostat easier to control from anywhere in the world, and monitor the temperature inside of the house.
Another nice feature is that the thermostat will interface with the Echo Dot. You just add the skill and link it to your account. With the Amazon Echo, you can then say things like “Alexa, set the temperature to 77 degrees”. A few seconds later, you will see the temperature setting on your thermostat change. I used to use IFTTT to control the fan, however, if you are using a Google account, this is no longer an option that I’m aware of. Google is discontinuing the “Works With Nest” program.
The Nest Thermostat E is the first automated thermostat I’ve tried, and was very happy with it. At least until Google made changes to what Nest will interface with. Be sure to verify any information you read here with the Nest manual. This document is simply for the purpose of explaining my own experience with the Nest Thermostat E! Visit http://nest.com for more information!
If you are interested in building some of your own home automation products, check out this page!
— Ricky Bryce