
Introduction to Associating PlantPAx Objects for PID
When Associating PlantPAx Objects for PID, we simply point our HMI objects to a tag in the processor. Recall that in previous sections, we set up our display screens. We also wrote our logic in function blocks.
At this point, we are ready to associate the HMI objects with our tags that we created in function blocks.
Keep in mind that in PlantPAx, each HMI object will usually be tied to a function block in logic.
Analog Input (P_Ain)
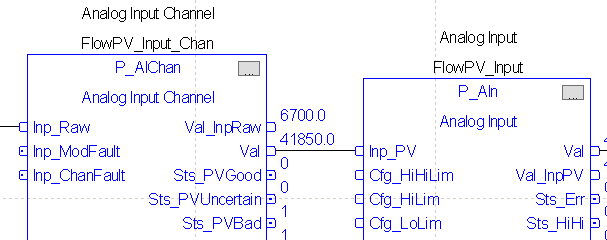
Before we configure the HMI display, let’s take a look at our P_AIn instruction in function blocks. As you can see, the name of the tag is “FlowPV_Input”. You also have a channel on this display, which is “FlowPV_Input_Chan”. It’s very important that we have the channel name correct.
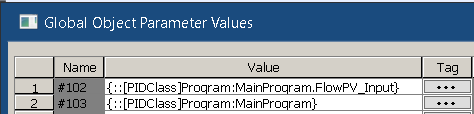
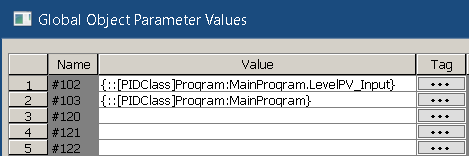
On our flow display in FactoryTalk Studio, let’s right-click on the P_Ain instruction. We’ll edit the global object parameter values. Hit the Ellipsis (three dots) to browse for the tag on parameter #102. Additionally, we need to browse for the path of the tag. The path for program tags is simply the folder that contains the instruction. If this is a controller tag, it’s simply the name of the shortcut in FactoryTalk Linx. The path allows PlantPAx to locate other components that belong to the P_AIn object such as the channel. This is why the name of the channel was very important. PlantPAx looks for other tags associated with the object automatically. Remember to “Refresh All Tags” when browsing if you do not see your tag name listed.
Analog Output (P_AOut)
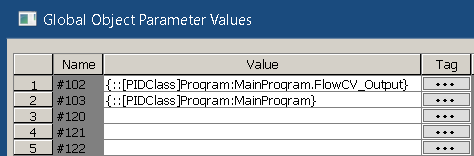
You are ready to configure the P_AOut object. Remember, this object must point to the tag for the P_AOut instruction in logic. Again, right-click P_AOut, and edit global object parameter values. In this case, we are looking for the tag “FlowCV_Output”. This will be for scaling the Control Variable.
PID (P_PIDE)
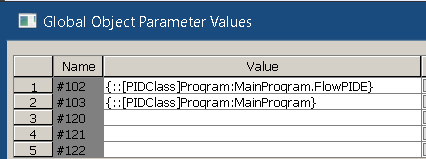
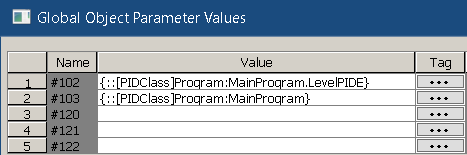
Our last global object is the PID instruction. As we have done before, right click the P_PIDE object on your flow display, and edit the global object parameter values.
Trend Chart
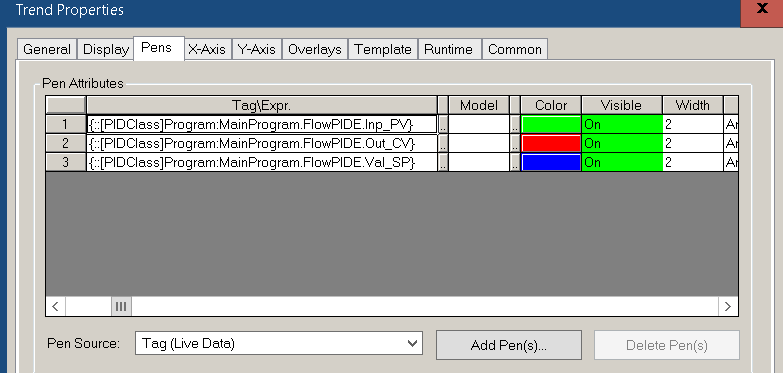
At last, we need to configure our pens for the trend chart. Remember, in this case, we are simply using live data. If you wish to use a data log, refer to other documentation on how to set that up.
Simply go to the properties of your trend chart. Go to the “Pens” tab, and add the following tags:
Be sure to save your work.
Level Display
In the same way, we will set up the level display.
For our Analog Input object:
We don’t need a real world analog output on this display because we will use it as a master in cascading PID. Our next step is to configure the P_PIDE object.
Lastly, we’ll set up the pens on the trend chart.

Summary
In Summary, almost every object in PlantPAx needs to be associated with a tag in logic. For the most part, each PlantPAx display object has a corresponding instruction in logic that it interacts with. In this section we simply associated the PlantPax object with the instruction in logic.
In the next section, we’ll configure each of these PlantPAx objects for the proper analog scaling.
— Ricky Bryce