
Introduction to Programming the Kenbak-1 Kenbakuino
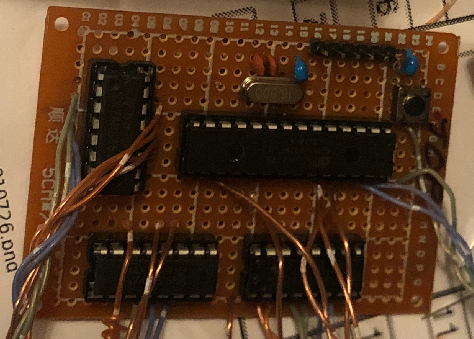
There are a couple ways that we can program the Programming the Kenbak-1. In this case, we’ll be programming the Kenbakuino. Mark Wilson put the code together for the Kenbakuino, and you can build your own. Another option is to purchase a kit. Chris Davis has put together a kit that you can purchase at adwaterandstir.com. This will save a lot of time, and the kit has a very nice appearance.
In this section, we’ll take a look at a couple different methods to get a program into the Kenbakuino. One way is through the front panel buttons. Another way is through a serial connection. Obviously, the serial connection will be much faster. However, programming through the front panel will give you a feel for what it was like back in the early 70’s.
Programming the Kenbak-1 Kenbakuino through the Front Panel
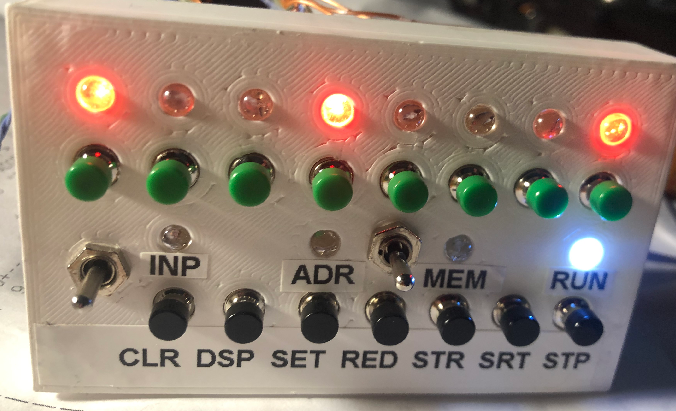
Let’s enter a program for flashing a light. After your Kenbakuino boots, press start, stop then clear. We’ll start at Address #3. Press button 0 then button 1. You will see a binary 3 on your LED display. Obviously, this is 00 000 011. Press “SET”. At this point, you will be starting at memory location #3. Now that you are at memory location #3, press “Clear”. This clears your LED’s, and sets you up to enter the data for this memory location. Keep in mind that memory cell 0 is your A register. Typically, we’ll call this the “Accumulator”. Likewise, memory cell 1 is for your B register. This is an extra register we can use for math. Memory cell #2 is the X register. We use this for indexing with variable addresses. We can use this for math if we are not using it for indexing.
Flasher Program
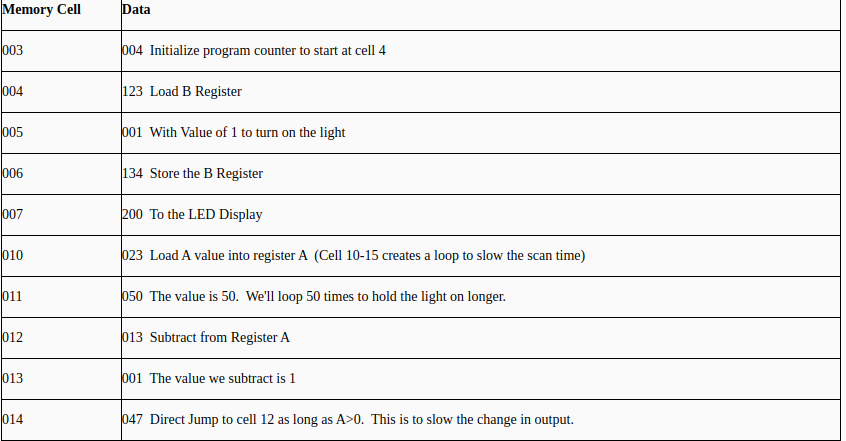
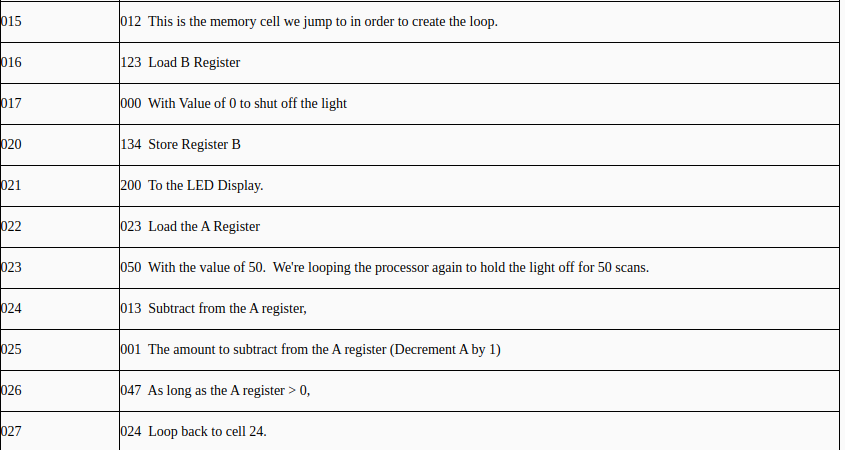
From this point on, each time you hit “Store” to store data, the processor will automatically increment to the next address. After you press “Store”, then press “Clear” after each entry. Here, I will list the memory locations, and the data for each memory location. Remember, we don’t need to enter the memory cell each time… just the numeric data. I will also describe each step.

Now press Start. You will notice the light flashes so fast that you can hardly see it flashing. Press Stop. Now press 4 first, then stop at the same time. This will slow the processor even further. Now press Start, and your light should flash.
Programming over Serial
An easier way to program is over the Serial connection. Press Stop. Now press 0 first then SET at the same time. This will set your kenbakuino up to receive a program at 4800 baud.
For this, I just use the serial monitor in the Arduino IDE. Just be sure your port and baud rate are set up correctly. You can copy and paste this code.
000,000,000,004,123,001,134,200,023,50,013,001,047,012,123,000,134,200,023,050,013,001,047,024,344,004,000,eNow that the Kenbak-1 (kenbakuino) has the code, just press stop, then press 4 then stop at the same time. Again, this slows the processor. Press Start, and your light should flash. Pressing a higher number button, then the stop button at the same time will slow the processor even more.
By using this method, you can search for programs on the Internet many programs on the Kenbak. Several users are still writing programs that you can check out.
Here is another program you can try. Although it has a couple redundant instructions, it should work well as a counter. Each time you press a button, your display should increment by one in binary.
000,000,000,004,023,000,123,000,223,000,234,377,034,200,124,377,144,016,003,001,234,377,
223,050,213,001,243,030,344,006,e
Saving Your Program
To save your project to EEPROM, simply stop the Kenback. Press a bit (0-7), then press STORE at the same time. Each bit number represents a memory location in EEPROM. Memory locations 7-4 will store up to 64 bytes. Memory locations 2 and 3 will store 128 bytes. On the other hand, memory locations 0 and 1 have 256 byes available. To read your project, press the bit number your project is stored in, then press READ. At this point, you can run your program.
Writing your own programs
I would highly recommend printing out the programming worksheets. Write the above codes on the worksheet, and try to determine how to derive each instruction! Additionally, you can look at the Kenbak Labs. By following these labs, you will end up with a good working knowledge of the Kenbak-1!
I have a more detailed explanation of the Kenbak-1 basic commands on this post.
Check out my Kenbak Build! If you wish to build from a kit, check out adwaterandstir.com. A big advantage of the kit is that it will look professional, and you don’t have to search for all of the parts you need!
— Ricky Bryce
Your articles have been such a huge help in me learning how to use my micro Kenbak-1 kit. Thank you so much.
Thank you Eric. I’m learning as I go with it too. The Kenbak-1 is addicting for sure. Thanks for the comment.