
Introduction to RC2014 Serial Communication with Arduino
When we set up RC2014 Serial Communication with Arduino, we simply need to use 3 wires. This will be Transmit, Receive, and Ground. In this section, we’ll simply get the Arduino to print “Hello World” to the RC2014. The maximum distance for this communication depends on several factors. This includes the capacitance of your cable, transmission rate, electrical interference, etc. In this case, we’ll run 9600 baud over DuPont-style jumper wires. As long as we don’t exceed 50cm, we should be fine. If you need a longer distance, then you can convert the TTL signal to other protocols at both ends. RS232 will give you 50 feet, and the maximum distance for RS485 is 4000 feet.
There are several methods to set up this serial communication on the Arduino. First, is the native TX and RX lines. Secondly, you can run a SoftwareSerial library if the TX and RX lines are already in use. It’s important to realize, though, that if we use the native TX and RX lines, we should disconnect them when uploading to the Arduino. This is because the Arduino uses these lines during the upload process.
Applications for RC2014 Serial Communication with Arduino
Once you have this set up, you can create “Menu Driven” functions on your Arduino. This can perform tasks such as turning on or off motors, reading analog values, and controlling servos.
RC2014 Setup
In this case, I have a dual serial module, and a dual clock module. I’m using the VT-132 terminal on Serial A. Serial B is where I will connect the Arduino TX and RX lines. For 9600 baud, clock 2 is at .6144 MHz. I’m running ROMWBW with CP/M on the RC2014, and the terminal emulator I will use is QTERM.
Arduino Setup
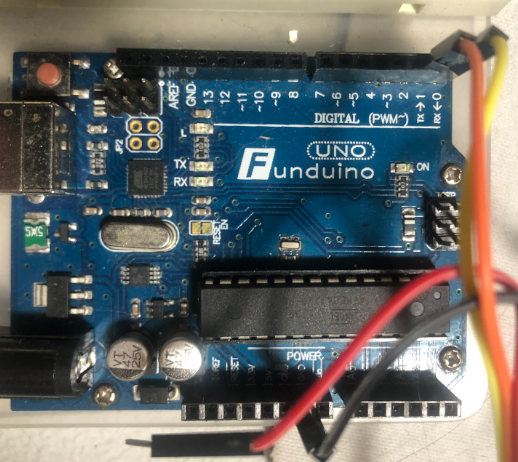
In the Arduino, we need to upload a sketch that will write out “Hello World” over the TX and RX Lines. I’m adding the following code:
void setup() {
  // put your setup code here, to run once:
Serial.begin(9600);
}

void loop() {
  // put your main code here, to run repeatedly:
  Serial.println("Hello World!");
  delay (2000);

}
Basically, this will configure the serial port on the Arduino to run at 9600 bps. At this point, we have the loop routine which will write out “Hello World!”. Then we delay for 2 seconds, and continue the loop. This will be fine since we are just trying to keep this sketch simple to demonstrate the communication. If this code is part of a larger application, you may not want to use the delay function. This is considered “blocking code” which holds up your whole program for 2 seconds. You may want to consider using the “Blink Without Delay” example in your Arduino IDE. This will show you how to execute code at periodic intervals without stopping the rest of your logic.
Be sure to select the correct board in the Arduino IDE, and the correct port. Upload your sketch before making any connections.
Make your Connections
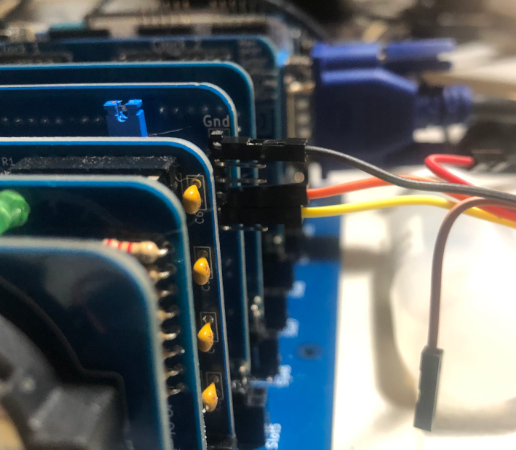
Basically, the connections are very simple. TX on the Arduino connects to RX on the Dual Serial Module. Likewise, RX on the Arduino connects to TX on the Dual Serial module. Ground connects to Ground.
The pinout of the dual serial module is as follows:
- Ground (Top)
- RTS
- VCC
- RX
- TX
- NC (Bottom)
Power up your Units
At last, we are ready to power up both the RC2014, and the Arduino. I’m powering the Arduino with USB. Another option is to power the arduino from the RC2014. In that case, you would need to make sure the voltage jumper is in place for Serial B. Use the third pin from the top for 5v power.
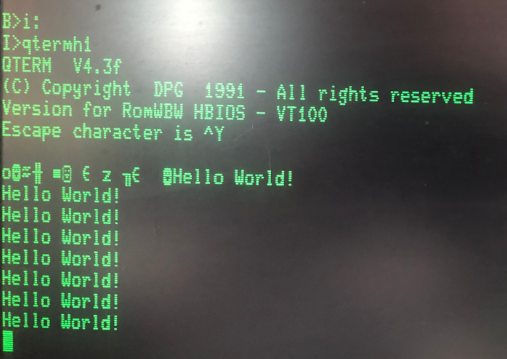
As you can see, in QTERM, we are seeing exactly what we expect. There are several versions of QTerm, so you want to be sure to use a version that uses Serial 2. In this case, I used QTERMH1 from ROMWBW.
Summary of RC2014 Serial Communication with Arduino
In short, there are only 3 connections. You just need the Arduino to write out of the native or Software Serial port. Remember TX connects to RX on the other device, and vice-versa. Be sure to connect ground as well. On the RC2014, you just need the serial port to clock at the same baud rate as your Arduino. On the RC2014, use a terminal program that works for the serial port you are using.
For more information visit the RC2014 Category Page!
— Ricky Bryce