
Introduction to Using Telnet under Windows
It’s important to realize that Using Telnet under Windows or any other operating system is insecure. In other words, telnet does not encrypt the data. A better option would be to use a protocol such as Secure Shell (SSH). On the other hand, there are some good uses for Telnet. First, you can access vintage BBS systems over the Internet. Secondly, you can use it for troubleshooting connections, such as a mail server.
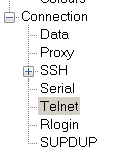
You have several options to run Telnet under windows. For example, are various terminal emulators that support telnet. This includes PUTTY and TERATERM. Another option is to run telnet natively.
Adding Native Telnet Support to Windows
Older operating systems, such as Windows 95 already had Telnet capability out of the box. On newer Windows operating systems, however, we have to install that feature.
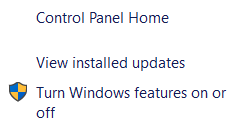
On Windows 10, go to Control Panel. After that, go to Programs and Features. At this point, we’ll choose to turn Windows features on or off.
As for Linux, there are several different firewalls in different versions. These include IPCHAINS, IPTABLES, FIREWALLD, etc. Do a search for how to disable or add a rule to the firewall in the particular version of Linux you are running.
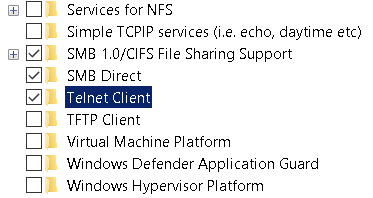
Scroll down, and check “Telnet Client”. Then press “OK”.
Finally, you are ready to use Telnet. Open your command prompt. You can just search for this in the Windows 10 search box down by the start button.
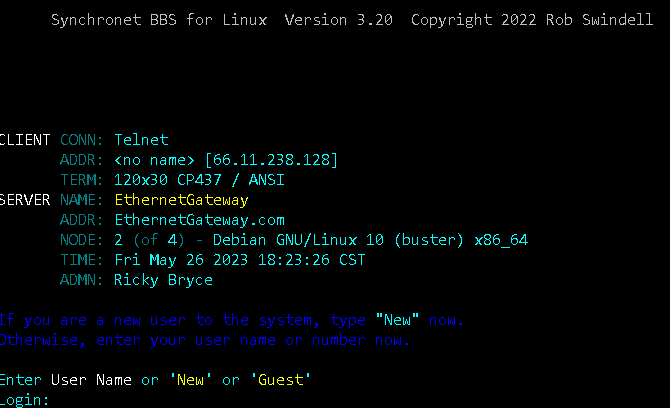
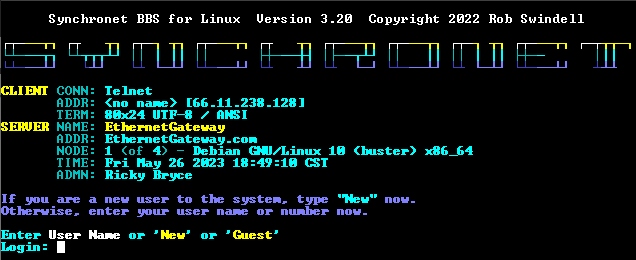
At this point, you can connect to the BBS. Simply type “telnet EthernetGateway.com:23”. Type this without quotes. Note there is a space after the telnet command. Substitute EthernetGatway.com for the domain name of the BBS you wish to connect to. After this, type a colon, then the BBS port number. If you leave the port number blank, then port 23 is implied.
If your connection fails, then you might need to add an exception to your firewall, or temporarily disable it.
To do this just type “Firewall” in the windows search box and open your firewall utility. From here you can open “Windows Defender Firewall”.
Using PUTTY
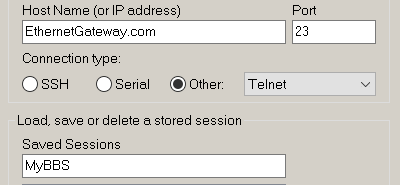
Another option is PUTTY. You can download PUTTY from this link. There are versions for both Windows and Linux. Simply install and run PUTTY. After that, we’ll need to set up a few things. Be sure to set PUTTY up for Telnet, and enter the URL and port number. Also give your BBS a friendly name, then save your changes.
In the left window pane, you can go to Appearance to change the font size. There is also an option to change the color. Under Keyboard, you can change the backspace behavior. I always set mine to “CTRL-H”.
Depending on what you are connecting to, you may need to change the behavior of your return key. When connecting to my Altair, I need to uncheck this. Otherwise directory listings are not complete.

Once everything is set up, you can go back to “Session” at the top of your left window pane. Save your work, and open the connection.
If you wish to use file transfer protocols, then you can install ExtraPUTTY.
Using TeraTerm
Another useful terminal is TeraTerm. You can download TeraTerm from this link. One advantage to TeraTerm is that you can transfer files over several different protocols including XMODEM, YMODEM, ZMODEM, and Kermit.
You can set up TeraTerm as follows:
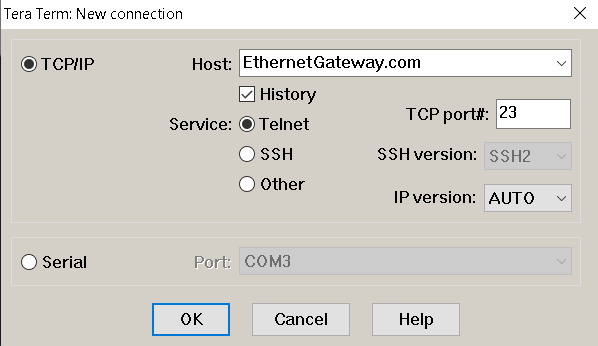
Simply hit OK, and you will connect to the BBS.
Summary — Using Telnet under Windows
To summarize, I’ve just listed a few different ways to connect over telnet from Windows. Use at your own risk. Telnet is is not secure. There is no encryption. Never use the same password on a BBS that you use for other important things. It’s your choice on which method to use. They all have advantages and disadvantages.