
Introduction to Node-Red with ControlLogix
In this section, I’ll discuss setting up Node-Red with ControlLogix. Basically, we just need to install the Eth-IP node in Node-Red (for CIP). After that, we just configure the IP address of the Ethernet Module, the slot the processor is in, then declare the tags we want to connect to. This node allows us to pull or push data to and from the processor. For example, we’ll take data from OpenWeatherMap, and send that data to a tag in the processor. This information is provided as-is and for example only. It’s up to you to ensure you take all safety precautions. Especially when writing data to the controller.
Set up Node-Red Nodes
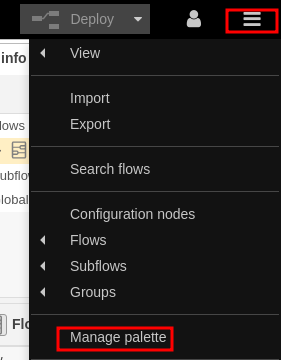
In this case, I already have Node-Red installed. Simply go to “Options” in the upper right corner of the web interface and “Manage Palette”.
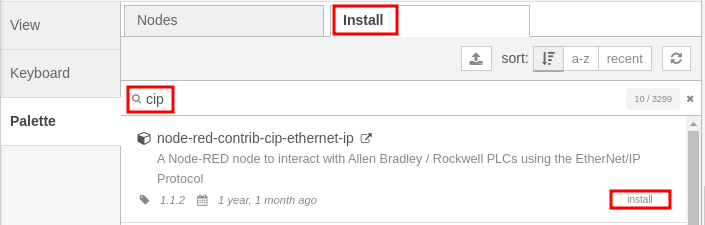
Now, search for cip, and click “install” as shown.
Likewise, we’ll do the same with “OpenWeatherMap”.
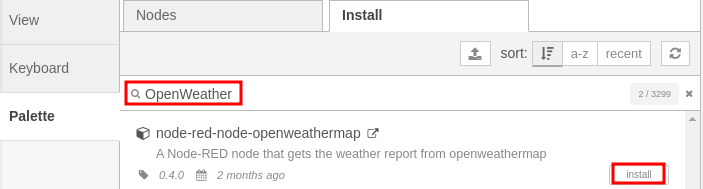
Eventually, you will need to go to OpenWeatherMap.org to get an API Key.
Set up the tags in your ControlLogix
In this case, I’ll configure the following tags in the ControlLogix processor that Node-Red will write to. Be sure to remember the data types of each tag. We will need to know these later when we set up Node-Red.

Configure the flows to connect Node-Red with ControlLogix
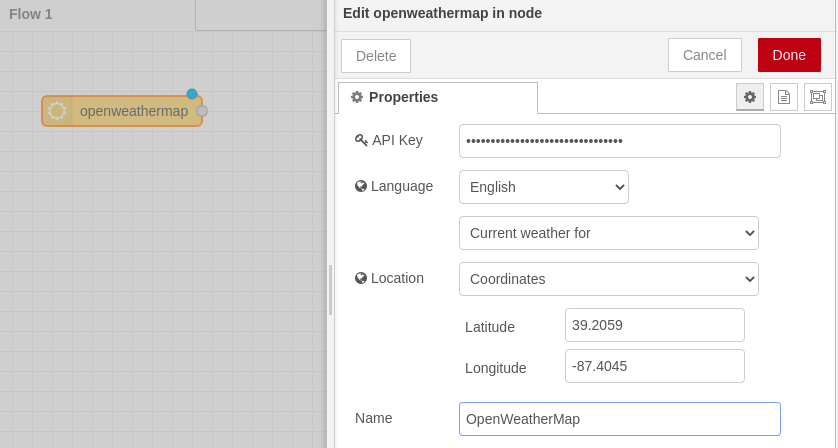
Finally, we are ready to configure the flows. First, we’ll add the OpenWeatherMap node to the flow. In this example, I’ve added the OpenWeatherMap IN node. Be sure to configure the node with your own API key from OpenWeatherMap.org. Add your coordinates, then click “Done”.
Next, we’ll add the “Eth-IP OUT” node. We will need to configure this, so double click on the node.

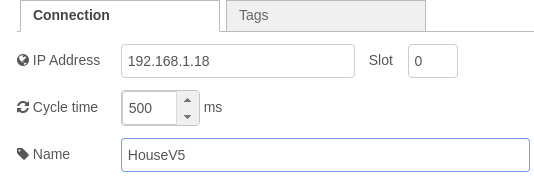
In the properties, click the pencil to add a new endpoint.

Be sure to set up the IP address of the Ethernet Module in your ControlLogix system. Also declare what slot the processor is in.
At last, go to Tags, and add the tags we wish to connect to in the ControlLogix. Remember, Controller tags are “Global” tags.
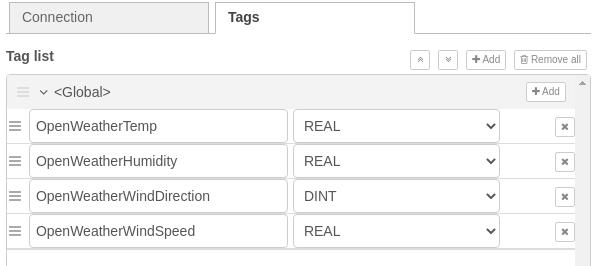
Be sure your data types match the data types in the processor. You are finished configuring this node. Click “Add” (at the top left), then Done.
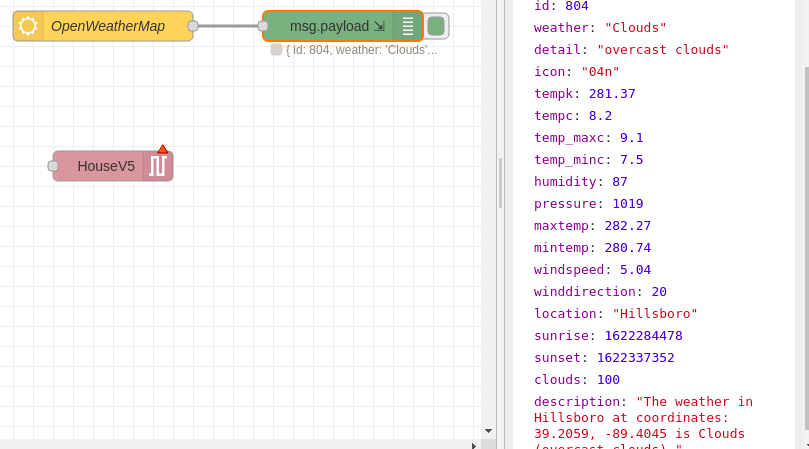
Debug Node to view different types of Data
Here, I’ve added a debug node, so we can see the different types of data coming from OpenWeatherMap.
Conversions when interfacing Node-Red with ControlLogix
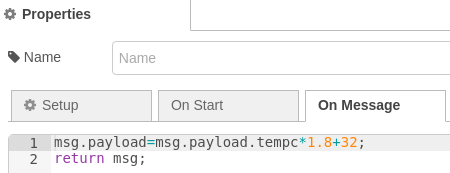
Since the Eth-IP node is looking for data in msg.payload, we will need to move some data around. Another issue is that we need to scale the Celsius value coming from OpenWeatherMap to Fahrenheit (in the US). Let’s do the temperature first. We will use a function for the conversion.

Double-click the function, and we’ll enter the following code.
Finally, we’ll configure the Eth-IP output node to write to OpenWeatherTemp. Just double click the Eth-IP output node to enter it’s configuration.

Be sure to tie your nodes together to show the flow of information.

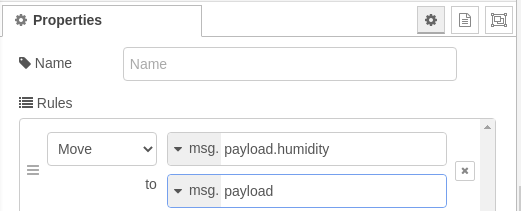
Humidity will work slightly different. We do not need to convert the data, so we’ll simply add a “Change” node, and another Eth-IP output node.
Configure the “Change” node as follows:
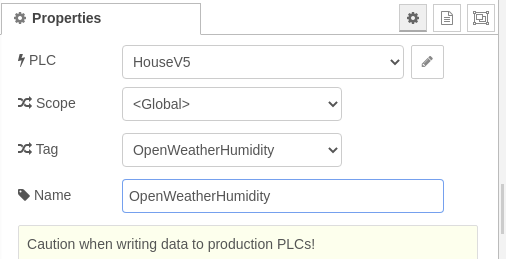
Then configure your Eth-IP output mode to store the data to the OpenWeatherHumidity tag.
Connect flows as follows:

In like manner, I’ll add the following logic for WindDirection and WindSpeed.
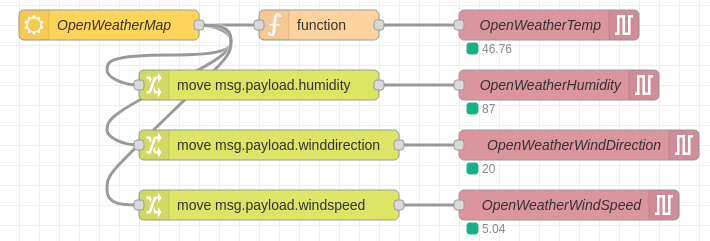
Click “Deploy” in the upper right corner of your web interface, and you will see the data going to the processor.
Open your ControlLogix, and go online. We can see the data is coming into the processor from OpenWeatherMap!

For more information on ControlLogix, visit the ControlLogix Category Page!
— Ricky Bryce