Introduction to Arduino (Microprocessor Introduction)
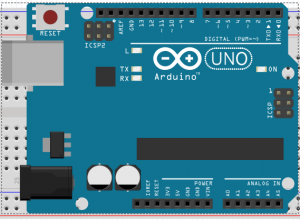
This document will give you a Microprocessor Introduction to the Arduino Uno. There are other variants of this board, such as the Mini, Nano, Yun, Leonardo, and Esplora. In addition, there are many off brand products such as Einsboard and Funduino. Although the off brand products are much less expensive, I would recommend the genuine Arduino to ensure quality, and to support the Arduino project.
If you choose to start with the Uno board, you would probably want to get one with the removable Atmega 328PU. This has a 28 pin socket on the Uno board. The removable processor is easy to replace if it becomes damaged. You can also remove the Atmega 328 to solder into your own projects. You can purchase a replacement Atmega 328 for as little as $2. Be aware, though, that some of the chips you purchase may not come with a bootloader. The bootloader allows you to easily program the processor using your USB cable. If you purchase a chip without a bootloader, though, you can burn the bootloader from another Uno board, or using a programmer such as an AVR programmer.
Note: The Arduino Uno image was generated using Fritzing software, which is great for documenting your projects!
Gather your components
To get started, you will need the Arduino Uno board (or a variant), a USB cable, and the Arduino software, which can be downloaded for free (with the option for donation) at arduino.cc. I always download the software, so it runs on your computer as I’ve had problems in the past with the web editor.
Once the software is installed, you can open an example project to get started. I/O Pin #13 is connected to the on board LED, so no additional connections are required to make a simple “blink” sketch (A program for your Arduino is called a “sketch”).
Loading your first program
Once you connect to your arduino, you can go to windows Device Manager to see what COM port the Uno appears on. In Windows, just go to Control Panel | Device Manager, and click the + next to Ports.

Next, go to your Arduino IDE software (Integrated Development Environment), and under “Tools” go to “Port” and select your COM port if it is not already selected.
Then, be sure the correct board is selected. Go to Tools | Board, and be sure Arduino/Genuino is selected.
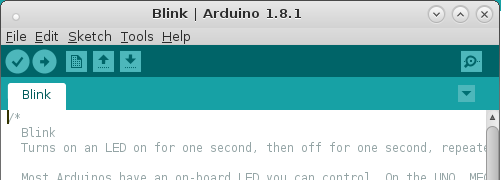
Now, open your “Blink” project. Go to File | Examples, and under 01_Basics, you can open the Blink example sketch.
Finally, you can click the “Upload” icon on the standard toolbar, or click Sketch | Upload, and your on board LED will begin to blink.
Your next step will be to purchase a breadboard, some breadboard jumpers, LED’s Resistor (1K and 10K), and some breadboard pushbuttons to continue building your knowledge with this microprocessor! While your at it, order some sensors, such as a DHT22 for reading temperature and humidity, a level sensor, gas sensor (such as CO), or a variety of the many other sensors designed to integrate with your Arduino projects, and many of them are documented right here on this site!
— Ricky Bryce
