
Introduction to RSView 32 Communication
RSView 32 communication is easy to set up. It takes a few steps, however, to configure communication properly. RSView 32 is HMI Software (Human-Machine Interface). Likewise, you might also hear the term “MMI” which means the same (Man-Machine Interface). In this example, I’ll set up communication from a PKTx card which is installed in the PC.
Before starting, I’ve created a new project in RSView 32 Works. It’s important to realize that RSView 32 Works is our development software. RSView 32 Station is for the runtime.
Configure the Channels
I’ve already set up the KTx Driver in RSLinx. We’ll use this driver for our communication in RSView 32 for this example.
Before we start, go into “Channel” under “System”. This is where we configure the communication methods that RSView 32 uses. In this case, ‘m only going to configure Channel 1. I’ll set for Data Highway Plus (DH+), and select my KT driver from RSLinx.
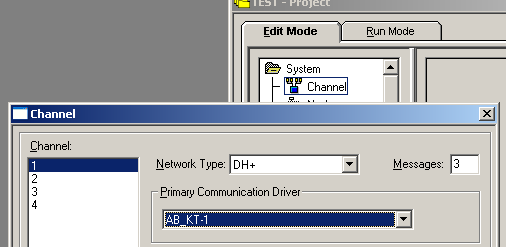
This is the primary communication driver. You can also configure another channel as a secondary driver in case the first method fails.
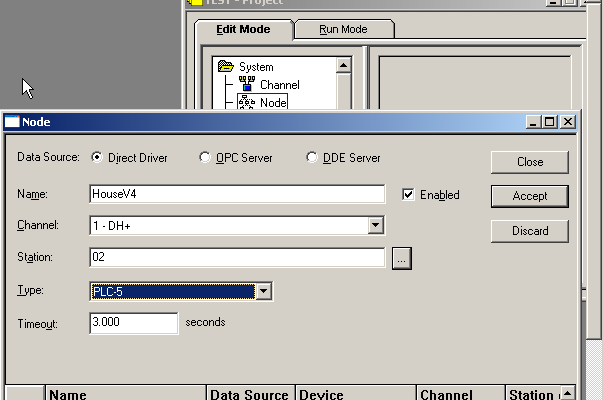
I’m using the direct driver. If you are communicating with a ControlLogix system, then you will use RSLinx as an OPC server. If you use an OPC Server, be sure you have an OPC topic configured in RSLinx. I’ll name the processor, and choose the communication channel. Also, on the DH+ Network, my processor is at Node 2. Moreover, I’m using a standard PLC-5 processor. When you have finished, press “Accept”.
Testing RSView 32 Communication
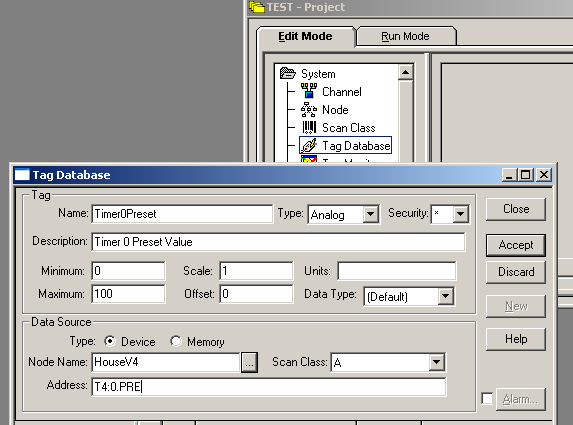
Now that our communication is set up, let’s test our work by adding an object to the RSView 32 display. Before we add an object, though, we need to create a tag that points to a memory location in the processor. In this case, we’ll just create a tag that points to T4:0.PRE. This is the preset for Timer 0.
In the Tag Database, I’ll set up a tag as shown. We do not need any scaling, but be sure to set up your minimum and maximum values for the tag. This is an analog tag, and points to T4:0 on the HouseV4 processor. This is the name of the processor that we set up under “Nodes”. Be sure to press “Accept” when finished.
Add an Object
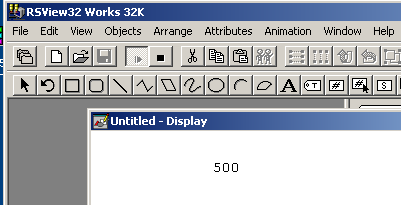
Finally, I’ll right-click “Display” to add a new display. Under Objects | Advanced objects, I’m adding a Numeric Display. Simply click and drag your mouse to draw the object onto the display. When you release the mouse button, your expression editor will appear. Our Tag name is “Timer0Preset”. You can use the “Tags” button to browse for this tag if that is easier for you.
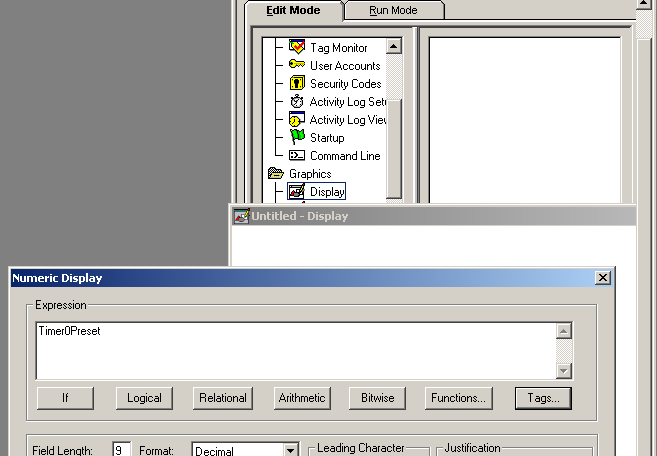
I’ll press OK then test run the project. “Test Run” is the play button on the standard toolbar.
For more information on more modern HMI software, visit the FactoryTalk View ME or SE category Pages!
— Ricky Bryce