
Resolving Connection Not Scheduled error
Anyone who has done work with Controlnet has gotten the “Connection Not Scheduled” error. Although this is easy to resolve, there are a few steps to schedule the connection. As long as you have RSNetworx for Controlnet software, we should be able to fix this issue.
Controlnet works a little bit differently than Ethernet. After changing a scheduled device, we must run RSNetworx for Controlnet to re-schedule the network. Modern Controlnet networks have multiple “Keepers”. The keeper is in charge of the network. The lowest node number on the network that is a keeper capable device (and a valid keeper) is the active keeper. If this node goes down for some reason, the next node on the network that is a valid keeper becomes the active keeper.
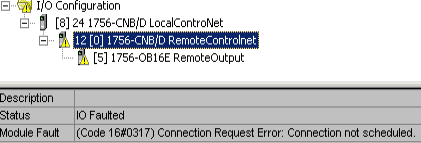
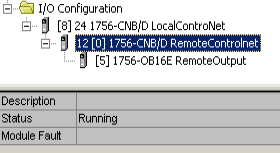
Let’s take a look at our situation. As can be seen, we have caution signs on a few devices. If we look at the first device that we lost, we see the error “Connection Not Scheduled”.
Warning: By using this procedure, each process on the ControlNet link will need to go to “Program” mode. This means your system will likely go down! Be sure you take all safety precautions, back up any necessary files, and disable prime movers (remove any possibility of harm or damage) prior to testing. Be sure you know what you are doing!
RSNetworx for Controlnet
At this point, I’ll open RSNetworx for Controlnet. In this case, I will only have 3 steps to follow to schedule the network. First, I’ll go online with the network. Next, I’ll enable edits on the network. Lastly, I’ll save and re-write connetions to the network. After that, our error should go away. I’m going to schedule the network from scratch. I have no previous Controlnet file to open and download to the network. I use the following procedure to automatically find connection requests and to reschedule the network. This should work as long as no manual scheduling is required (such as in the PLC-5).
Step 1) Go Online with the Controlnet
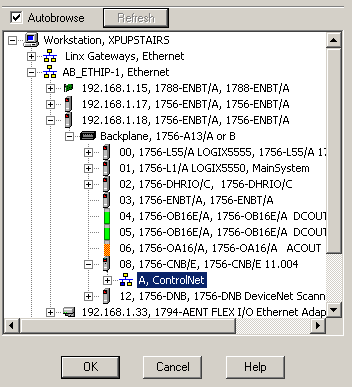
In RSNetworx, click “Network | Online”. Browse for the ControlNet network. Be sure it’s the word “Controlnet” that you have highlighted in the RSWho screen, then press “OK”.
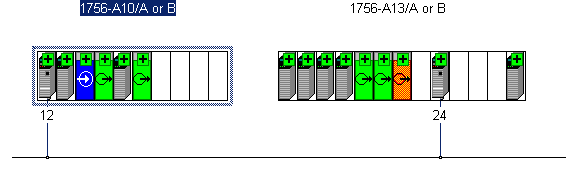
At this point, RSNetworx for Controlnet will browse all of the nodes on the Controlnet Link. Each link might have up to 99 nodes. Let the browser finish, and it will populate the chassis as shown.
Step 2) Enable Edits
In this step, we will simply enable edits on the network, and download the information. I’ll check the box for “Edits Enabled” as shown.

Step 3) Save and re-write connections
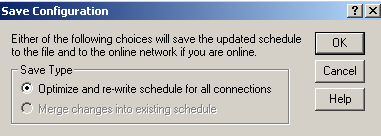
In RSLogix (Studio) 5000, there are still errors on the modules. After this step, the errors should clear. After that the I/O should be working. Click “File | Save”, or the “Save” icon in the standard toolbar. You will see a prompt for a file name and to optimize and re-write connections.
Finally, verify the error “Connection Not Scheduled” is gone. As you can see, we no longer have any faults, and the I/O is now working.
For more information on ControlLogix, visit the ControlLogix Category Page!
— Ricky Bryce