
Introduction to Preparing PlantPAx for PID
In this section, we’ll be Preparing PlantPAx for PID. We’ll assume you already have a running PlantPAx project. If not, you’ll have to install PlantPAx using the PlantPAx process library. Be sure your HMI Images, macros, tags, and global objects are imported. You should also have the required user groups and security codes configured. You will also need to import any faceplates that are common dependencies of PlantPAx features.
PlantPAx 4 requires you to run RSLogix 5000 version 18 or higher. Additionally, your FactoryTalk View version should be 10 or higher.
Basically, in this section, we’ll just import items that we need. We’ll do this both in Studio / RSLogix 5000, and FactoryTalk view. This guide will use FactoryTalk View SE.
Import the Add-On instructions
At this time, you need to have a copy of the PlantPAx process library. If now, download it from Rockwell’s website.
In Studio 5000, we’ll right click the Add-On instruction folder. Next, choose to Import Add-On instructions.
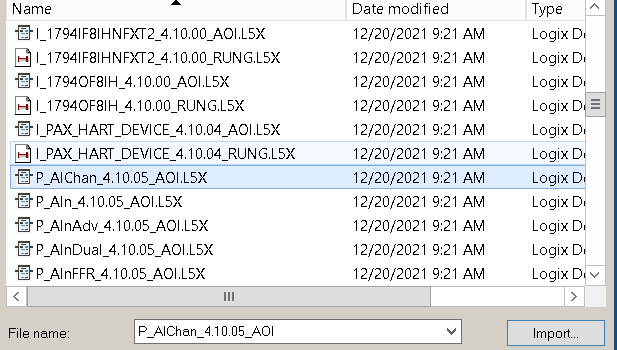
Choose the instruction you wish to import, then press the import button. After that, just hit OK to accept the instructions defaults. Unfortunately, we’ll have to import these one at a time. Please import the following instructions. The version number of your PlantPAx instruction is also included in the instruction’s name.
- P_AIChan
- P_AIn
- P_AOut
- P_PIDE
It’s important to realize that dependencies, such as P_CmdSrc, P_Gate, and P_Alarm will import automatically. For now, we’re just using the P_Aout for the Control Variable as a demonstration. If you are controlling a valve, you could use P_ValveC instead, for example.
Import the HMI Displays
At this point, we are ready to import some faceplates into FactoryTalk view. Because you are limited by your license, we’ll just import the displays that we will need.
In FactoryTalk View, right click “Displays”. Choose to “Add Component into application”. In this case, we can import multiple displays at once.
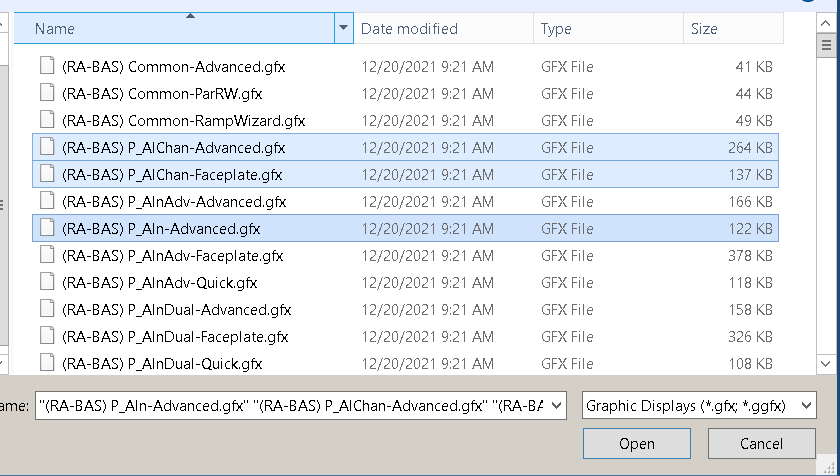
Hold down CTRL to choose the following displays:
- P_AIChan-Advanced
- P_AIChan-Faceplate
- P_Ain-Advanced
- P_Ain-Faceplate
- P_Ain-Quick (You have to scroll down to find this one)
- P_AOut-Advanced
- P_AOut-Faceplate
- P_AOut-Quick
- P_PIDE-Advanced
- P_PIDE-Faceplate
- P_PIDE-Quick
Additionally, there are some dependencies we need to import. In the same way, please import the following faceplates:
- Common-Advanced
- P_Alarm-Advanced
- P_Alarm-Faceplate
- P_CmdSrc-Advanced
- P_CmdSrc-Faceplate
- P_Gate
Finally, there are some trends we will import. We will use these later:
- ProcessPVandCV-Trend
- PVcapture-Trend
- PVctrl-Trend
Create your Navigation Bar
Because we need a navigation bar on every page, we’ll just make this a global object.
Right click Global Objects, and create new. We’ll need four standard buttons. The first button allows us to log in. After that, we’ll add a button to get to the main screen from any other display. The next button will navigate to the Flow Display. Likewise, we’ll need another one to get to the Level Display.

Login Button
Go to the properties of the first button. The release action will be the command “Login”.
The up action will display the caption “Login”.
Navigation Buttons
Similarly, we’ll set up the next button to navigate to the main screen. The release action will be “Display Main”. The “Up Appearance” will have the caption “Main”.
Repeat this procedure for the last two navigation buttons.
Highlight all of your buttons, then go to “Arrange” on the menu bar to group them. At this point, they all act as a single object. This will help when we copy and paste them onto our displays.
Save your new global object screen, and name it “Navigation”.
Create your Displays
Finally, we are ready to set up your displays. Right-click “Displays” and create a new display. We’ll title this display as “Main”. Copy the navigation bar from your global objects that we just created, and paste it onto the main display.
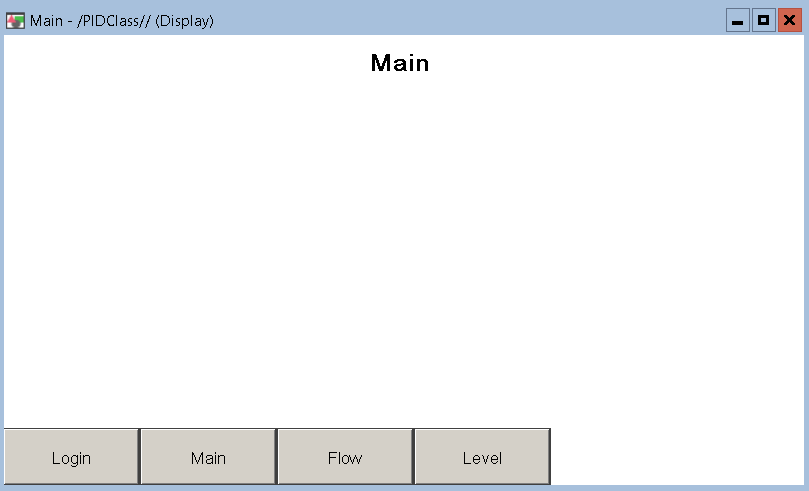
Repeat the same procedure for a new “Flow” display, and “Level” Display.
Create a Startup Macro
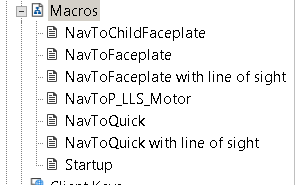
With FactoryTalk View Studio SE, we’ll usually have a startup macro. This startup macro performs tasks that we need to execute when the project starts. To create your startup macro, simply right-click macros and create a new macro.
At this time, we’re only going to have one command in the startup macro. The command is simply “Display Main”. Close your macro, and save it with the name “Startup”.
Your startup macro is now listed in your project explorer tree.
Summary
In short, we had to import required add-on instructions into RSLogix / Studio 5000. Next, we went to FactoryTalk View, and imported required faceplates. At last, we created a few displays, and set up navigation between them.
In the next section, we’ll be adding PlantPAx Objects for PID. We’ll also add trend charts, so we can easily tune the PID from the PlantPAx Faceplates.
— Ricky Bryce