
Introduction to ControlLogix Structured Text Timer
In this post, we’ll cover the ControlLogix Structured Text Timer. ControlLogix supports 4 programming languages: Ladder, Structured Text, Function Blocks, and Sequential Flow Charts. Some vendors prefer structured text over ladder. One reason for this is that they can develop the program without a license for Studio 5000. They might simply write the logic in a text editor. After that, they will paste it into the ControlLogix project.
The Structured text timer works similar to other timers. In this case, we’ll cover the on-delay with reset (TONR).
TONR Operation
Basically, the TONR works a lot like the TON instruction. We enable the timer. Once the accumulator reaches the preset, the done (DN) bit goes high. When the enable bit goes low, the timer resets. Another way to reset the timer is with it’s reset bit.
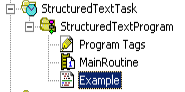
Create a Structrued Text Routine
Basically, I’ve just created a new subroutine called “Example”. The type of routine is structured text. As you can see, I created this example in it’s own task. Don’t forget to add a JSR to the main routine. This allows the Example routine to execute.
Create the Tags
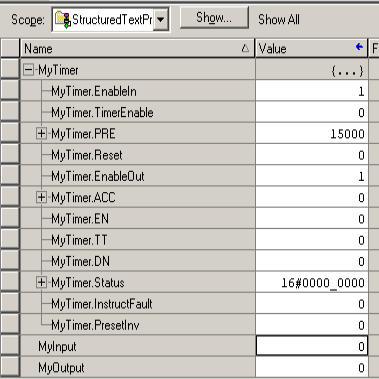
First, we need to create a new tag for our timer. I’ll simply name the tag “MyTimer”. This timer will have the FBD_Timer Data Type.
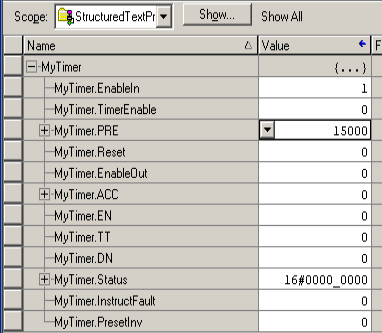
We use this same data type in function blocks as well, so we won’t concentrate on every single bit of the data type. However, there are a few members that we will look at. TimerEnable will enable the timer. This is similar to applying power to the timer. Once the timer becomes enabled, it starts timing. The PRE member is the preset. Notice that I’ve entered 15000 for the preset. Since the preset is in milliseconds, the timer will time for 15 seconds.
The reset member resets the timer to zero. ACC is the accumulated value. This is the value that will increase by 1000 counts per seconds when we enable the timer.
The TT Bit is true as long as the accumulator is running. The DN bit goes true once the accumulator reaches the preset.
Add the Logic
At this point, we’ll open the example routine, and add the logic for our structured text timer. We’ll keep this simple. We don’t need a lot of logic for the timer to operate. I’ve added a couple extra bits to the controller tag database. This allows you to see the logic you might use to control the timer. In this case, I’m adding “MyInput” and “MyOutput”. Both of these tags are BOOL.

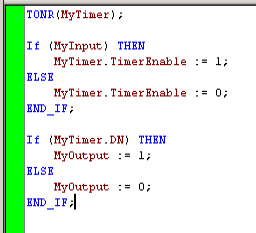
First, we set up our timer using the TONR instruction. Next, we look at MyInput. If MyInput goes true, then we will set the enable bit for the timer. Otherwise, if MyInput is off, we shut off the enable bit for the timer.
In the next structure, we control the output. We simply look at MyTimer.DN. When MyTimer.DN is high, then we turn on the output. Otherwise, we shut off the output.
Now, I’ve finalized the routine edits.
Test the Logic
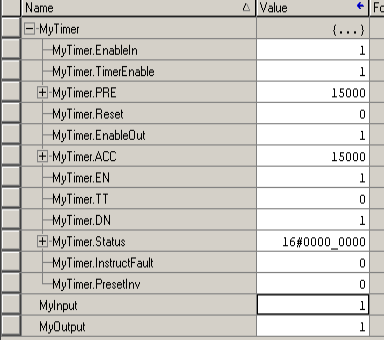
To test this logic, I’ll simply turn on MyInput. you will notice the timer begins to time.
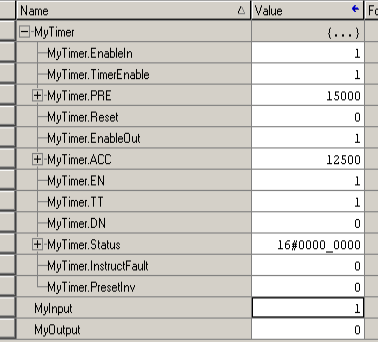
We also see that the EN bit is high, and the TT bit is high.
Once the ACC value reaches the PRE, the timer stops timing, the DN bit goes true, and MyOutput energizes.
As you would expect, when I shut off MyInput, then our output shuts off, and the timer resets automatically. It’s important to realize, however, that we could reset the timer at any time by setting MyTimer.Reset.
Summary
In short, we simply add the timer to our structured text routine using the TONR instruction. After that, we turn on the TimerEnable bit to enable the timer. Once the accumulator reaches the preset, the Done (DN) bit goes high. We can use this DN bit to control other logic. When we shut off the TimerEnable bit, the timer resets back to zero.
For more information, visit the ControlLogix Category Page!
— Ricky Bryce