
Introduction to XModem over Ethernet WiFi
To set up XModem over Ethernet WiFi, we’ll have to get a few things set up first. In this case, I’m running Debian Bullseye. I will be using Minicom in this example. I’m transferring a file to an AltairDuino. You can get these at the AdWaterAndStir website. It’s important to realize that although this configuration worked for me, you will need to test the procedure with your setup. Additionally, be sure to verify the contents of the file that the Altair receives. The AltairDuino 8800 is a great project that Chris Davis put together. It teaches you how computers really work instead of the “smoke and mirrors” that today’s computers use. For information on how to add an ESP-01s to your AltairDuino Pro, check out this video.
It’s important to realize that you can transfer files with your USB cable as well. In this case, I had to reduce the baud rate to 9600 to get it to work.
Configure the ESP-01S for “Pass-Through”
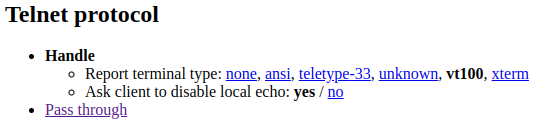
First, we have “WifiModem” firmware on the ESP-01s. Be sure to connect this to your local network. In your web browser, we’ll enter the IP address of your ESP-01. Scroll down until you find the telnet protocol. I’ve left this to “Handle” I have tried this with “Pass through” as well, and it seems to work OK. I’m not sure what the difference is between these. It looks like “Handle” reports the terminal type.
Map a virtual COM port
For minicom to work, it needs to connect to a communication port on your PC. At this point, we’ll map the connection to “/dev/virtualcom0” on your linux computer. If you are running Windows, you might try software such as TCP2COM.
To map the virtual port in Linux, I used this command: socat pty,link=/dev/virtualcom0,raw tcp:192.168.1.100:23&
Configure the AltairDuino to Receive Data
At this time, we need to set up the client to receive data over the XModem protocol. Be sure that you apply power in such a way that it loads the configuration to use your ESP-01s. Next, with switches 12, 13, and 2 on, press Aux1 down to mount this disk. Once you mount the disk, we need to boot to this disk. Turn on switches 3, 2, and 1 and press Aux1. This will boot to CPM. You could mount any other disk instead that boots to CP/M. You must also have the PCGET command available.
Connect to the AltairDuino via Minicom
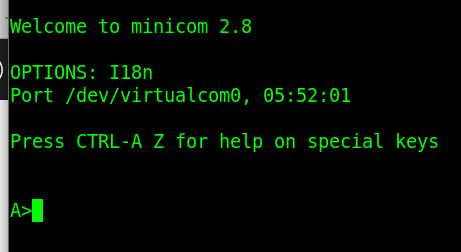
If your standard user does not have privileges to access virtualcom0, then we’ll have to run this as sudo. Run the command “minicom -D /dev/virtualcom0”. At this point, press ENTER, and you should see your A> prompt. It’s important to use the capitol -D after minicom. It’s important to realize that it’s not always a good idea to run a program as super user. Especially if there is a way to run the program as a standard user. For more information on how to set up the permissions, check out this post.
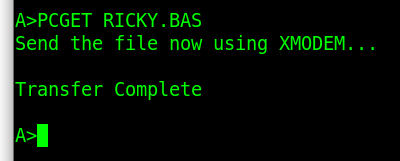
At this time, I’ll type “PCGET RICKY.BAS”

Obviously, you are now ready to send the file from your Linux Machine.
Send the file from MiniCom
You are now ready to send the file. In this case, I’m sending the file, RICKY.BAS to the AltairDuino computer. Press CTRL-A then Z. These are the default settings to bring up the menu in Minicom.
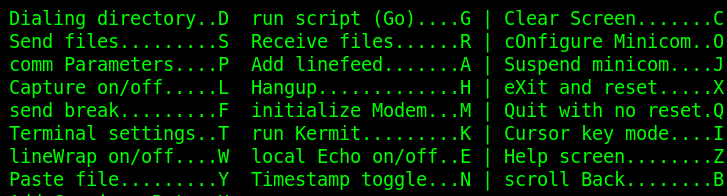
Press S to send the file.
Choose “XModem” from the menu.
Press ENTER to select the Path and File Name.

At this point, your transfer should be complete.
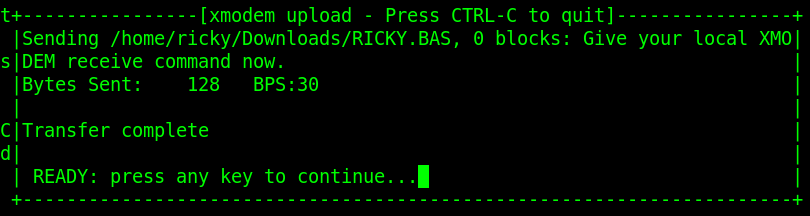
After you press any key, you will see the PCGET command also acknowledges the transfer is complete.
Additionally, the DIR command shows the file exists.

Test the File
Since this is a BASIC file, I’m going to load MBASIC at the command prompt.
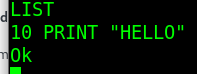
Next, I’ll LOAD “RICKY.BAS”.
Then simply list the contents.
Summary
In short, sending files over XModem is very easy. Simply connect to the terminal, and type “PCGET FILENAME”. Secondly, press CTRL-A then Z. Hit S to send the file. Enter the file location, and your file will send.
For more information, check out the Main Site!
— Ricky Bryce