
Introduction to Geoff Graham’s VT100 Terminal
Geoff Graham’s VT100 Terminal is a hardware emulator. This is a simple board that you can build yourself for a very reasonable price. I purchased a pre-built module on Ebay. There are several versions of this board. For instance, you can use a configuration that supports a PS/2 keyboard. Another version supports a USB keyboard. Additionally, you can choose a configuration with composite output or VGA output for video. You can configure the baud rate through jumpers, or set it up for software configuration. You can also obtain power through USB or through an on board power connector (just pay attention to your jumpers). Some setups might require RS232, and others require TTL. This board is very versatile, and allows you to work with either one.
In this post, I’ll be connecting to an industrial module, which is the 1747-BAS module. This is a BASIC module for the SLC-500. Take a look at the user’s manual for information on setting up the baud rate, port mode, etc.
VT100 Hardware
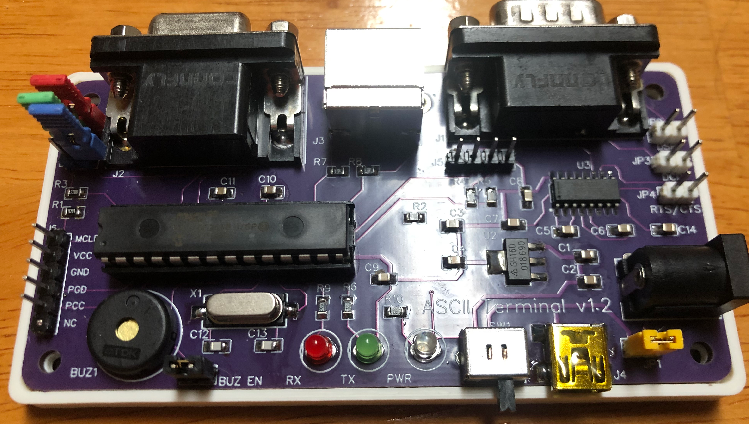
The board is very simple even if you built it yourself. I’ve built one of these before as part of the Altairduino. It’s always been very stable. As per Geoff’s recommendation, I moved the red and blue jumpers to an unused position. Obviously, this gives us a screen with the classic black background with green text. You also have a header for TTL, and a jumper for your power source. Additionally, you can disable the buzzer on the board. In my case, I just powered the module from a standard USB power adapter.
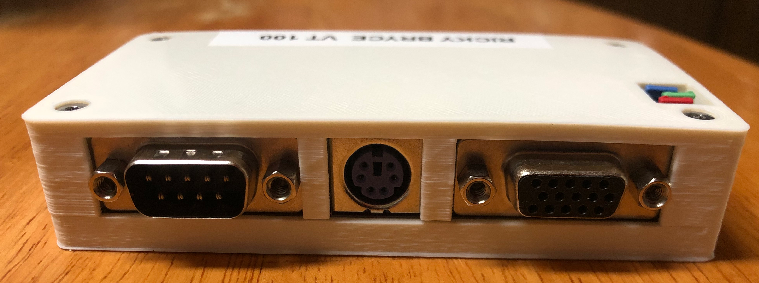
On my particular module, I have VGA Output, a PS2 Keyboard connection, and a 9 pin D-Shell for RS232. As I said before, you can use different configurations of this board such as composite video out, and a USB Keyboard. Just make sure to choose the version of the board that meets your needs.
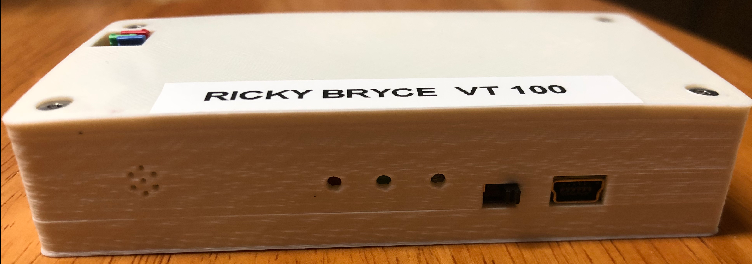
The front of the case allows you to see the status of power, transmit, and receive. Additionally, you have a power switch.
Terminal Setup for Geoff Graham’s VT100 Terminal
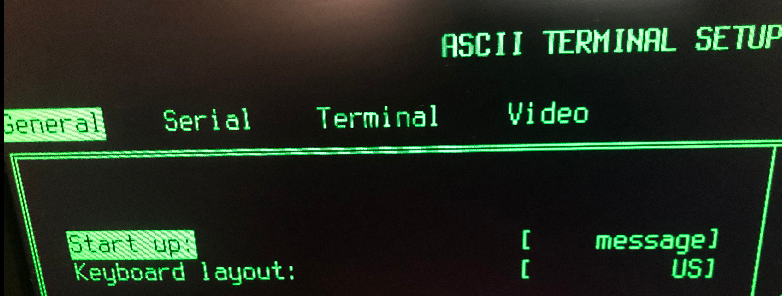
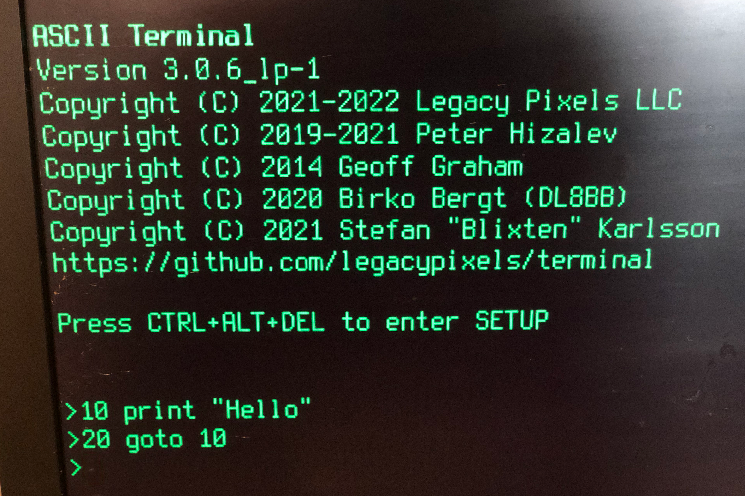
On this particular board, the startup screen tells us how to get into configuration mode. I just pressed CTRL-ALT-Delete. The on-screen documentation guides you through how to navigate the menus. Keep in mind that the baud rate, stop bits, and parity must match the device you are communicating with. The terminal is pretty much instantly on and ready when you power it up. Under the General Tab, you can disable the initial power on message, and keyboard layout.
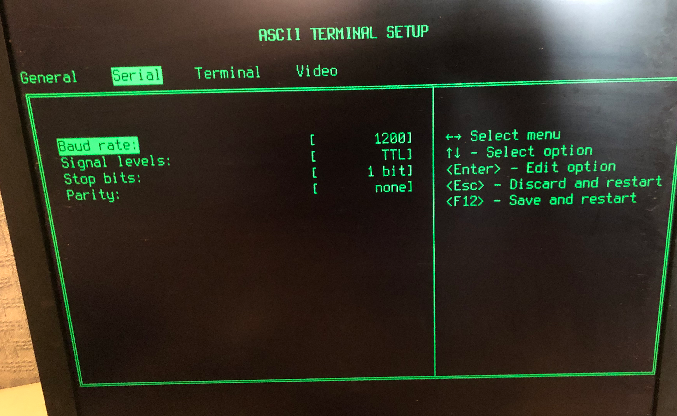
The serial tab allows you to select the serial parameters.
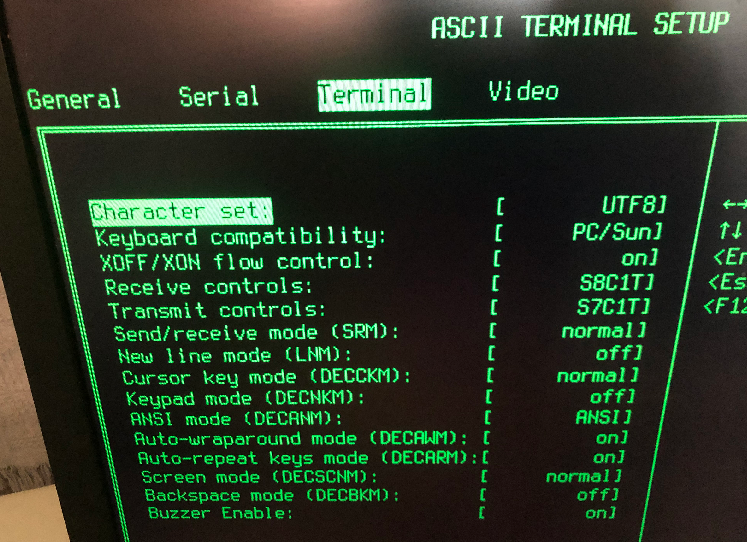
On the other hand, the terminal tab allows you some more customization of the terminal’s behavior.
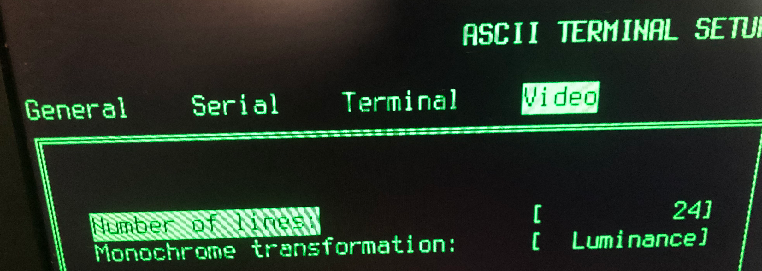
The video tab allows you more configuration of the display itself, and the number of terminal lines.
Once I configured the terminal, I was able to easily access the 1746-BAS (BASIC Module) for the SLC-500.
Summary of Geoff Graham’s VT100 Terminal
In short, this is a very nice ASCII terminal. It’s very small, and does it’s job very well as a stand-alone terminal. Basically, you can connect to virtually any ASCII field device without tying up your PC. This includes some field devices such as industrial bar code readers, and vintage computers. Just be aware of all disclaimers. Always use properly certified equipment in an environment with potential danger to equipment and personnel.
The pre-assembled cost is around $50 USD. Depending on the configuration you need, you can probably build this with parts you have laying around. If you don’t have a programmer, such as a PICKIT though, you may want to purchase a PIC chip that is pre-programmed with your desired version.
For more information on industrial controls or vintage computers, please visit my main page!
— Ricky Bryce