
Introduction to the ControlLogix FOR Instruction
The ControlLogix FOR Instruction allows us to execute a routine for a specific number of times. To understand how a FOR loop works, let’s go back and look at some examples of BASIC from 1975. In this example, we will print the value of 1 to 10 to our screen.
10 FOR X = 1 TO 10
20 PRINT X
30 NEXT X
40 END
Let’s take a look at another example. In this example, we print “HELLO” to the display 5 times.
10 FOR X = 1 TO 5
20 PRINT "HELLO"
30 NEXT X
40 END
In ControlLogix, this is important for use in Indirect Addressing. We can use X as our index. For example, if we want to calculate the volume of 32 tanks, we can just use the same logic over and over again. We just use X to represent the tank number. Each time we call a subroutine, we increment X to perform our volume calculations on the next tank.
In this post, we’ll take a look at a simple FOR instruction just to understand it’s operation.
Create the Subroutine and Tags
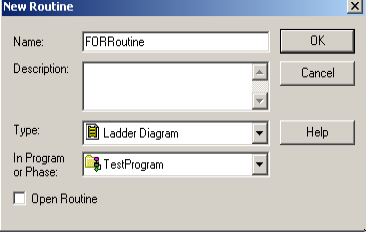
Before we set up the FOR Instruction, we’ll set up a new subroutine and tags. First, we’ll create a routine called FORRoutine. We’ll just make this a ladder diagram. Do not add a JSR to this routine. We will call this routine through the FOR Instruction later on.
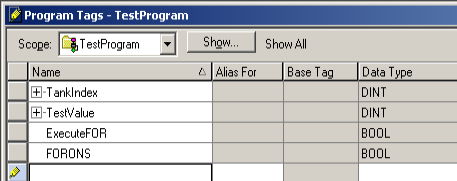
At this point, we’ll create a couple tags that we’ll need to demonstrate the FOR Loop. These tags will be “TankIndex”, and “TestValue”. Both tags will have the DINT data type. Additionally, we will have two BOOL bits. ExecuteFOR will be the bit we toggle to test our loop. We’ll create FORONS as a tag for a one shot. The purpose of this tag is to execute the FOR instruction just one time when we toggle our ExecuteFOR bit.
Add the ControlLogix FOR Instruction
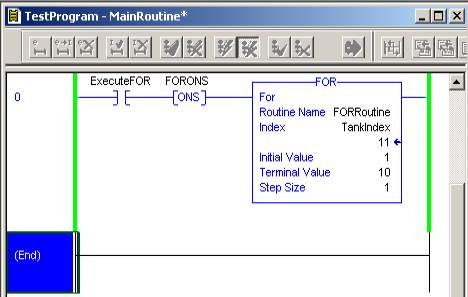
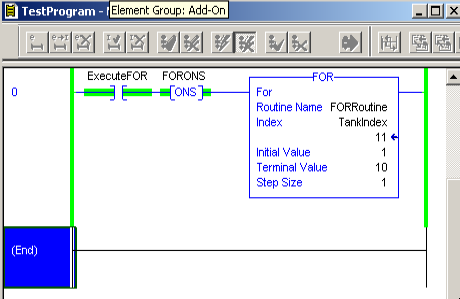
In the MainRoutine, we’ll add our FOR instruction. The routine that we call is “FORRoutine. The Index is our variable. This will reflect how many times the loop executes. Obviously, this will start at the Initial value. It will end at the terminal value. Our Step Size is how much the index will change by each time the loop executes. When we toggle the “ExecuteFOR” bit, the FOR instruction executes just one time. This is because of our ONS instruction. Without the ONS, the FOR would execute every scan. There is nothing wrong with executing the FOR every scan though if that is what you need. It’s important to realize, though, that it will affect your scan time.
Add Test Logic
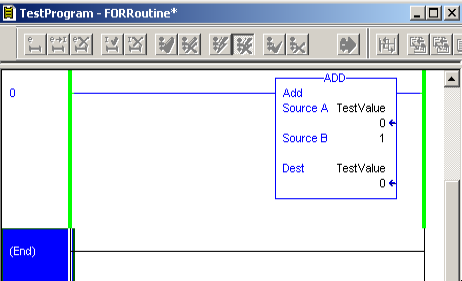
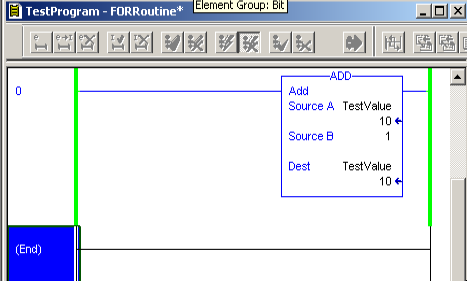
At this point, we’ll add some logic to the FORRoutine so we can verify that our loop did execute 10 times. We’ll just use an ADD Statement.
In the MainRoutine, toggle the “ExecuteFOR” bit.
Now, let’s go look at the ADD instruction in the FORRoutine.
As you can see, the test value is now 10. This means that our loop executed 10 times.
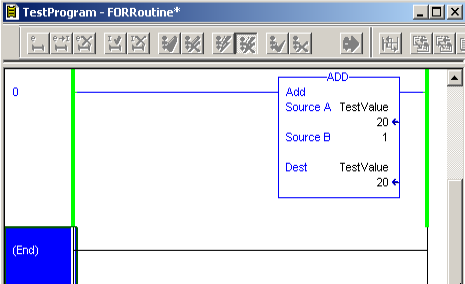
Toggle the “ExecuteFOR” bit off then back on. You will see the test value increments to 20.
Summary of the ControlLogix FOR Instruction
In short, the FOR instruction will execute a routine a specific number of times. Each time the routine executes, the index changes according to the step number. Typically you will use this in indirect addressing to perform calculations on an array of similar pieces of equipment. This includes tanks, motors, or valves. The FOR instruction sounds intimidating, but it’s operation is very simple. It’s a cornerstone command that is in nearly every programming language including BASIC, C++, PASCAL, PHP, and Java.
For more information, visit the ControlLogix Category Page!
— Ricky Bryce