
Introduction to Compiling CP/M for the Z80 Processor
When Compiling CP/M for the Z80 Processor, we’ll start with Donn Stewart’s documentation for the CPUVille Z80 Single Board Computer. Each compiler is picky about a few different things, so it’s important to realize that I’m using the z80asm assembler for this post (V1.8). I’m running Debian Linux.
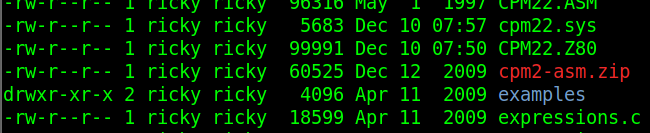
Basically, we just need to download the CP/M Source code. After that, we’ll make a few changes. Then we’ll compile the source code into a binary. Finally, we’ll check the size to be sure it’s the correct length of 5683 bytes.
Installing the Assembler
In my home directory, I created a folder called “a80”. After that we’ll switch into the a80 directory using the cd command. Personally, I start all directories containing assemblers with the letter “a”, so I can keep track of where they are on my Linux machine. However, you can name this directory anything you like.
mkdir a80
cd a80
Next, we’ll use the wget command to get the assembler. I’m using version 1.8.
wget http://download.savannah.nongnu.org/releases/z80asm/z80asm-1.8.tar.gzOur next step is to extract the files.
tar xzvf z80asm-1.8.tar.gzAt this point, we’ll go into the directory of the files we just extracted.
cd z80asm-1.8Now we need to build the assembler with the “make” command.
makePreparing CP/M
At this point, we are ready to prepare CP/M for assembly. We’ll need to download the source code, then make a few changes. First, we’ll set up CP/M for 64K. After that, we’ll change some of the old 8080 statements to work with the Z80 assembler. Finally, there are a few other specific changes we need to make that are specific to the compiler we use. For this compiler, all of the labels in the source code need to end with a colon. I noticed however, with some of the other compilers, there must be at least a space after the label. These errors should be obvious when you compile your code under any assembler when you view the list file.
First, let’s download the source code. I’m still in the z80asm-1.8 folder.
wget http://www.cpm.z80.de/download/cpm2-asm.zipNow we need to unzip this file.
unzip cpm2-asm.zipAt this point, we’re ready to make some changes as per Donn’s instructions at CPUVille. I’ll be using kwrite to make these changes, but any standard text editor should work fine.
It’s important to realize that it’s the CPM22.Z80 file that we will be editing.
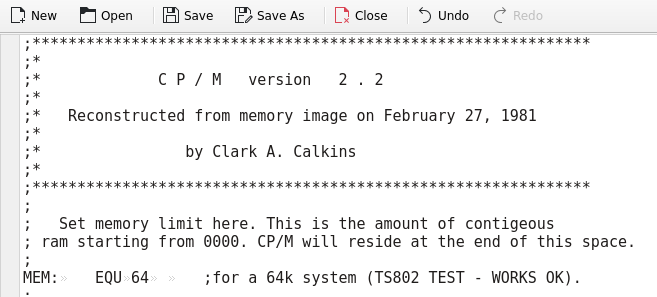
kwrite CPM22.Z80SET MEM Length
The very first line of code has the MEM label. We’ll set this up as follows for a 64k system:
Correct the code for Z80
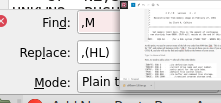
At this point, we need to convert some of the left over code from 8080 into Z80. This is a simple search and replace. Just search for “,M”, and replace all instances with a “,(HL)”. You can do these one at a time if you are more comfortable with that. Just press CTRL-R, and you will see the find and replace fields at the bottom of your screen.
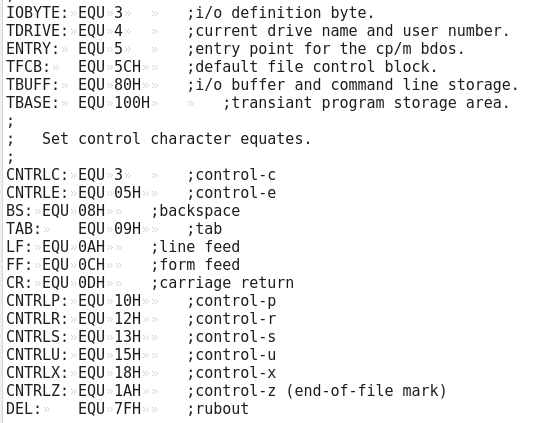
End all Labels with : for z80asm Assembler
Next, we need to add a colon “:” after all of the labels. Thankfully, there aren’t many of them that need this, and most of them are at the top of the code. Aside from the labels at the top, we will need to search our code and put a colon after the following other labels: NFUNCTS, STKAREA, CCPSTACK, NUMCMDS. Be sure to only place a colon after the labels, which are on the far left side of the code.
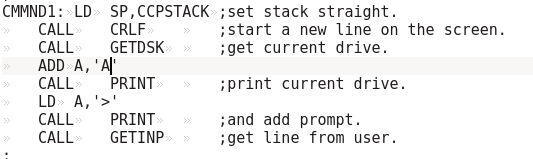
Set the Command Prompt to Capitol A
At this point, we’ll change the command prompt to display a capitol letter A. Search for the label CMMND1. You can set this up as follows. You might have to hit “Find Next” a few times to get to this block.
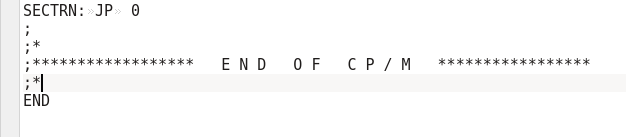
Add the END Statement
At last, we need to terminate the code with an END statement at the very bottom.
Compile, and Verify CP/M
Finally, Compile CP/M.
./z80asm -i CPM22.Z80 -l -o cpm22.sysAt this point, we’ll verify the size is 5683 bytes.
Summary of Compiling CP/M for Z80
The Z80 Single Board Computer at CPUVille is capable of running CP/M. To get the most out of this machine, you may want to install this onto an IDE drive. We simply install an assembler, download the CP/M Code, and make a few changes. After that, you’re ready to compile the source code, and follow the instructions for getting CP/M up and running on this machine!
For other posts, visit the Vintage Computer Category Page!
— Ricky Bryce