
Introduction to the CPUVille Single Board Computer (8 bit)
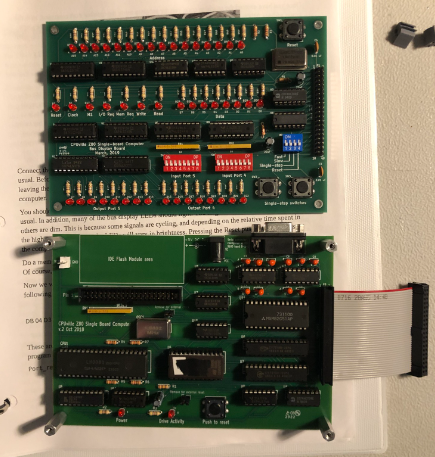
The CPUVille Single Board Computer is a kit that you can purchase, and assemble yourself. Additionally, you can buy a kit that is already pre-assembled. This is kit has a Z80 processor, and is fully capable of running CP/M. To run CP/M, you just need to set up your own IDE Hard Drive, CompactFlash module, or DOM (Disk On Module).
This is a good kit for learning the very basics about computers. Even though this is a vintage type processor, the main concepts of computers still apply in today’s world, and probably always will.
I would also recommend the Bus Display kit, which displays the Address Bus, Data Bus, Processor Status, and some I/O that you can program. This kit takes about a day to put together (Including the Bus Display Board) with plenty of breaks. The bus display kit also provides you with a slow clock, and single step option. This kit stacks on top of the main board.
It’s important to realize that you will need your own regulated 5v power supply. Be sure this only puts out 5v! The dimensions of the power jack are 2.1mm x 5.5mm.
You can also buy a logic probe kit (on the site) that plugs right into the 5v connector on the main board. This is a good tool for troubleshooting, and also a good tool for learning how each component on the board works.
The instructions for this kit are very detailed, and well thought out.
CPUVille Single Board Computer Monitor
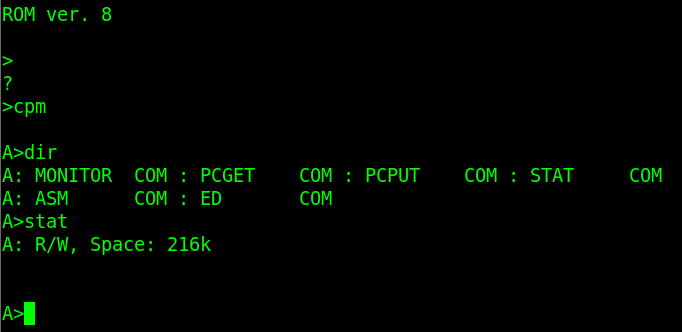
The Monitor program will automatically come up when you power up the board. Connect through a terminal emulator at 9600/8/N/1. You will need a straight serial extension cable (not null modem). If you use a standard serial cable, you will probably need a male-male adapter.
The monitor supports commands such as Binary Load (bload), load, run, jump, dump and save. The bload command allows you to load binary files onto the machine. On the other hand, load allows you to enter hex data. Obviously, run (or jump) allows you to run a program, and save will save blocks of memory to the drive. Be sure to enter these commands in lower case. When you enter hex data with the load command, however, the hex characters must be in upper case. You also have a help command in case you don’t remember these commands six months from now.
If you like to write your own programs in assembly, the z80asm assembler in Linux is the one I prefer. There are many options available though. You will also need an assembler to compile CP/M if you wish to set this up on the machine.
Running CP/M
CP/M will take a little bit of work to set up, but as I said before, the instructions are very good. You will need a storage device attached to the IDE Port. This can be a hard drive, CompactFlash, Disk On Module (DOM), etc. You can see the instructions to find a list of compatible drives. Donn has said that CompactFlash modules over 2GB will not work for some reason.
Basically, when you follow the steps in the manual, you will just follow the procedure to test your storage device. Before you compile CP/M, there are a few corrections to make to the source code. After that, you will compile CP/M from your ASM file, and transfer a few files onto your storage device. This will give you a bare CP/M system.
Once you put the CPUVille PCGET command on your drive, though, you can easily transfer CP/M’s transient commands through XModem. Examples of terminals for XModem are Minicom (Linux/MAC), ExtraPUTTY, and TeraTerm. Using XModem, I was even able to install and run Zork1 very easily, and it worked the first time! After you transfer CP/M’s ASM.COM file, you can even use the machine itself to compile your programs @.org 0100. (This is the memory location where your user programs start under CP/M.)
Summary of the CPUVille Single Board Computer
In short, this kit gives you very good value for the cost. This is not an emulator. It runs an actual Z80 processor. You will likely use a terminal emulator, though to communicate with the board, and program it. The instructions are very good, and it’s an easy kit for beginners with minimal soldering skills. I would just tape a few components in place at a time, then go back and solder them. The board booted on the first try.
For information on other vintage computers, visit the vintage computer category page!
— Ricky Bryce