
Introduction to the Z80ASM on IMSAI 8080 (Assembly Language)
Running Z80ASM on the IMSAI 8080 allows you to assemble a program right on your IMSAI. In other words, you don’t need to rely on another computer to assemble your program. You can create a text file containing your program. After that, you can use the assembler to generate a .COM file. Finally, you can run this .COM file on your IMSAI under CPM.
Obviously, you have a choice of editors that you can use to build your program. In this case, I’m just going to use WordStar 4.0. To ensure there is no WordStar formatting, we want to create a “Non-Document” file.
There are different assemblers called Z80ASM. However, I’m going to use the 1983 version by SLR Systems. Currently, you can obtain a copy of this assembler on the retroarchive website. Additionally, you can download a manual for the Z80ASM from the S100Computers website.
Create Your Program
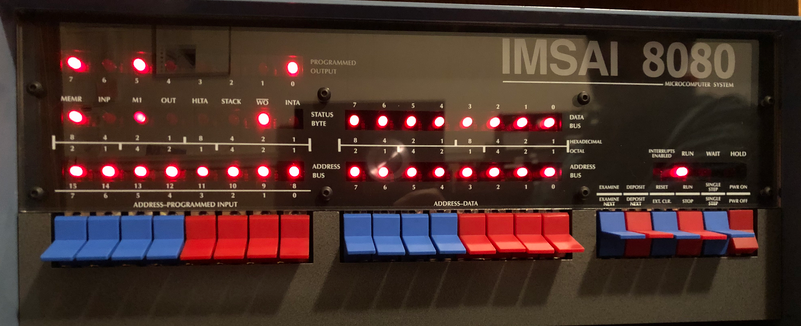
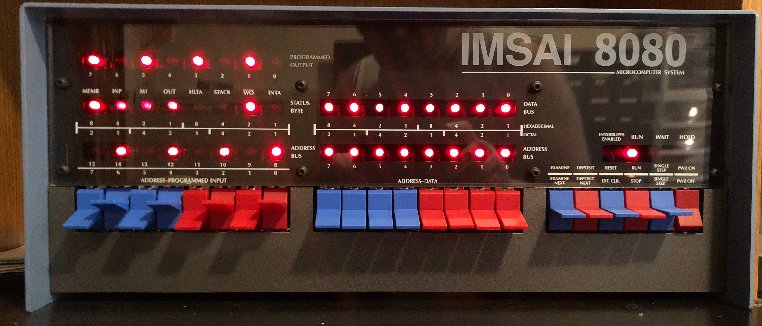
In this case, we’ll create a program that simply reads your sensor switches (Address switches 8-15). Next, it will write the inverted value of your switches to your programmed output. These are the LED’s at the top left of your IMSAI.
I’m using WordStar 4 for this, but you can use most any standard text editor. You can download WordStar 4.0 from the WinWorld website.
Currently, I have WordStar on my hard drive, which is drive I. I will be storing the program on a blank floppy disk in drive B.
We’ll run WordStar, and create the program as follows:
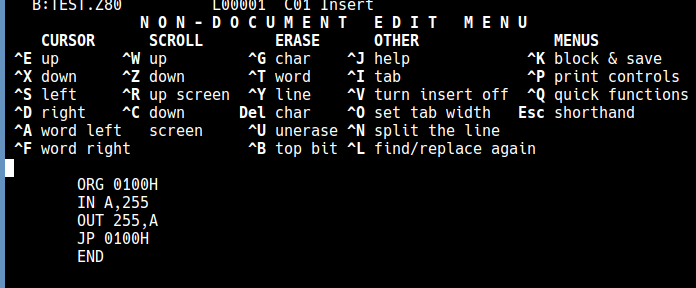
Be sure to place a tab, or a couple spaces before each command. Otherwise, the assembler will think your text is a label instead of a command.
At last, we’ll save this file to “TEST.Z80” on the B: drive.
Assemble Your Program
At this point, we are ready to run TEST.Z80 through the assembler. The assembler already anticipates that our extension will be “.Z80”. We do not need to add this. However, when we run the assembler, we do need to specify the source drive, destination drive, and which drive we want our program listing on. In this case, they will all be drive B. We’ll also use the “/F” flag for a full listing. Use the manual to get a better idea of every command, and the other options available.
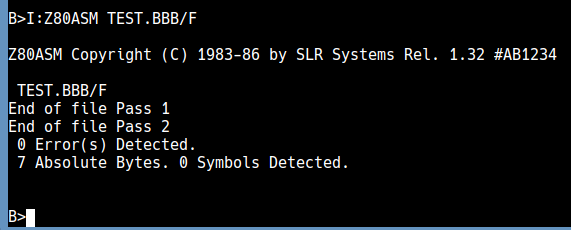
I’m on the B: Drive now. Keep in mind that my assembler is on drive I, and TEST.Z80 is on drive B. Therefore our command will be:
I:Z80ASM TEST.BBB/F
After you press ENTER, you should have no errors.
At this point, you can perform a directory listing to see if the assembler is generating the files we wanted.
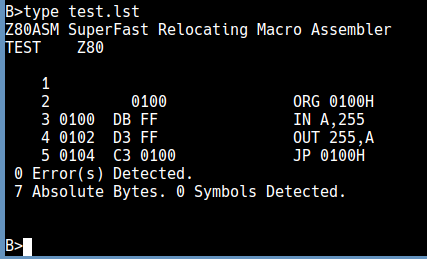
As you can see, we have the original TEST.Z80 File. Also, we have the executable, which is TEST.COM, and the listing file which is TEST.LST.
Let’s take a look at the listing file.
Run Your Program
Keep in mind that we do not have a way to exit back to CP/M. The purpose of this section is to simply demonstrate the assembler. Once we run and test the program, you will need to hit the EXT.CLR button to return back to CP/M.
To run the program, simply type “TEST” at the B prompt.
At last, you are ready to check your switches and lights. Remember, the value of the LED’s will be inverted.
As you can see, our program is running.
Summary of Z80ASM on IMSAI 8080
In short, you just need a text editor and the Z80ASM assembler for this to work. Write your program in the text editor, then save your work with a .Z80 Extension. Run the assembler with your program’s file name in the command line. Be sure to include the source and destination disks… (ie: I:Z80ASM TEST.BBB/F). Use the /F to flag a full file listing. This file listing is useful for troubleshooting your code.
For a full instruction set, read the Z80CPU Manual.
For more information, visit the Vintage Computers Category Page!
— Ricky Bryce