
Introduction to running your IMSAI 8080 on the Internet
When running your IMSAI 8080 on the Internet, keep in mind that the machine is from 1976. This was long before the Internet as we know it became popular. Although we can connect the IMSAI 8080 to the Internet, we cannot browse web pages. At least not in the way that you are accustomed to in modern computers.
Before the Internet became popular, there were BBS (Bulletin Board Systems). Users would dial into these systems to email each other, share files, and make announcements. For the most part, these systems simply use ASCII. In other words, you will not see pictures unless someone became creative with ASCII art.
There are still many BBS systems running today. Most of them run over Telnet, so you do not need a dial-up modem. We can simply use a WIFI modem which emulates a dial-up modem. That way, we don’t have the expense of long distance phone calls. We don’t even need a phone at all.
In this section, I’ll explain my procedure for connecting to these BBS systems with the IMSAI 8080esp. I’ll use KERMIT to connect to my bbs at EthernetGateway.com. If you don’t already have one of these vintage computers, you can order a kit from Dave at The High Nibble.
Configuration
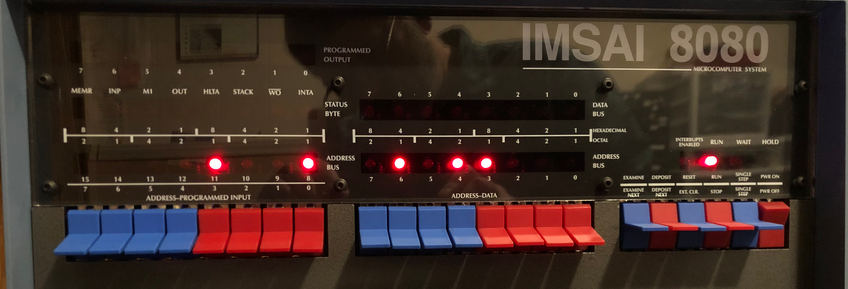
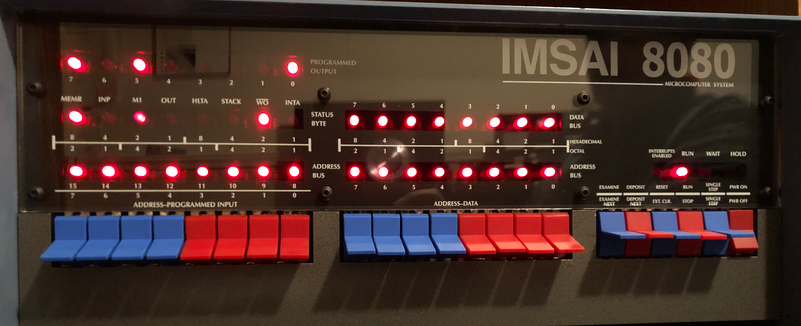
Before we begin, I’ll explain my configuration. If you leave the power switch off, and hold examine, then hit the hardware reset button, you will enter configuration mode. It’s important to realize the reset switch on the front panel will not get you there. You must use the reset button the ESP, on the side of your computer, or simply cycle power to the IMSAI while holding “Examine”.
I’m set up to boot to CP/M with banked memory. I’m in Z80 mode at 4MHZ, and set up as WIFI STA with the WIFI already connected to my router. In other words, I’ve set up the following switch pattern for configuration: 000 1001 0101 1000. Press “Deposit”, then you can hit “Reset” on the front panel. Turn on the power switch. Once the IMSAI, comes up, you can hit the “RUN” switch. At this point, the IMSAI will boot to CP/M.
Mounting the COMMS Disk
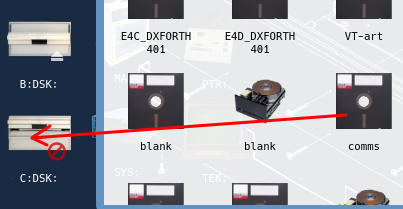
If you have the S-132 terminal, simply press CTRL+ALT+F6 to mount the comms disk from your library. In this case, I’m mounting the disk to drive C. On the other hand, if you are using the WEB insterface, simply be sure that no disk in in your target drive. Drag the COMMS disk from your library, and drop it on drive C. (Note: B or D will work just fine as well.)
Using Kermit
At this point, we’re ready to open Kermit. You can use a variety of other software as well. Remember our modem is on port UC1 (2SIO.PortB). We will need to set this up in Kermit. Open your TTY Terminal.
First, to open Kermit, go to your drive C. (Type C: then press ENTER). DIR will give you a directory listing. At last, just type “kermit” without the quotes to run the terminal program.
Next, type “set port UC1”, the press enter. Finally, type “connect”, then enter again.
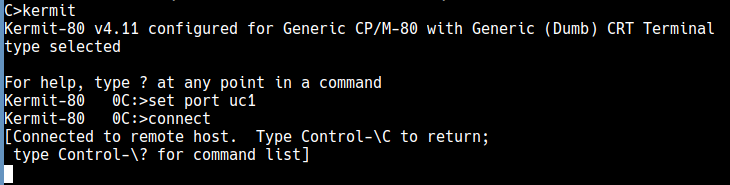
At last, you are ready to connect to the BBS. Type “ATDETHERNETGATEWAY.COM”
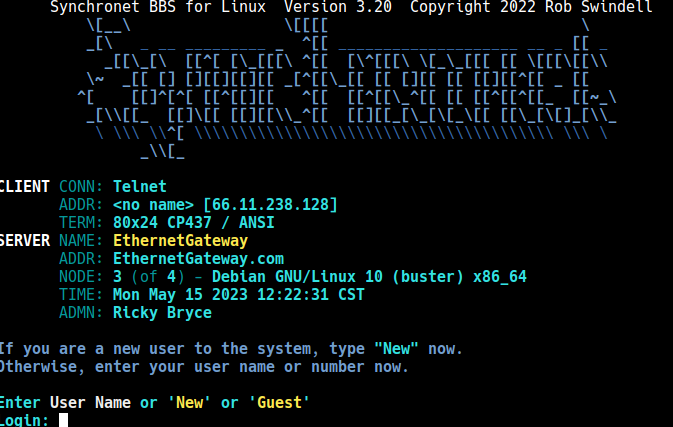
At this point, you will see the Synchronet Login Page!
Summary of IMSAI 8080 on the Internet
In summary, you just need to have your IMSAI in a configuration to boot to CP/M. After that, mount your comms disk. Then open your terminal program and set the port to UC1. Type Connect, then ATDbbsname. Other terminals are available such as QTERM, and IMP8 Just be sure to configure them for the port that your modem is on.
For more information, visit the IMSAI Category page!
— Ricky Bryce