
Introduction to Building the Southern Cross Computer
Building the Southern Cross Computer is very easy, even for beginners. There are no surface mount components, and the soldering pads are large, and durable. The purpose of the Southern Cross Computer is to teach you how computers work. You can find the user manual on Steve Justin’s Github page.
In this section, I’ll go over some of the features of the Southern Cross Computer, and display some useful links that will get you started.
Obtaining the Parts
The circuit boards are available on PCBWay. Craig Jones posted the design of the latest board, which is version 3.2. You can just add the boards to your cart, and in a few days, the boards are complete, and on the way to your home. On the other hand, if you only need a few of these boards, I noticed they are sometimes available on Ebay.
On his Github page, you will find the parts list. Most of the parts are very common. In this case, I purchased some standard buttons with a square head. After that, I 3d printed the button caps, and used standard labels.
Furthermore, from Jameco, I purchased the speakers, and the 27C64 EPROM. Jameco had a “Grab Bag” of these chips, which were 10 for $10. Hence, they needed to be cleaned and erased. Keep in mind that to erase these EPROMs, you will need a UV eraser. Additionally, you will need a way to program the chips. I used the T48 Programmer to burn the monitor code.
Building the Board
Basically, the build is pretty standard. Just start with the lowest profile parts first. Obviously, this would be the resistors and diodes. After that, build your way to the taller components. If you are inexperienced, be sure to check each segment of the displays. They are difficult to remove from the board once you have soldered them.
As you can see, I bypassed the rectifier and voltage regular. This is because I’m supplying the board with a regulated 5v power supply. Above all, do not connect a power supply above 5v if you bypass the regulator! Unregulated 5v power supplies can output more than 5v, depending on the load, so be careful!
In this case, I did not have the 100 ohm resistor banks. Subsequently, I used eight 100 ohm resistors, and mounted them vertically
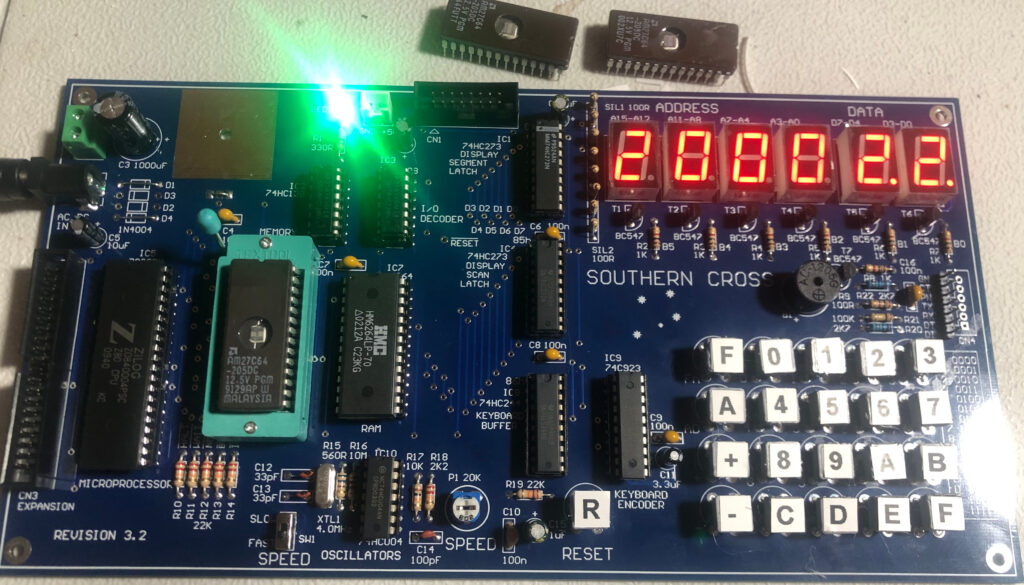
Meanwhile, be careful if you use cheap sockets for the IC’s. If you aren’t careful, you could push a pin out of a socket when soldering. In this case, I am using a ZIF socket for the EPROM. That way, I can easily update the monitor in the future, or add extra code on to the IC.
Moreover, be sure to place the diodes, speaker, and electrolytic capacitors are inserted the right way. Also, be sure to place your IC’s and display digits in the proper direction.
Running the Southern Cross Computer
Keep in mind that the user manual is your friend. This is very well written. It will guide you through step by step on how to program the machine. Once you are familiar with the basic operation, you can add other devices through the expansion port. Another key feature is the ability to download to the machine from a standard computer. This would save you a lot of keypad strokes.
The computer has many built in functions. Consequently, you can test your machine before even learning how to write a problem.
Summary of Building the Southern Cross Computer
In short, you can build the machine in just a few hours. Your next step is to start walking through the examples in the manual. You will learn about how computers work in general. Additionally, you will learn exactly how 7-segment displays work. I’m getting a lot of enjoyment out of this machine, and I’m sure that will continue many years into the future.
For more information, visit the Vintage Computer Category Page!
— Ricky Bryce