
This document will walk you through my personal preference for creating an arduino database and tables to log data from your project to this database. In this particular example, we will set this database up to log level, temperature, and humidity. You will need to already have a server setup in a LAMP configuration. If you do not have this set up already, please use this procedure to configure a VPS.
https://bryceautomation.com/index.php/configuring-virtual-private-server/
Once you have a server set up, we will install webmin onto the server, and use webmin to configure our database graphically.
Step 1 — Webmin Download
Go to http://webmin.com, and select the Debian Package
Step 2 — Copy the Link Location
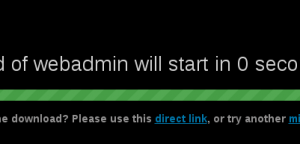 We want to download the debian package onto the server, and not onto our computer. We will cancel the popup that prompts us to download the file to our computer, and right click the direct link, and copy the link location (or link address). We will use this link location to download the file onto our server.
Step 3 — Download the file onto our web server
Log into putty as root. We will type cd /root to enter our root home folder. then type: wget:http://downloads.sourceforge.net/project/webadmin/webmin/1.820/webmin_1.820_all.deb?r=http%3A%2F%2Fwebmin.com%2F&ts=1482526185&use_mirror=pilotfiber
That’s wget, then a space, and paste the link you copied from the download page. This will download the file we need to install webmin.
Step 4 — Rename the file
Let’s rename the file, so it is a bit easier to work with… Again, assuming this is the only webmin file in this directory. mv webmin* webmin.deb
Step 5 — Install Webmin
To install webmin, type dpkg -i webmin.deb
Step 6 — Fixing errors
We have some dependency errors that we need to fix. Type apt-get -f install
Step 7 — Logging into Webmin
Now, in your web browser, you can go to https://learnautomation.com:10000, substituting your own domain name. You might have to choose “advanced” on the initial page to confirm that you want to enter the site. Whatever browser, you are using, you will want to get past the security messages, and confirm that you want to enter the site. Then log in as root with your password for the server.
Step 8 — Select MySQL Database
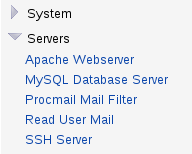
Under “Servers”, we will open MySQL Database
Step 9 — Create the database
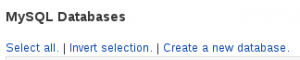
Log in as “root” with your password if asked, and select “Create New Database”
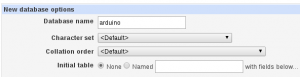 Now, Name your database, and press the “create” button.
Step 10 — User Permissions
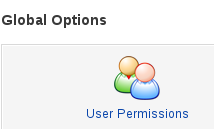
Now, we will add a user to our database, so we will select “User Permissions”
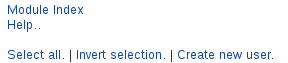 Now, choose to “Create new User”
Complete the user
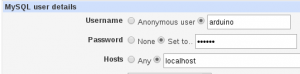 permissions as follows. We don’t need to give this user any privileges right now. We will make them specific to the database later on. Be sure to choose “localhost” for the user, though, and set the password for this user. Here, I’ll just name the user “learnautomation”
Press “Create” to finish creating the user.
Step 11 — Database Permissions

Now, we will associate the new user to the database, so back on the main MySQL page, we will select “Database Permissions“, then “Create New Database Permissions“.
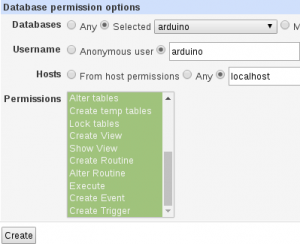 Complete the form similar to the one shown. Again, here we are mainly concerned with just getting the page running. You can always research more secure settings. To give this user all privileges, click the top privilege, scroll to the bottom of the privilege list. Hold down shift and click the bottom privilege to select all privileges. Then press “Create“.
Step 12 — Creating the initial table
 Next, we will create a table. In this table, we will have a unique ID to identify entries, and level, temperature, and humidity. Back on the main MySQL Database page in Webmin, we will click on our “arduino” database.
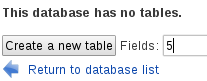 In this example, we will create 5 fields. The number of fields you use will depend on your project, and how much data you want to log. Please modify this accordingly.
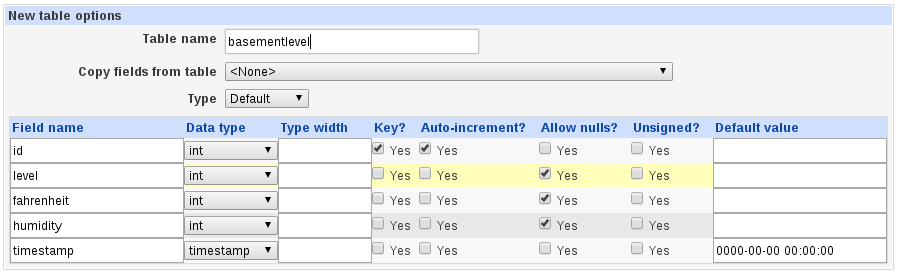 For logging our level, temperature, and humidity, we will set the table up as follows. Please modify these fields according to your project.
Press “Create” and that’s it!!! You are ready to start using the table with your arduino project!!
— Ricky Bryce